How to deploy a static site or javascript MVC in Spinup via Github actions
Problem
I want to build a website with an automated workflow for deployment.
Solution
Static websites, launched via Spinup, are deployed to secure and reliable infrastructure on AWS and are fronted with TLS (HTTPS) and a CDN. They can quickly and easily be used to host static HTML content or to host sites built on javascript frameworks such as Angular, React and Vue.
Create your static website in Spinup
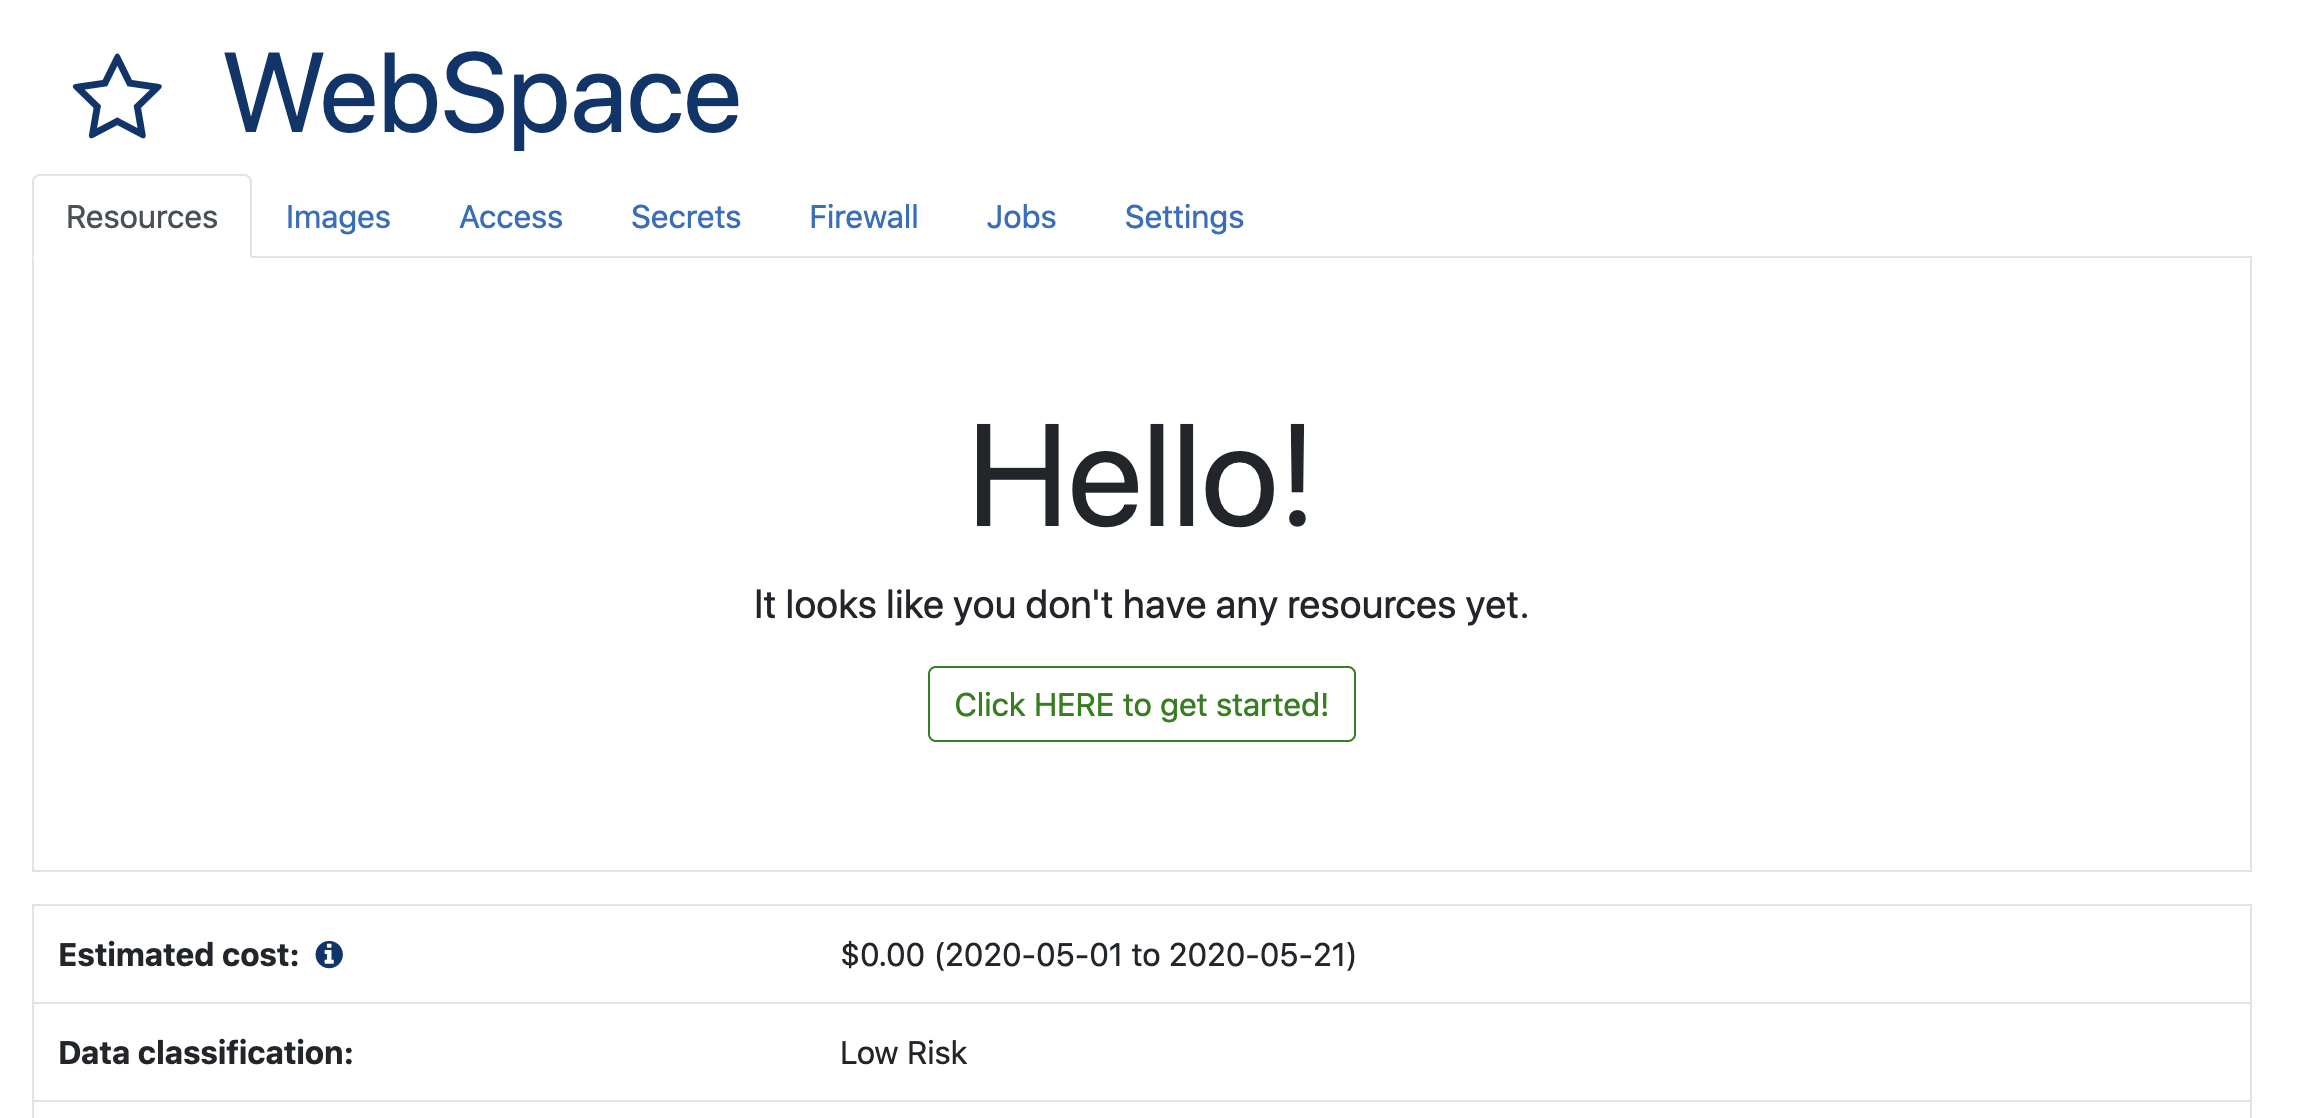
We assume that you already have logged into Spinup and have created a funded space. If not, you should do that now.
Click the "Click HERE to get started" button, or the "Create" button in your space.
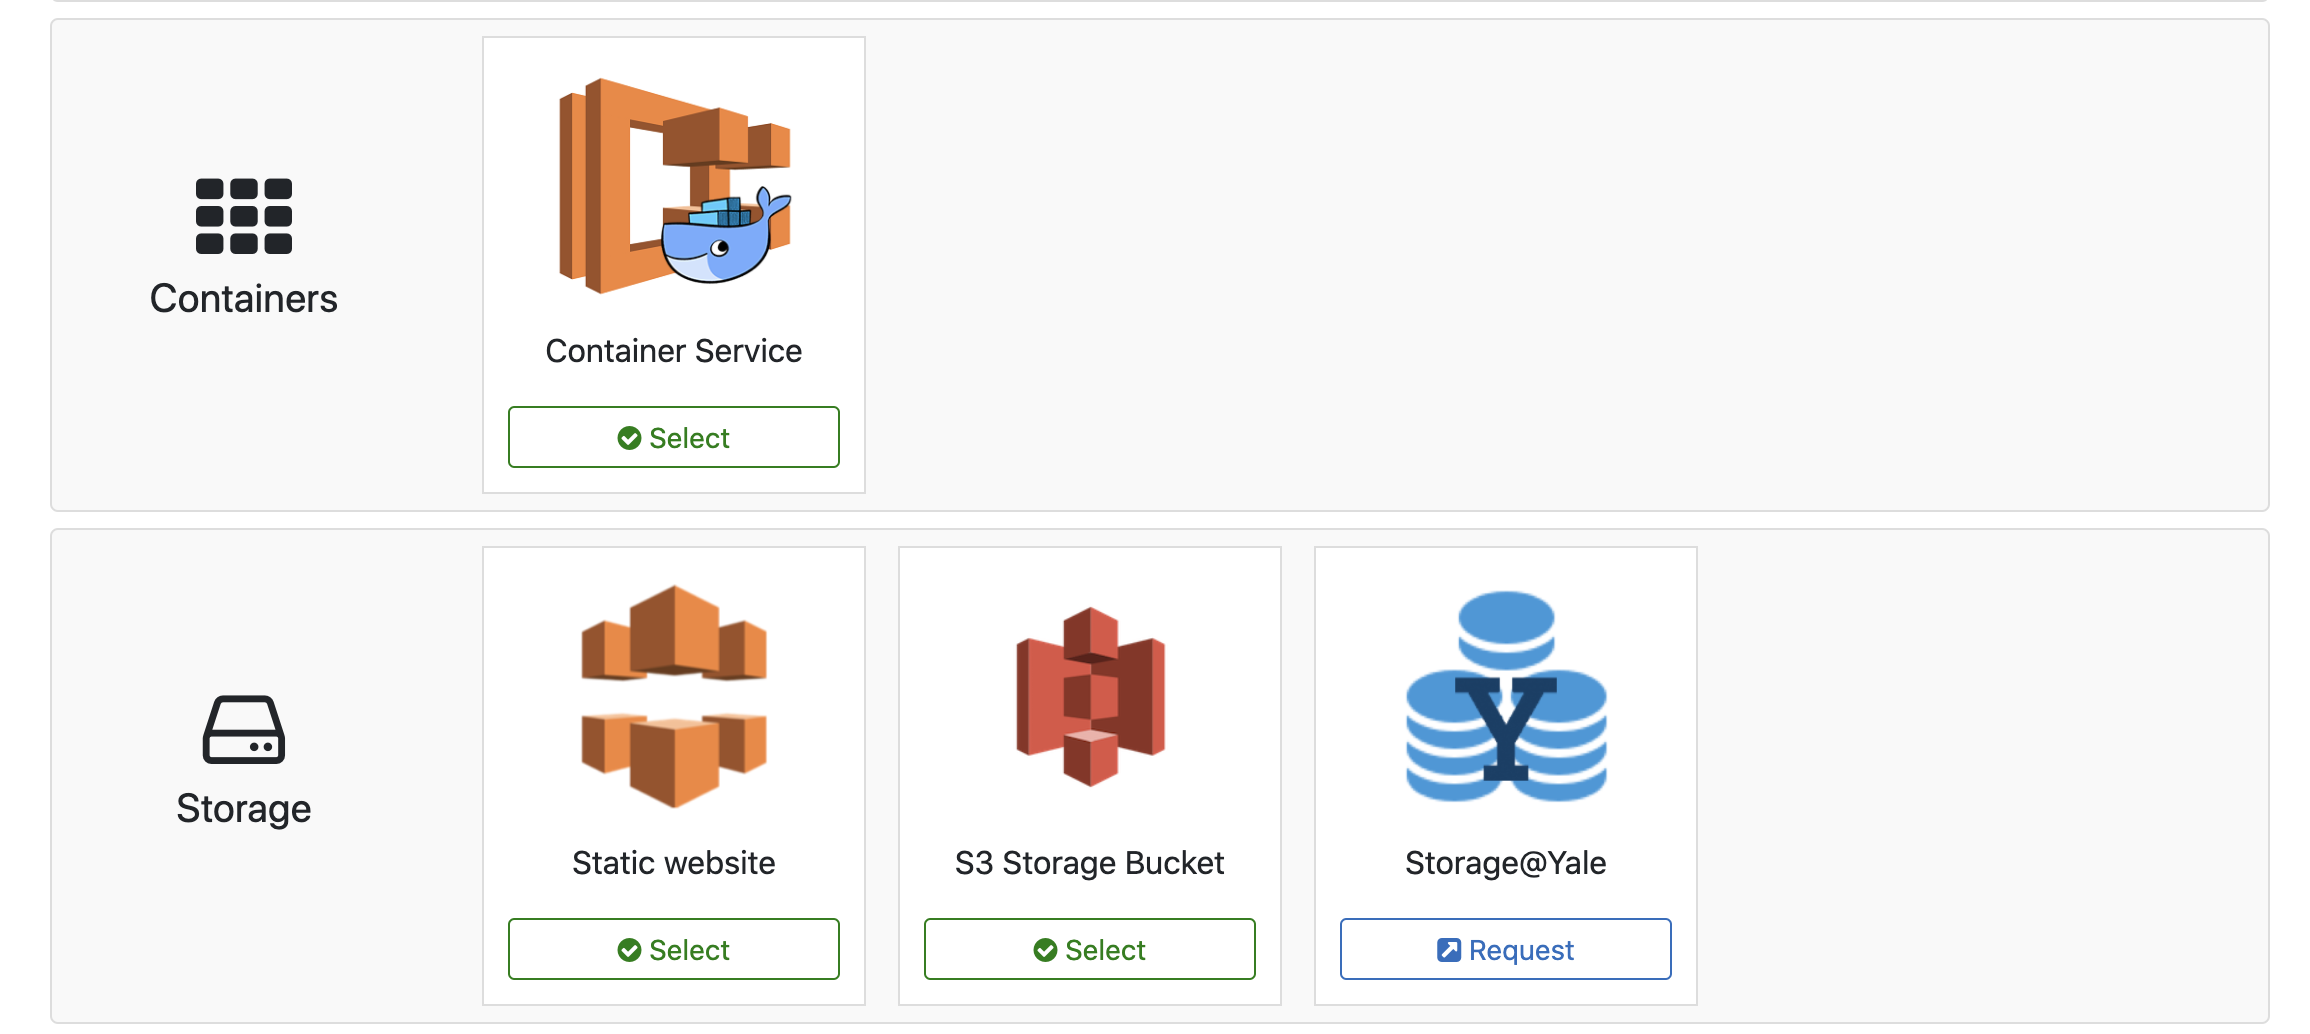
Scroll down to the "Storage" section of the available resources and select "Static website".
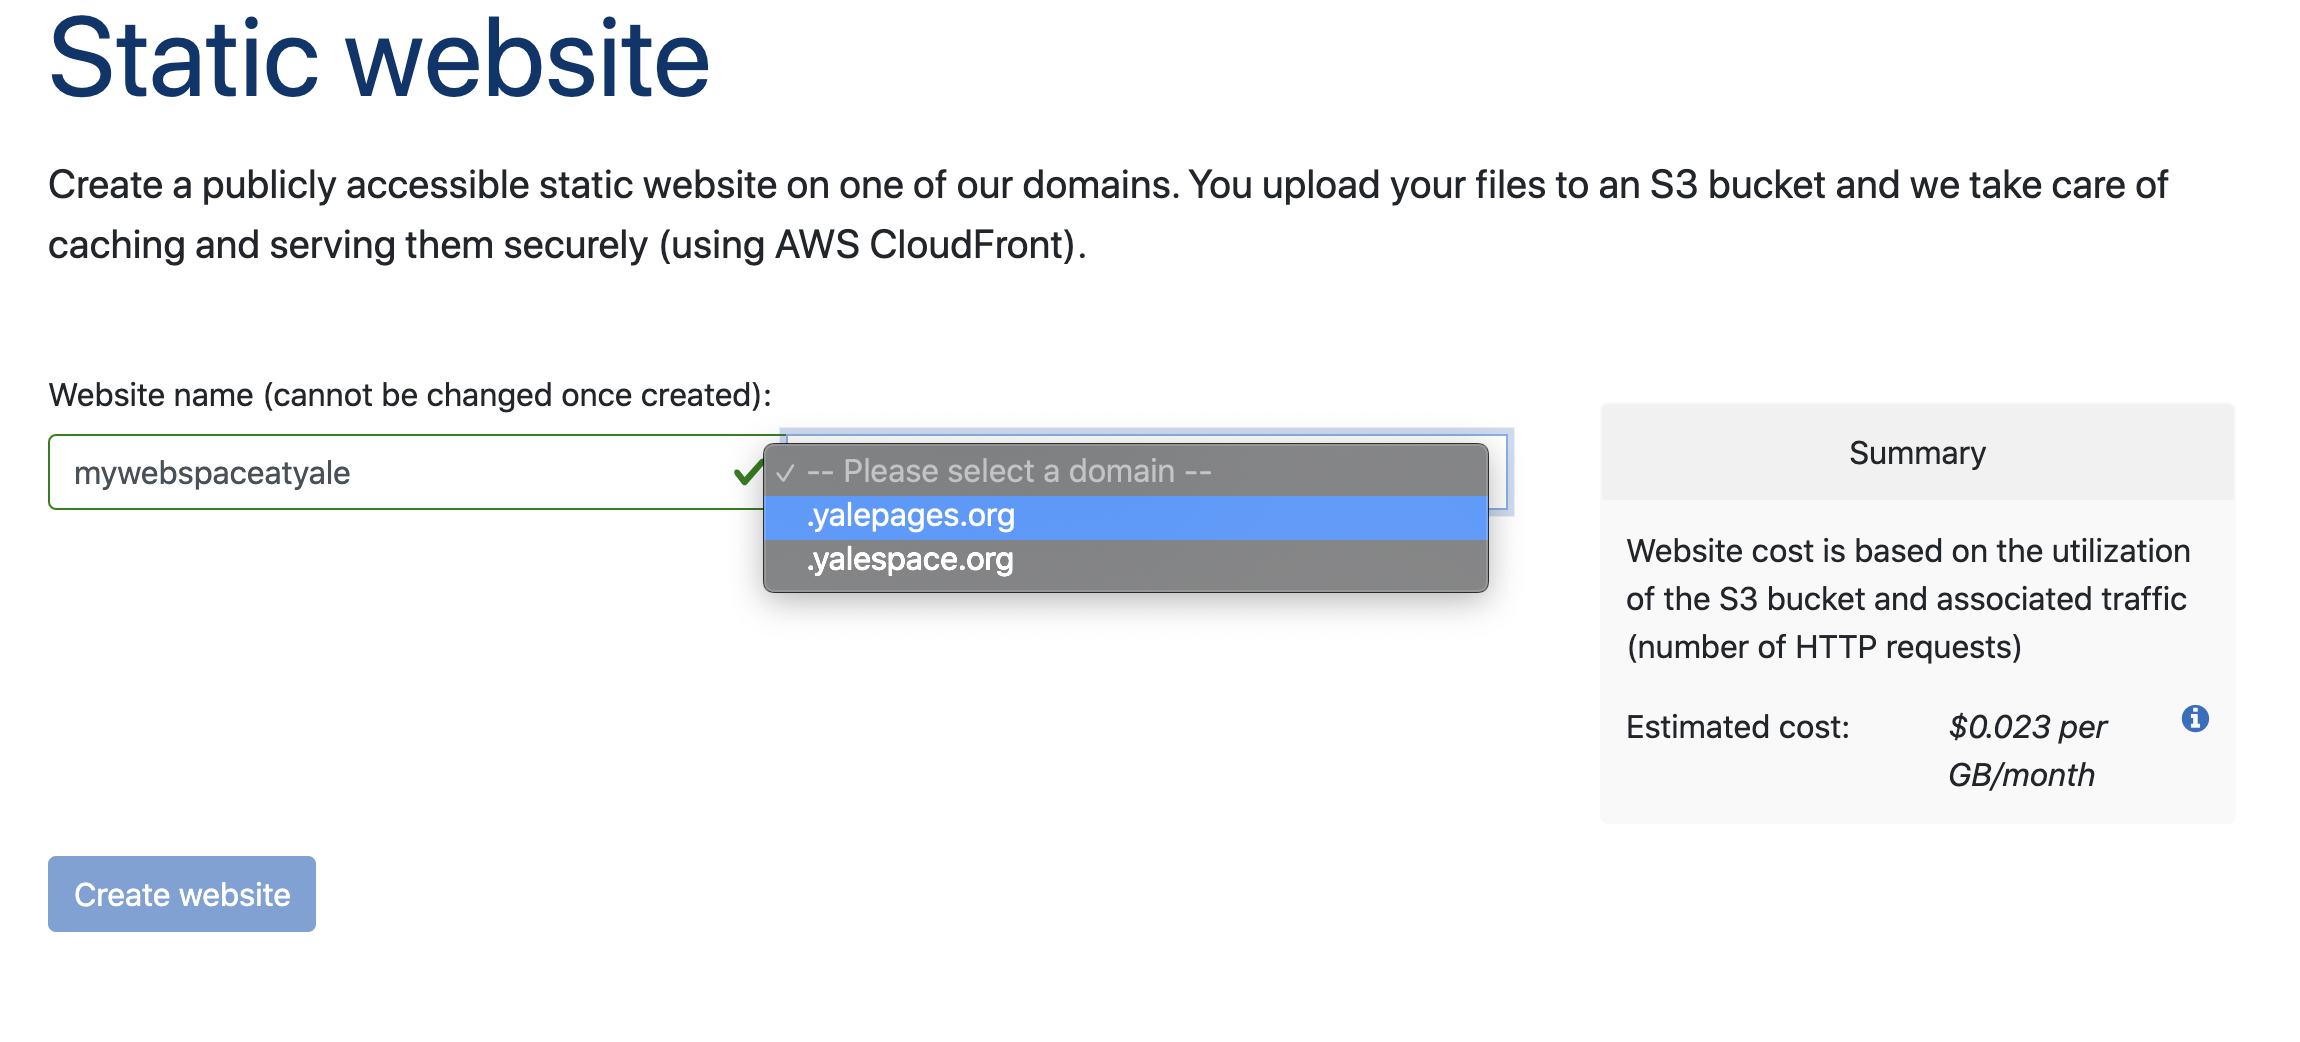
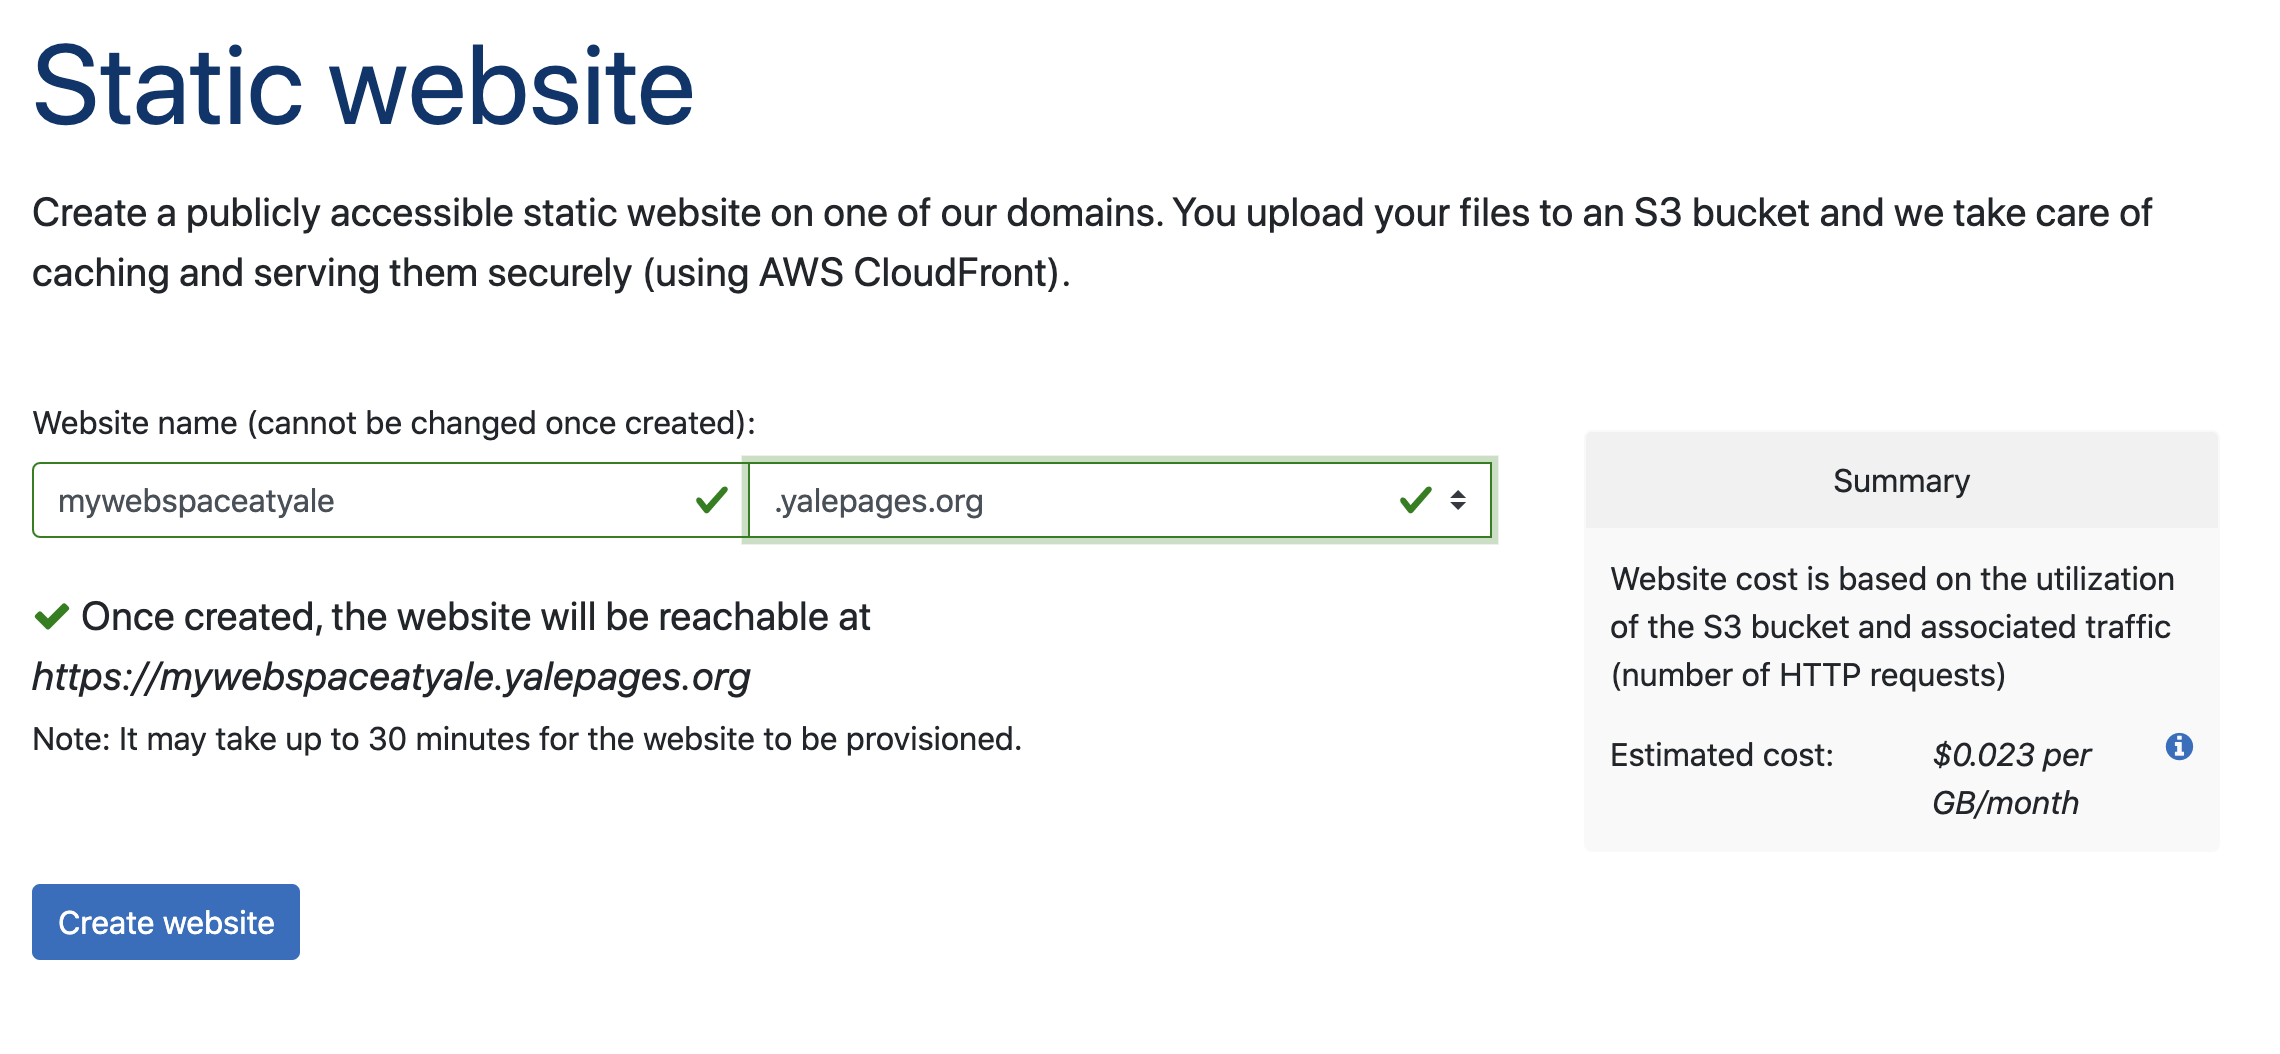
Enter your website name and select from the available domains. Click the "Create website" button.
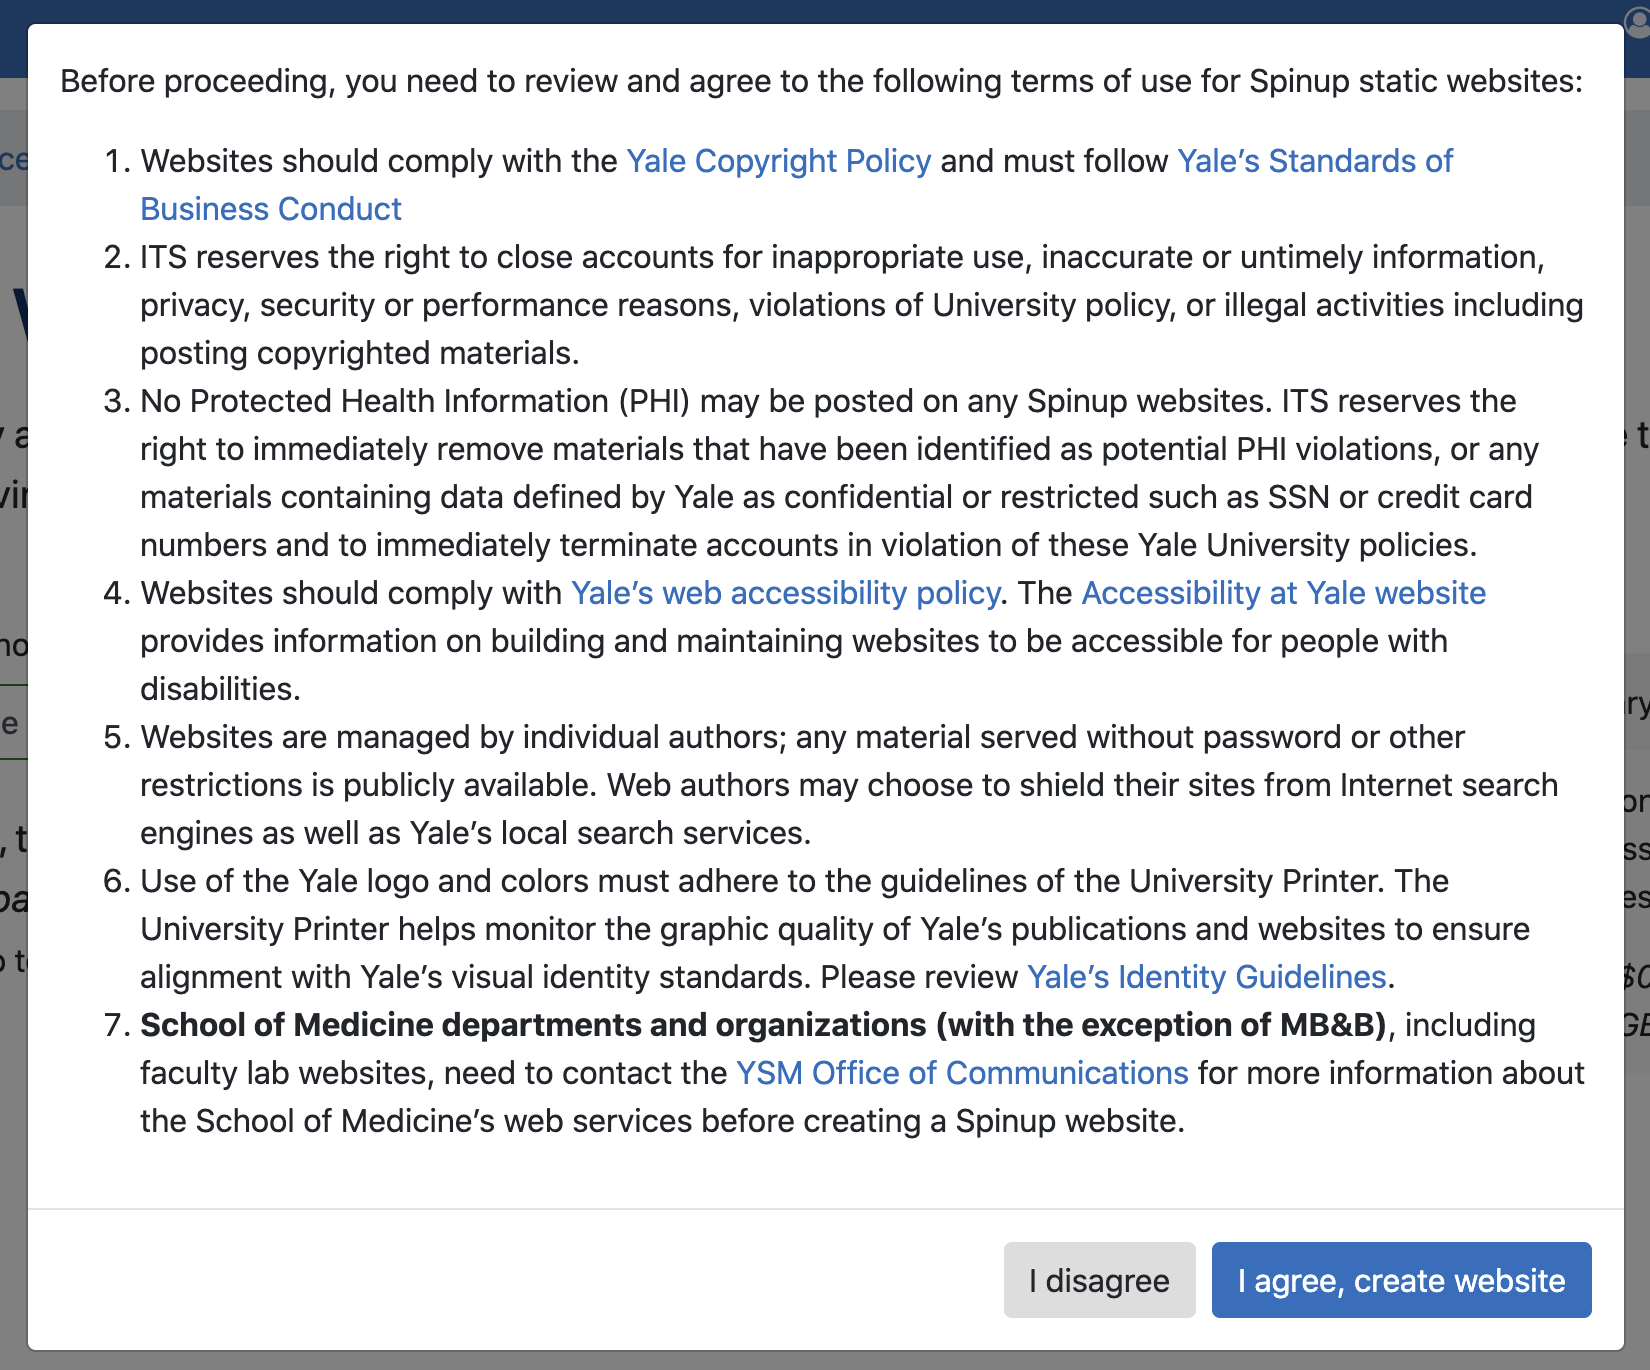
Review the terms and if applicable, click "I agree, create website".
Your website is now creating. It can take up to 30 minutes to fully create, but is usually much faster. Once complete, you will have an internet accessible website with HTTPS protection and your chosen name.
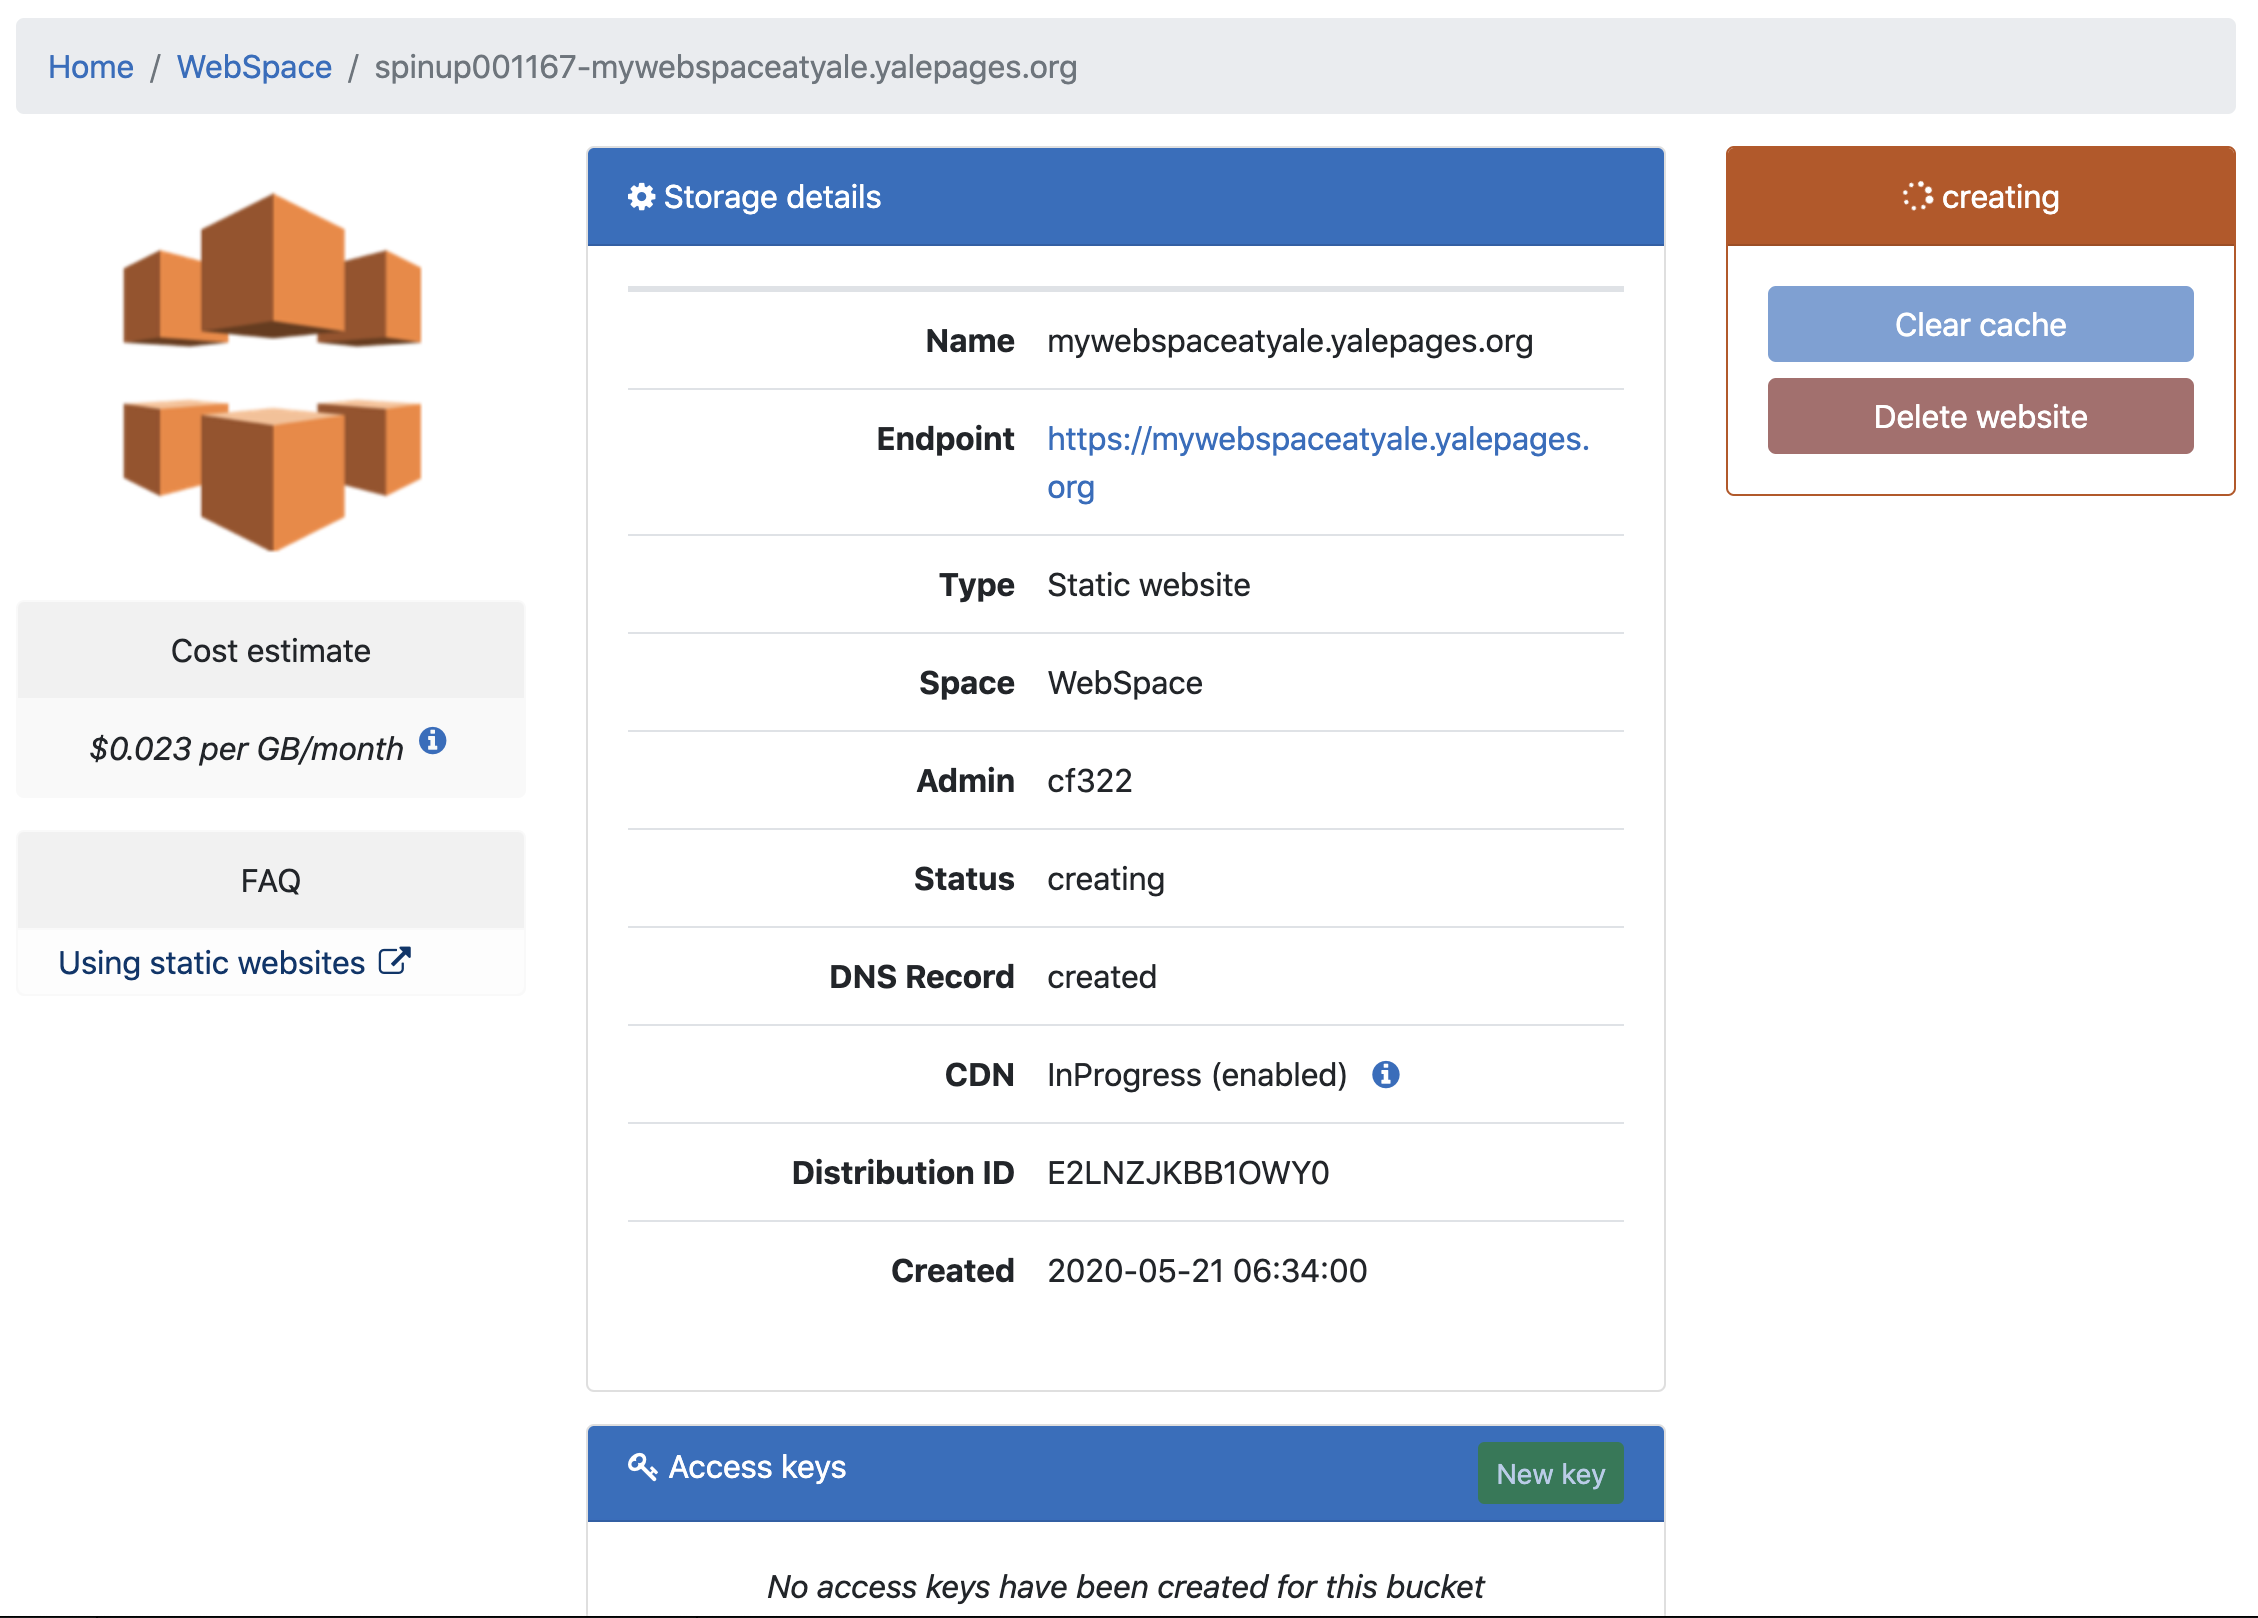
Once your website is created, your view will look like this.

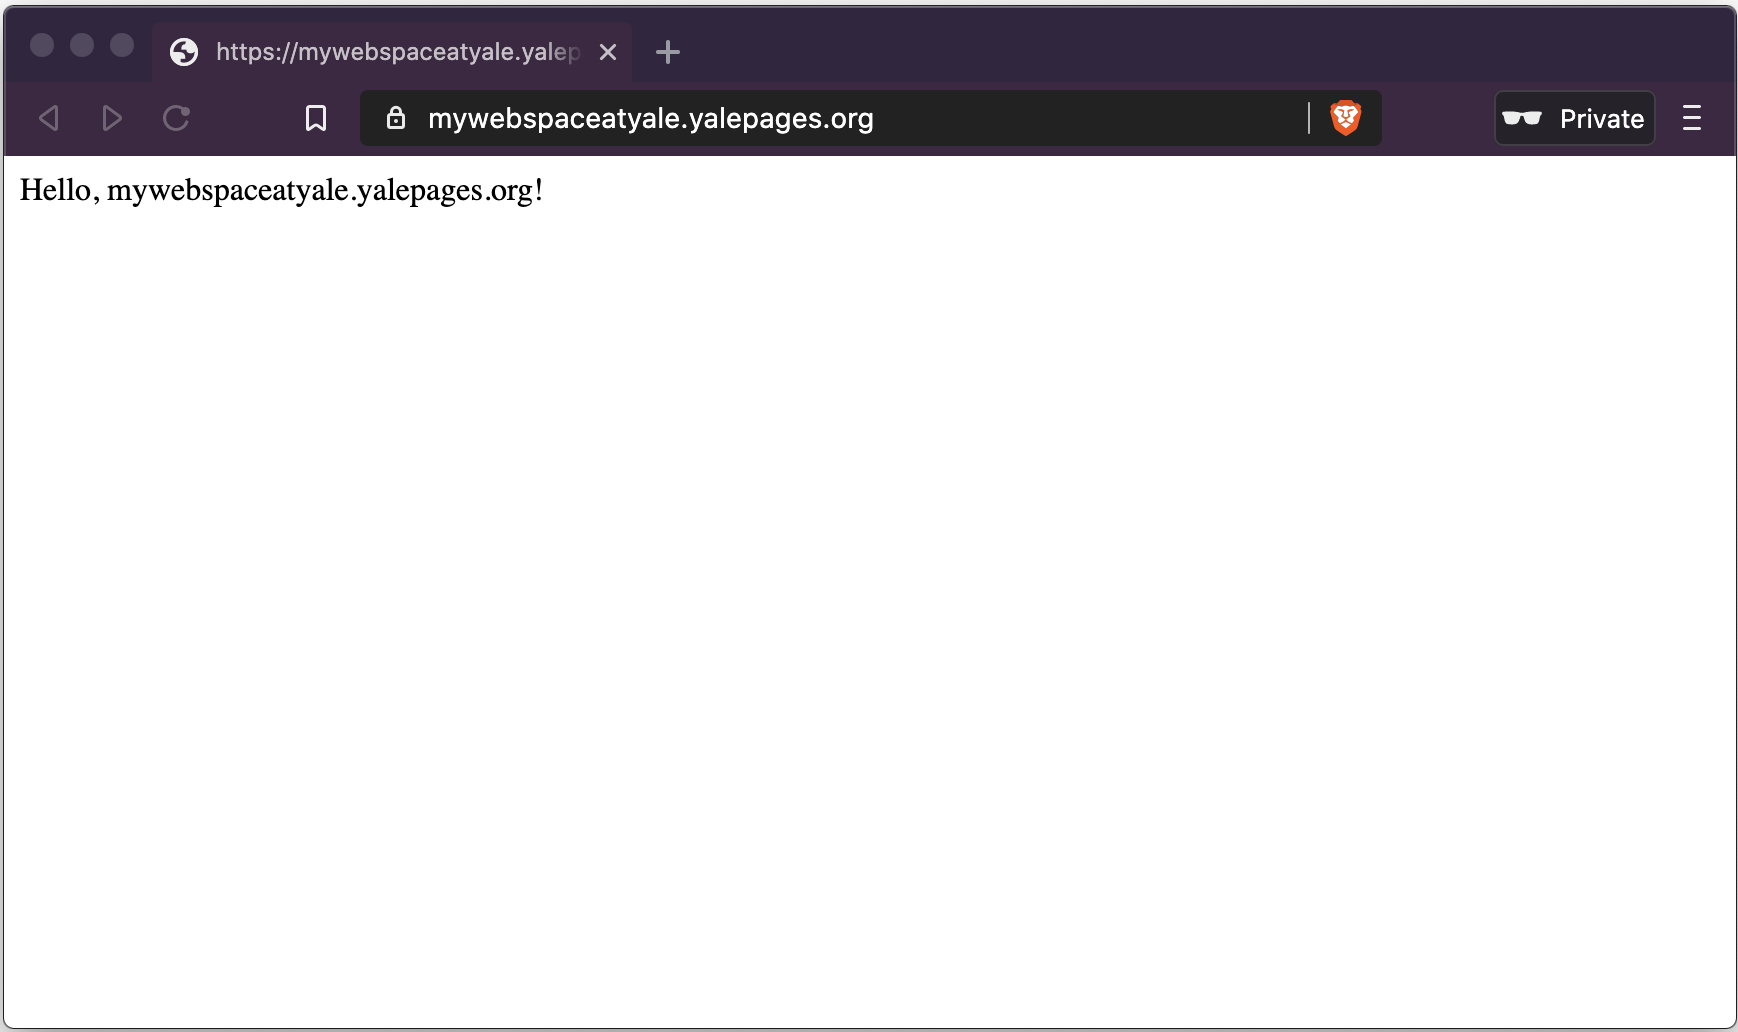
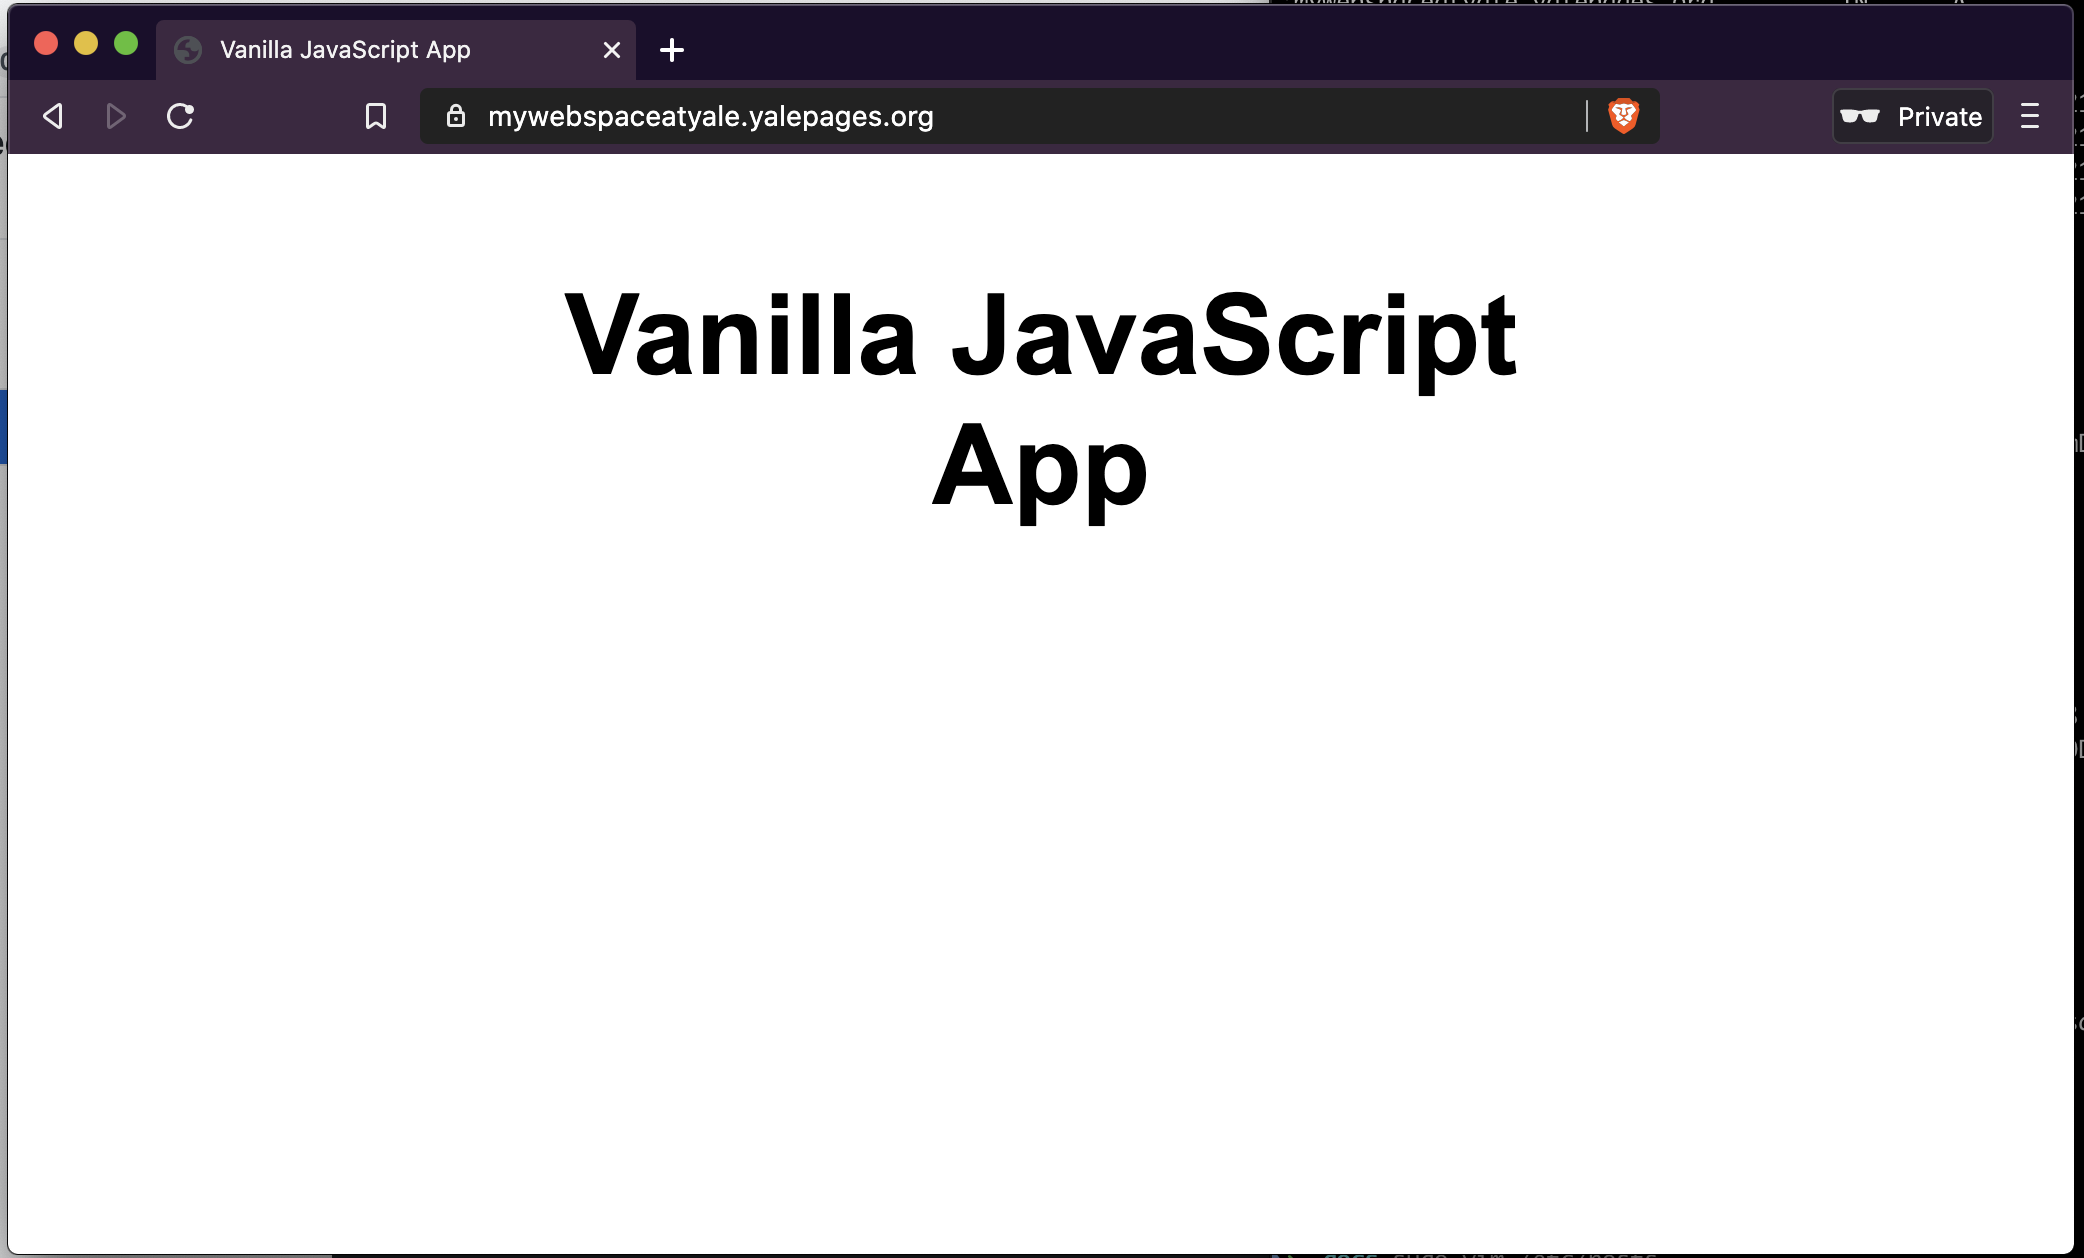
At this point, your website is accessible from the internet, give it a whirl!
If you don't want to automate the deployment of your site, you're done!. You can access your website content like any other S3 bucket. If you want to automate your workflow, keep reading!
Create your access keys
To automate your website deployment, you will need 3 pieces of information from Spinup.
* DistributionID
* AccessKeyId
* SecretAccessKey
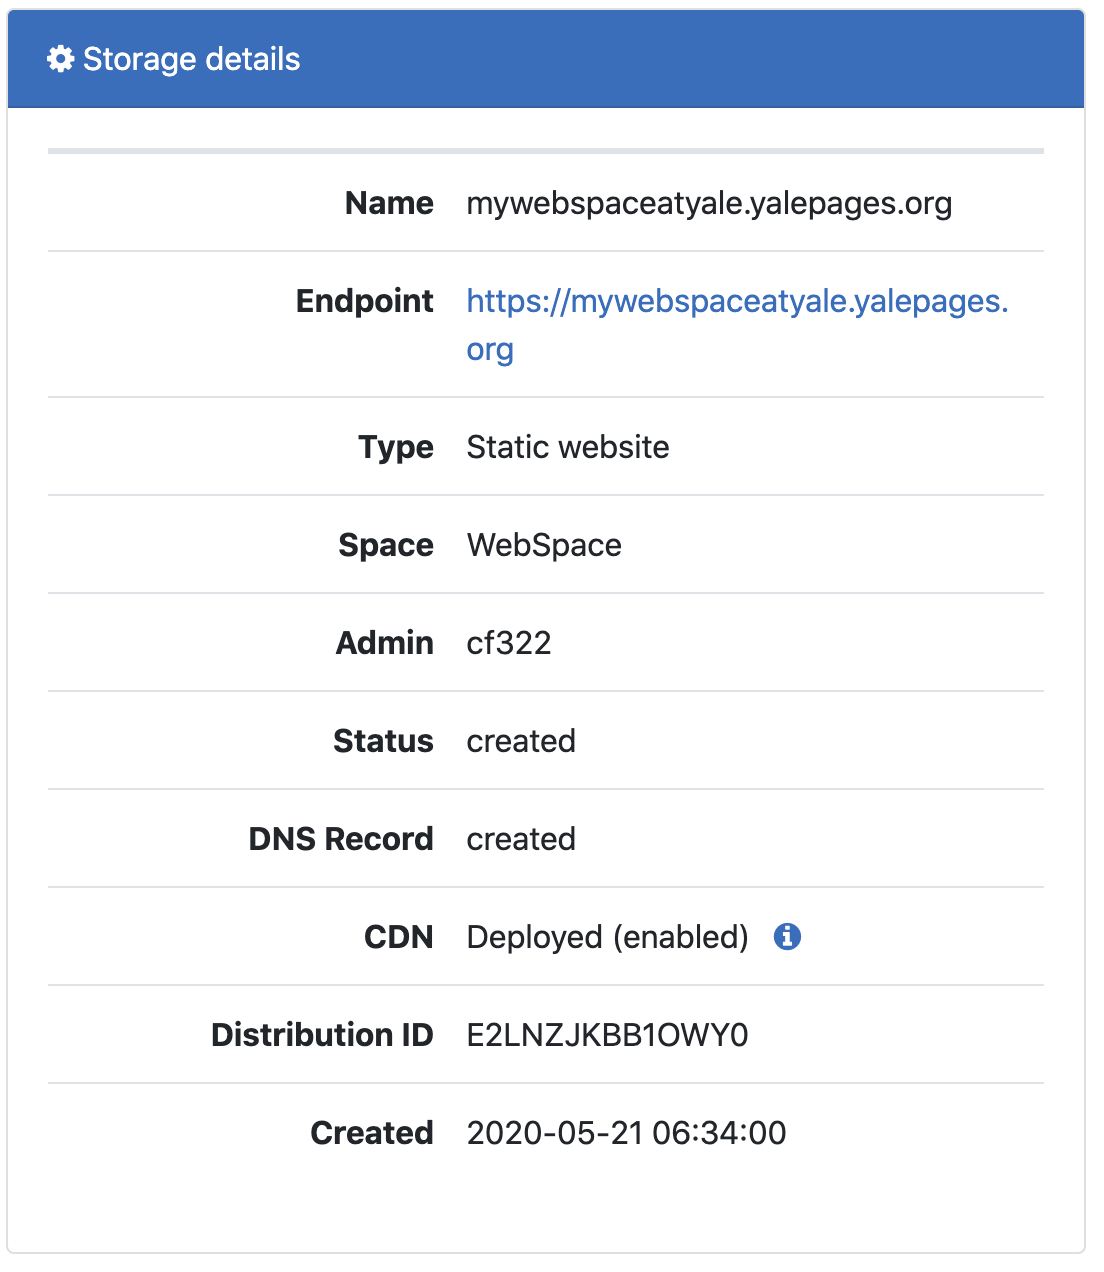
Your "Distribution ID" will be in the details panel and should be a string of random letters and numbers.
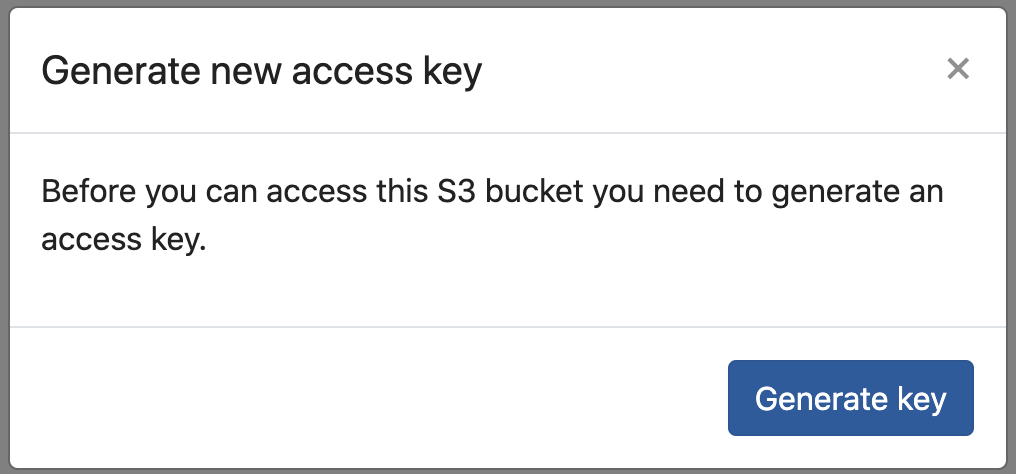
Scroll down to the "Access keys" panel and click the "New key" button.
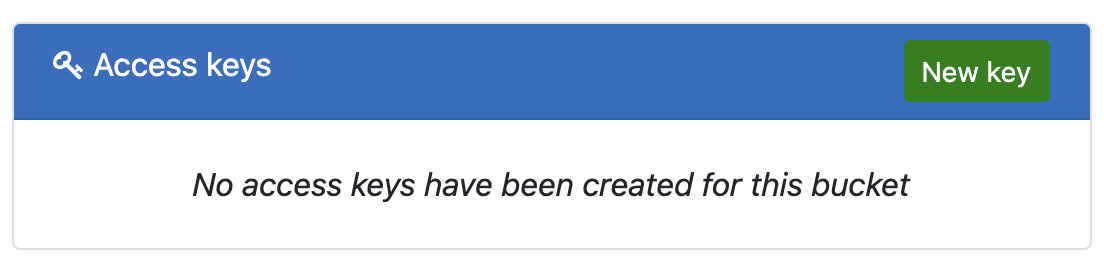
Click "Generate key" in the modal.
Copy your newly generated AccessKeyId and SecretAccessKey somewhere safe, you will **not** be able to retrieve them once the modal is closed (you can reset them).
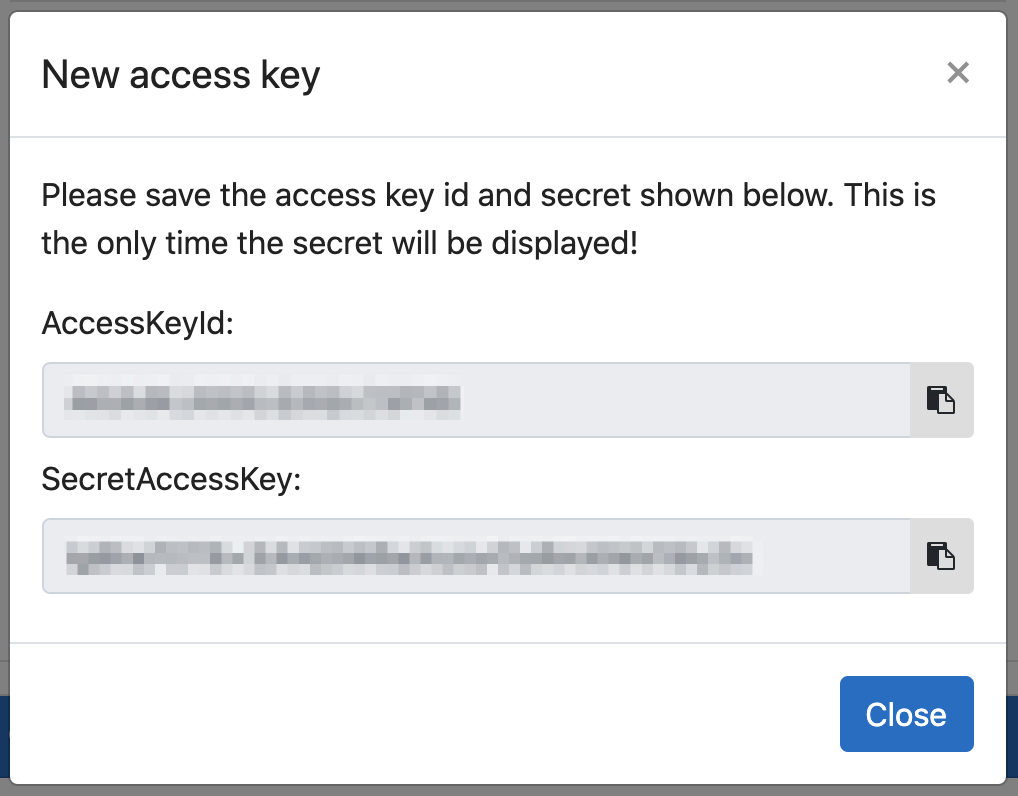
These are credentials and will give you access to publish content to your website, keep them safe!
Create a repository for your website
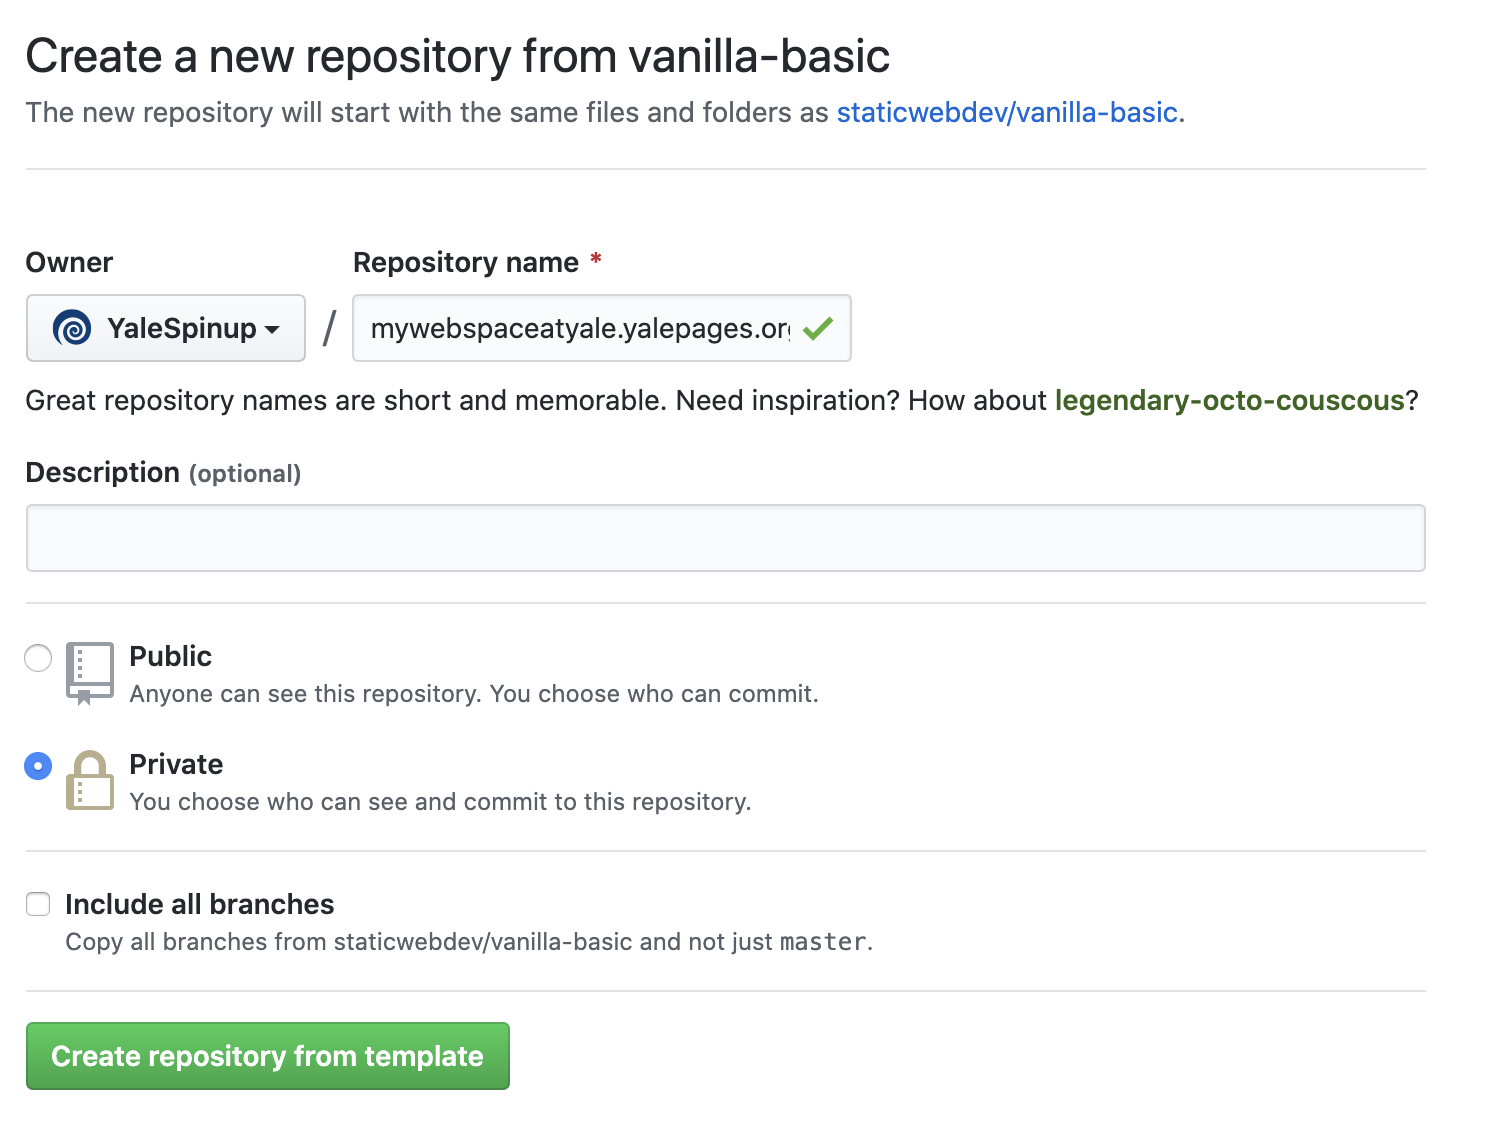
Next, you will need a Github repository for your website. If you don't have one now, you can get started by using one of the templates below.
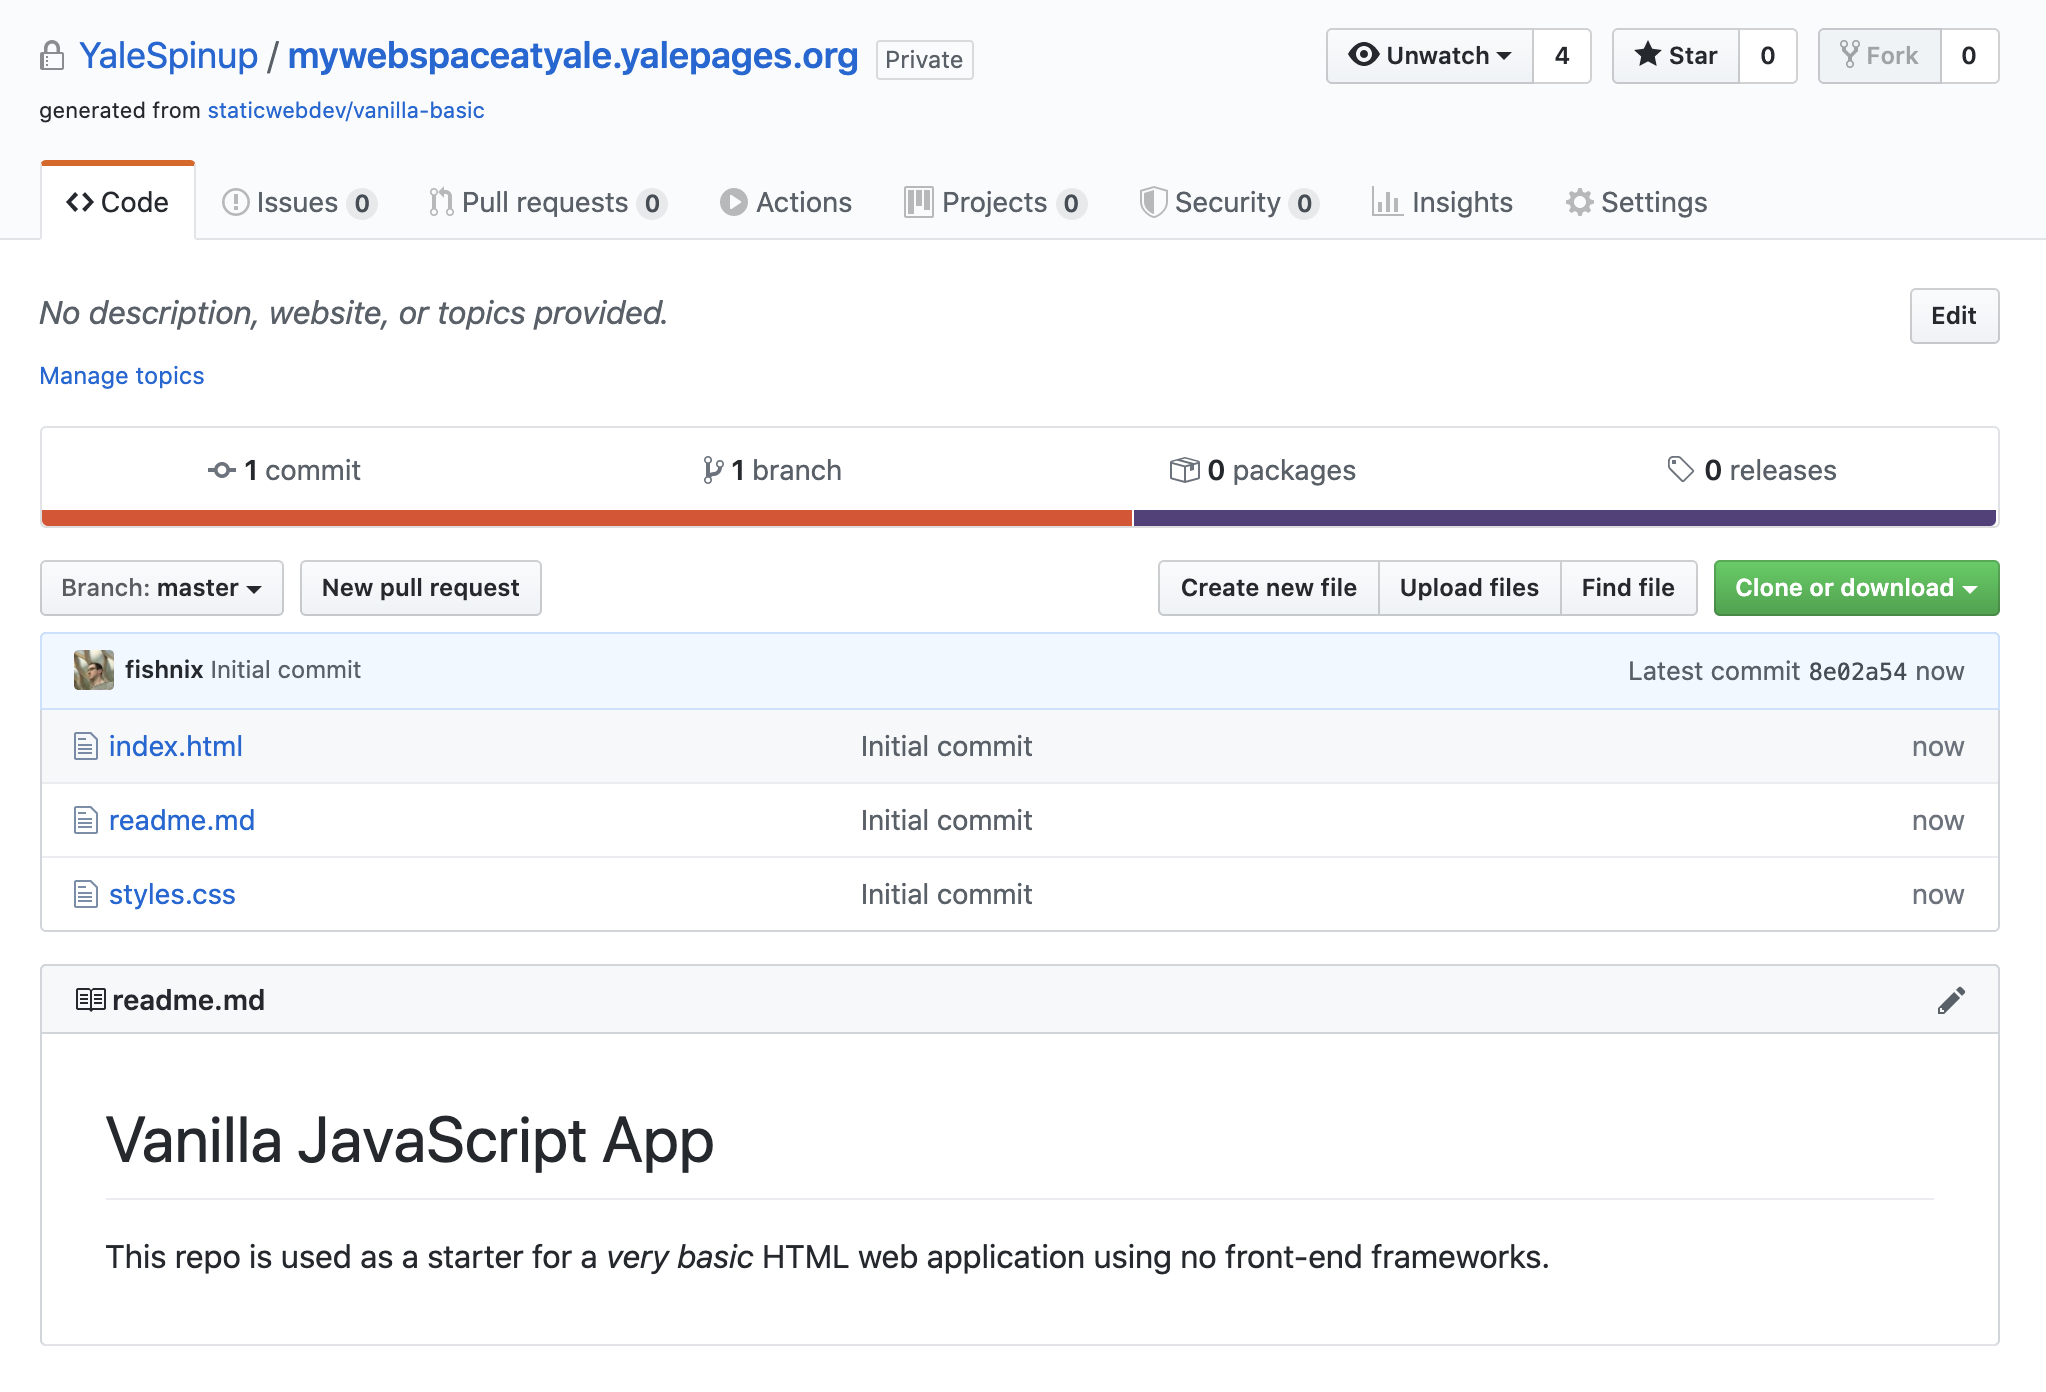
Here, I'm going to create a generic site with no framework.
Give your repository a name, I like to use the website name, but it's not required. Click "Create Repository".
Create your "secrets" to give Github Actions access to publish your website
Click the "Settings" tab at the top and select the "Secrets" option in the menu on the left.
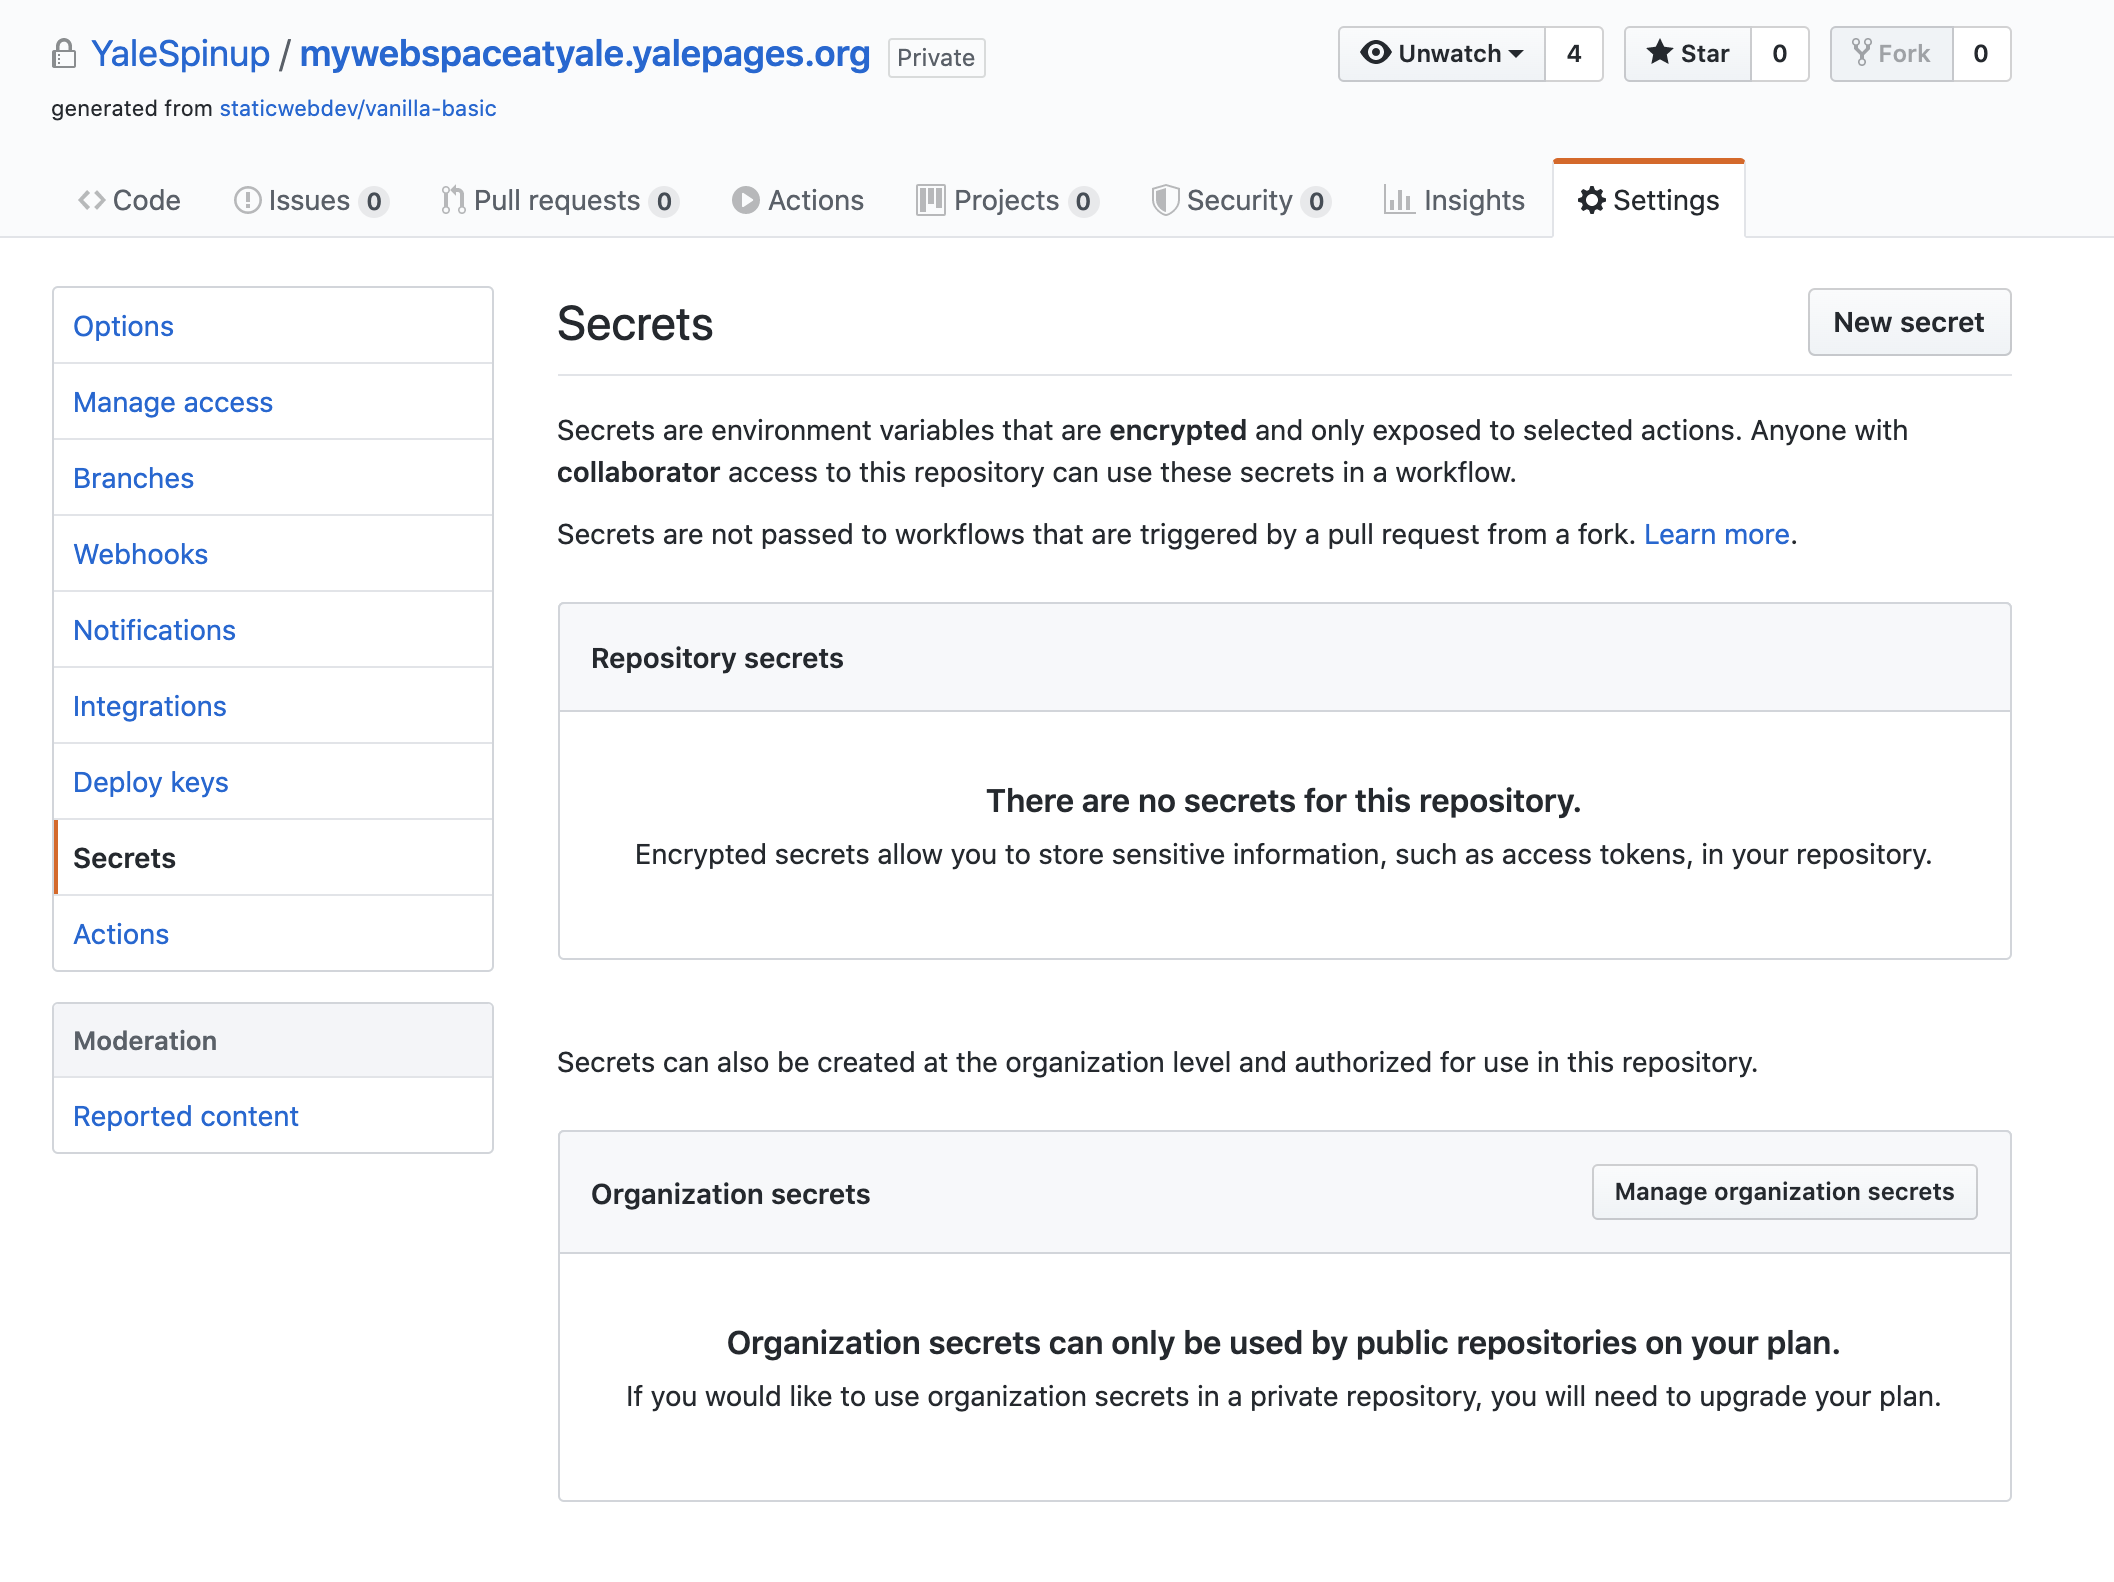
Here we will enter the 3 pieces of information we collected from Spinup.
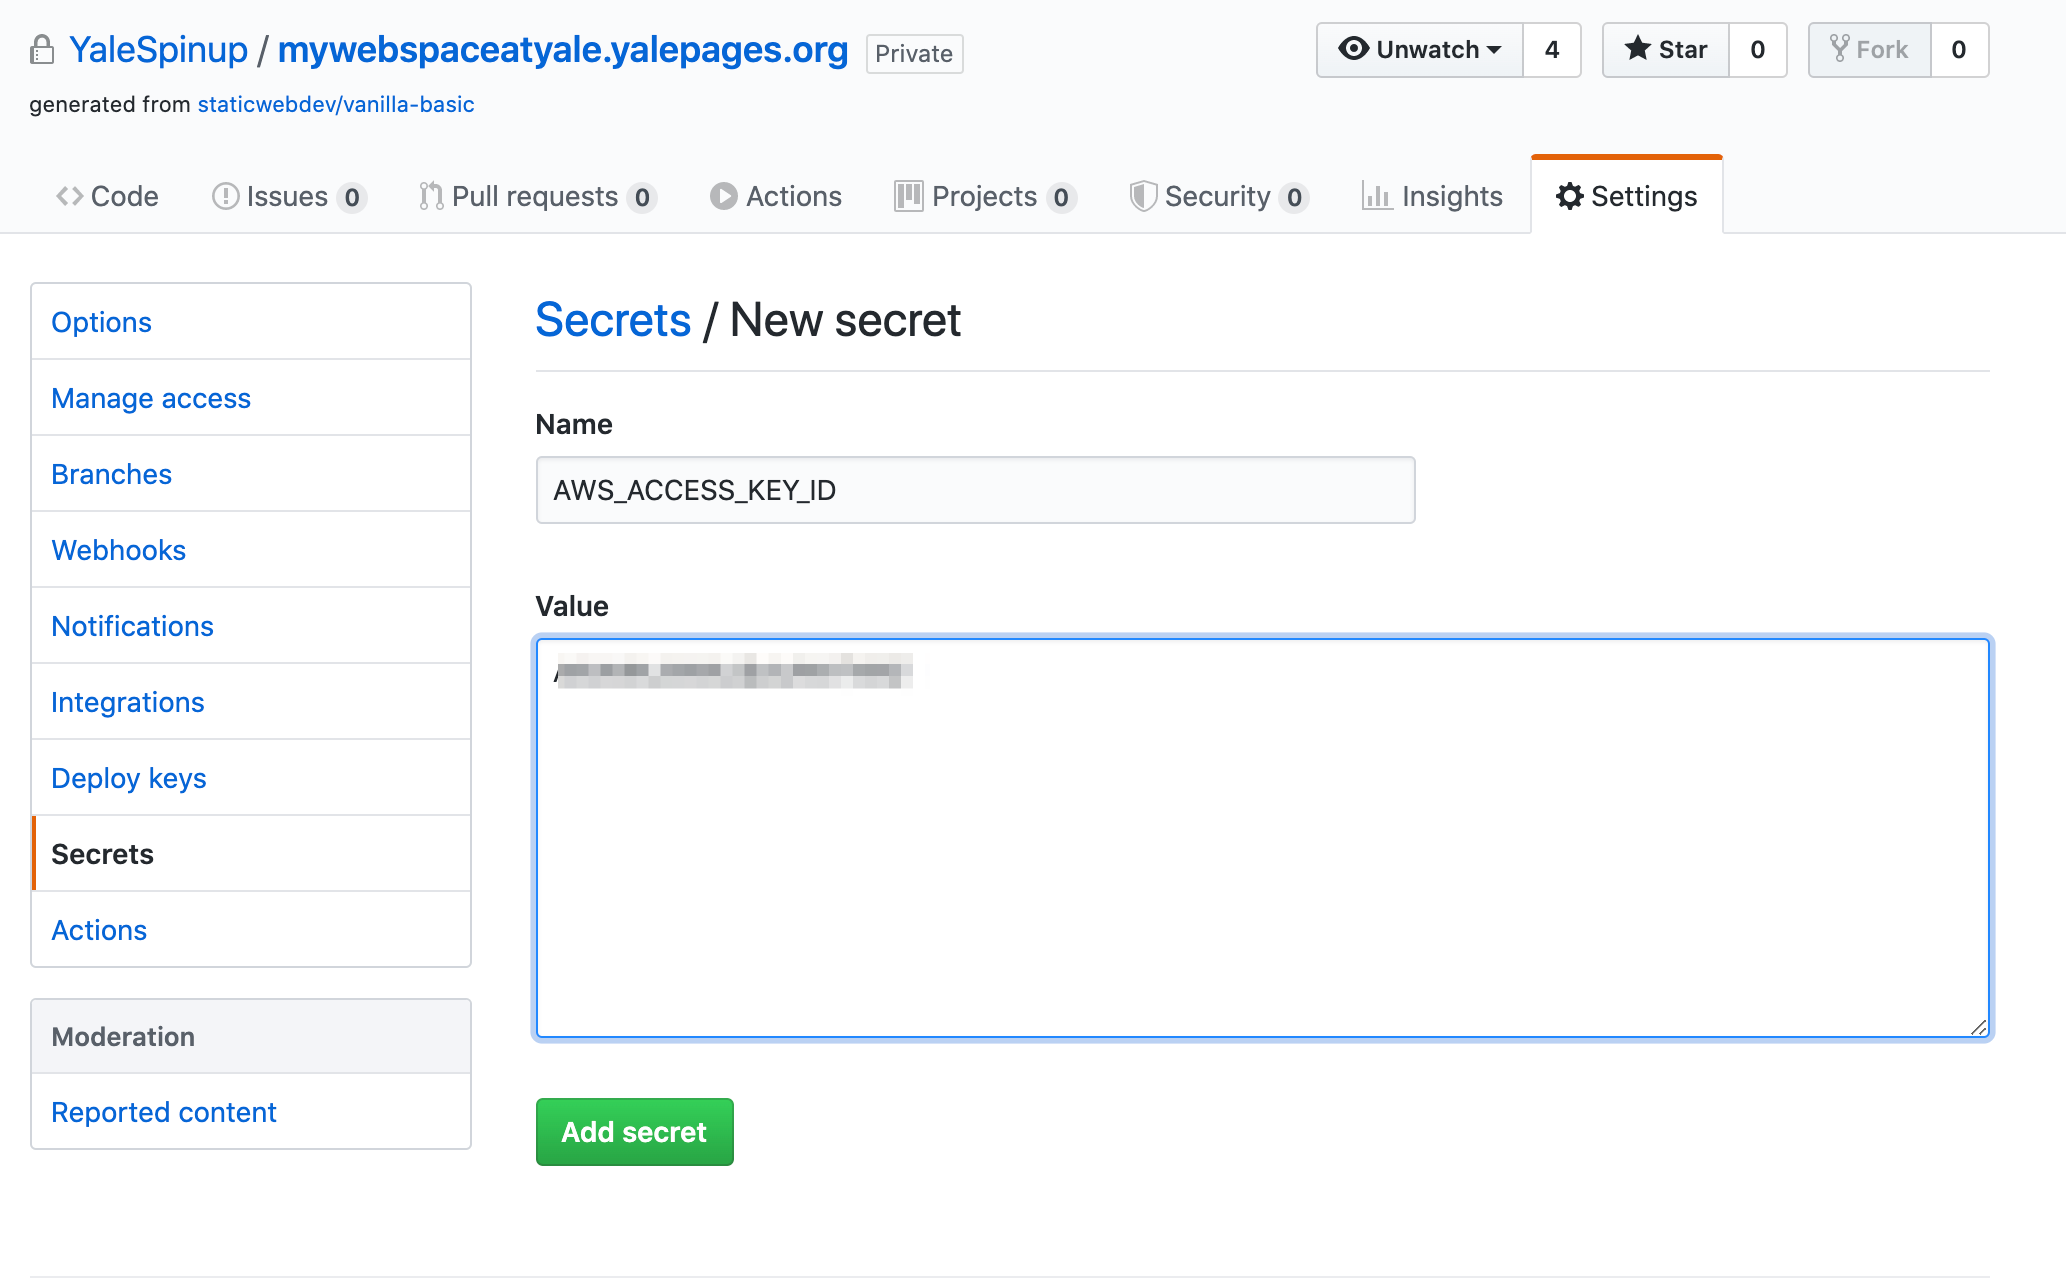
Click the "New Secret" button. Enter `AWS_ACCESS_KEY_ID` and the AccessKeyId value you copied. Click "Add Secret".
Click the "New Secret" button. Enter `AWS_SECRET_ACCESS_KEY` and the SecretAccessKey value you copied. Click "Add Secret".
Click the "New Secret" button. Enter `DISTRIBUTION_ID` and the value you copied. Click "Add Secret".
When you are done, you will see all three secrets.

Create the action to build and publish your website
Here we create a simple action to publish your website, however there are many more complex build tools (npm, yarn, webpack,etc) or static site generators (Jekyll, Gatsby, Hugo, etc) that you may want to use for your particular application.
Click on the Actions tab at the top of your repository
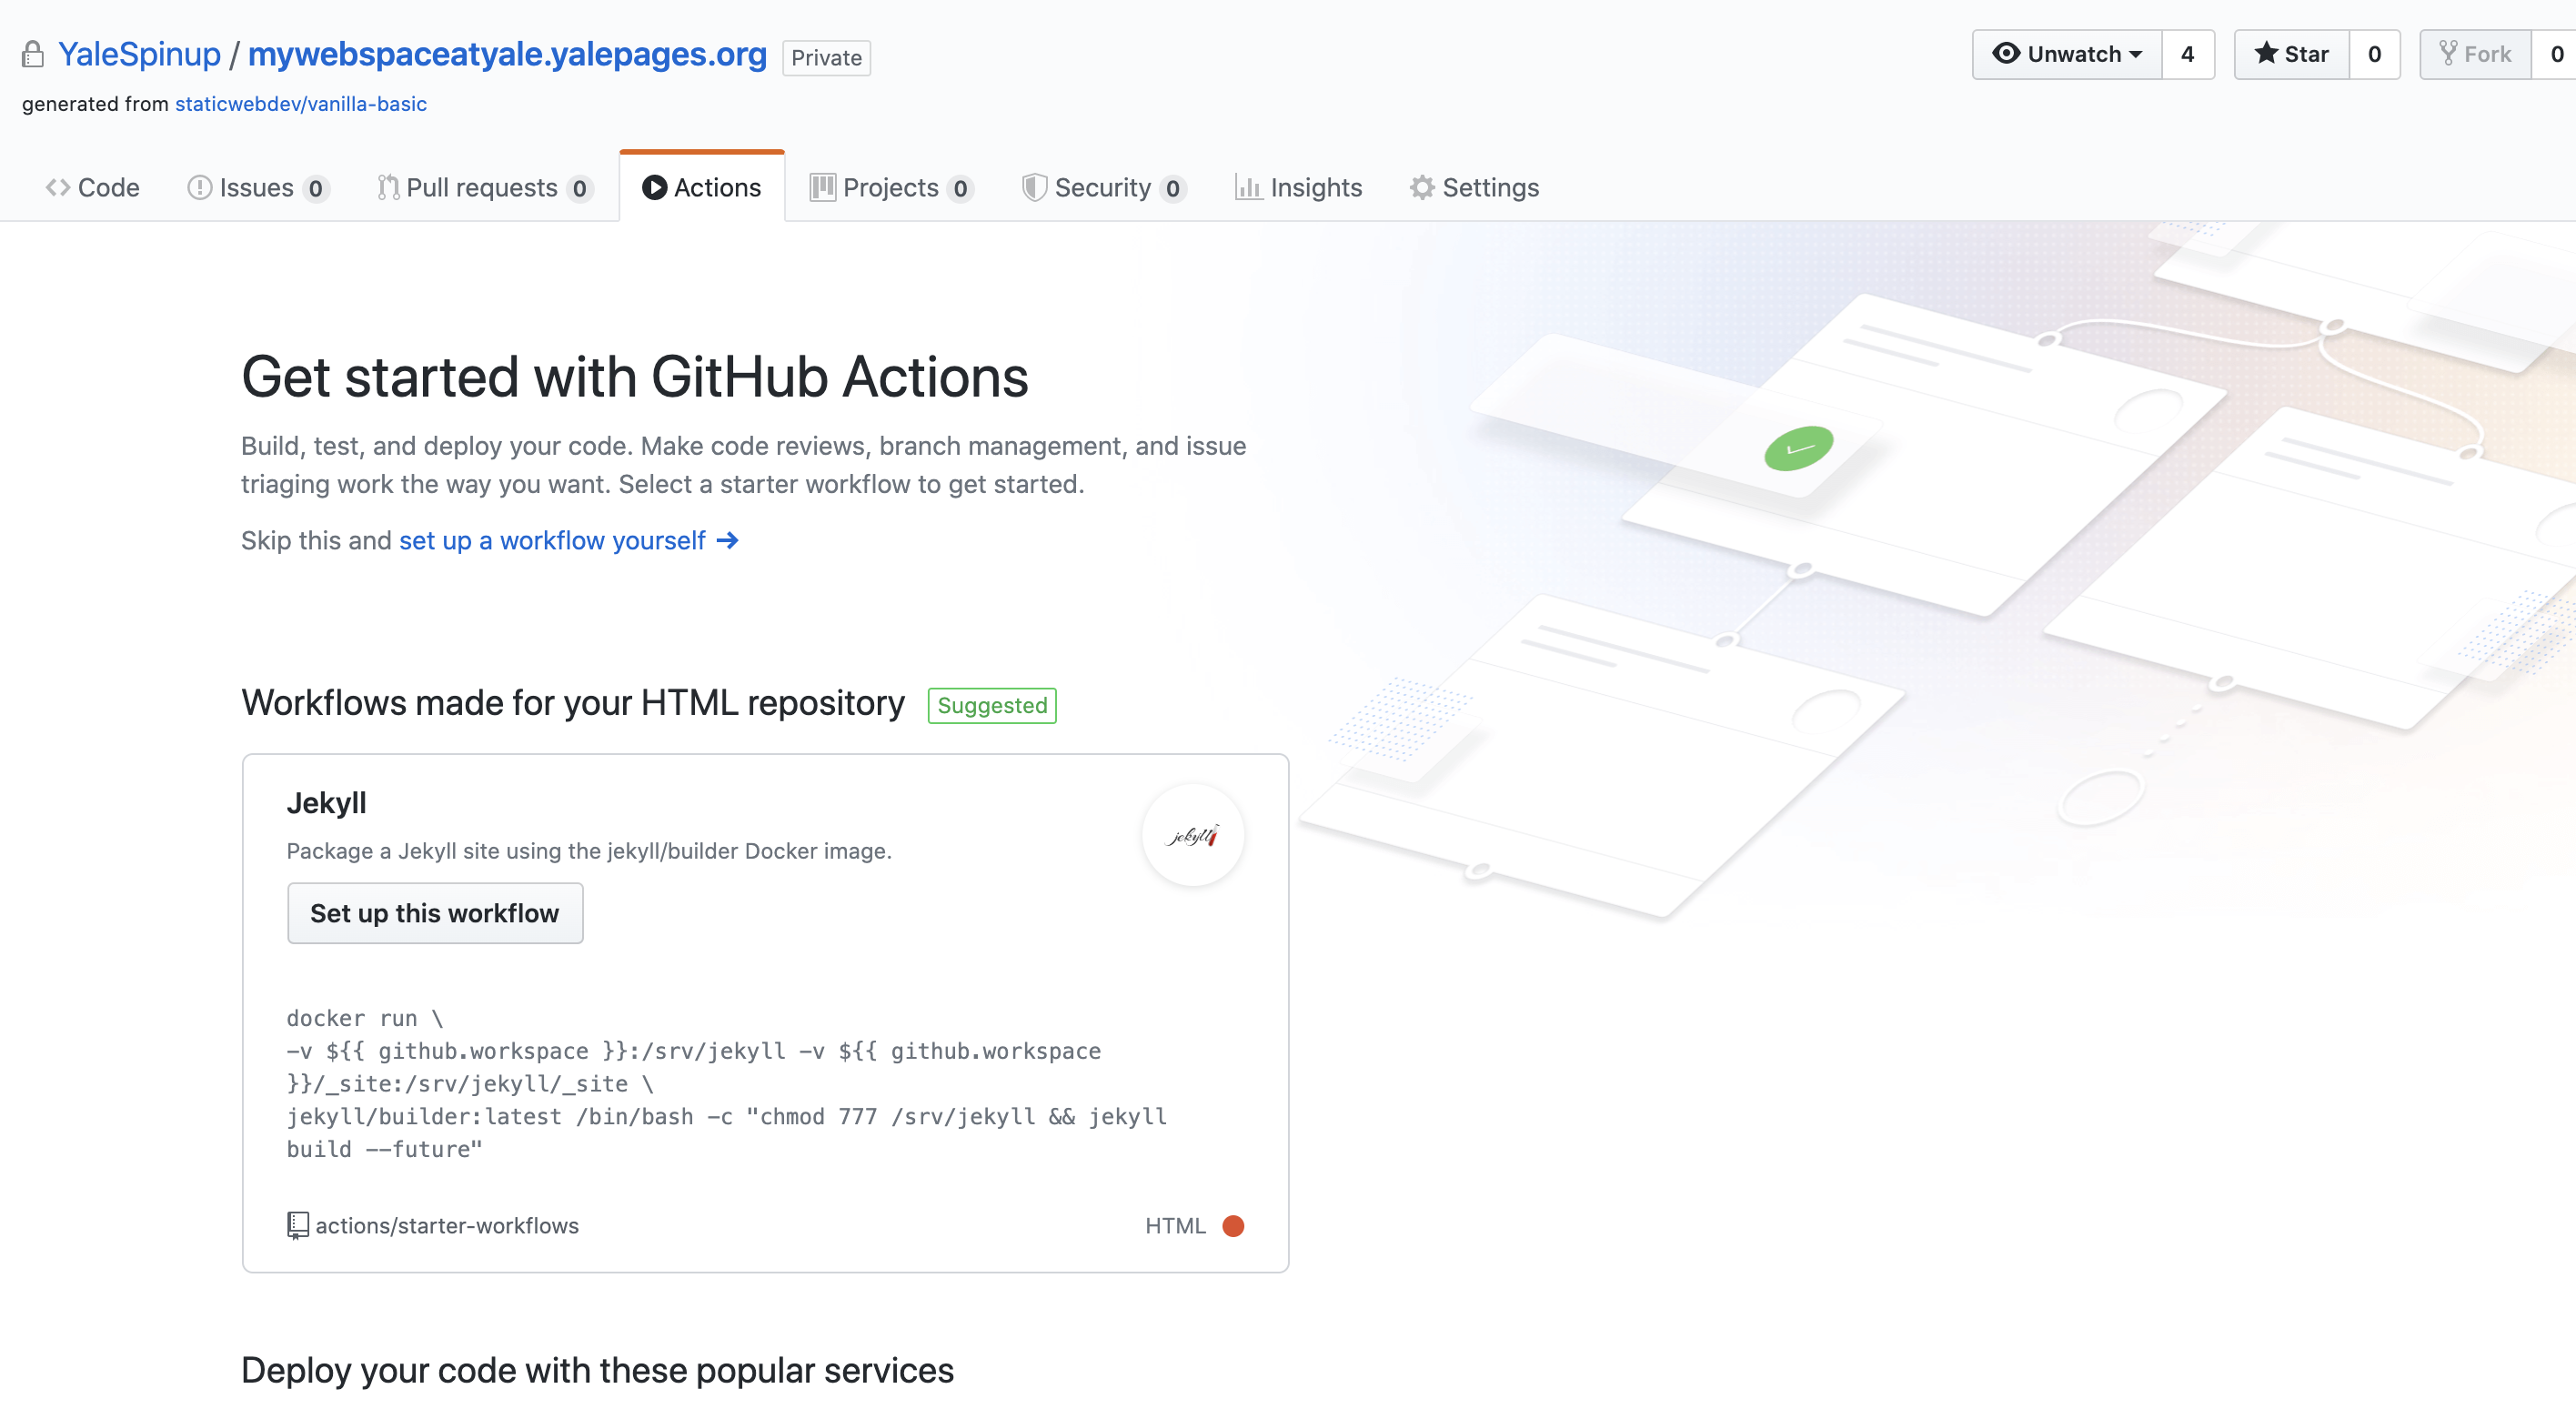
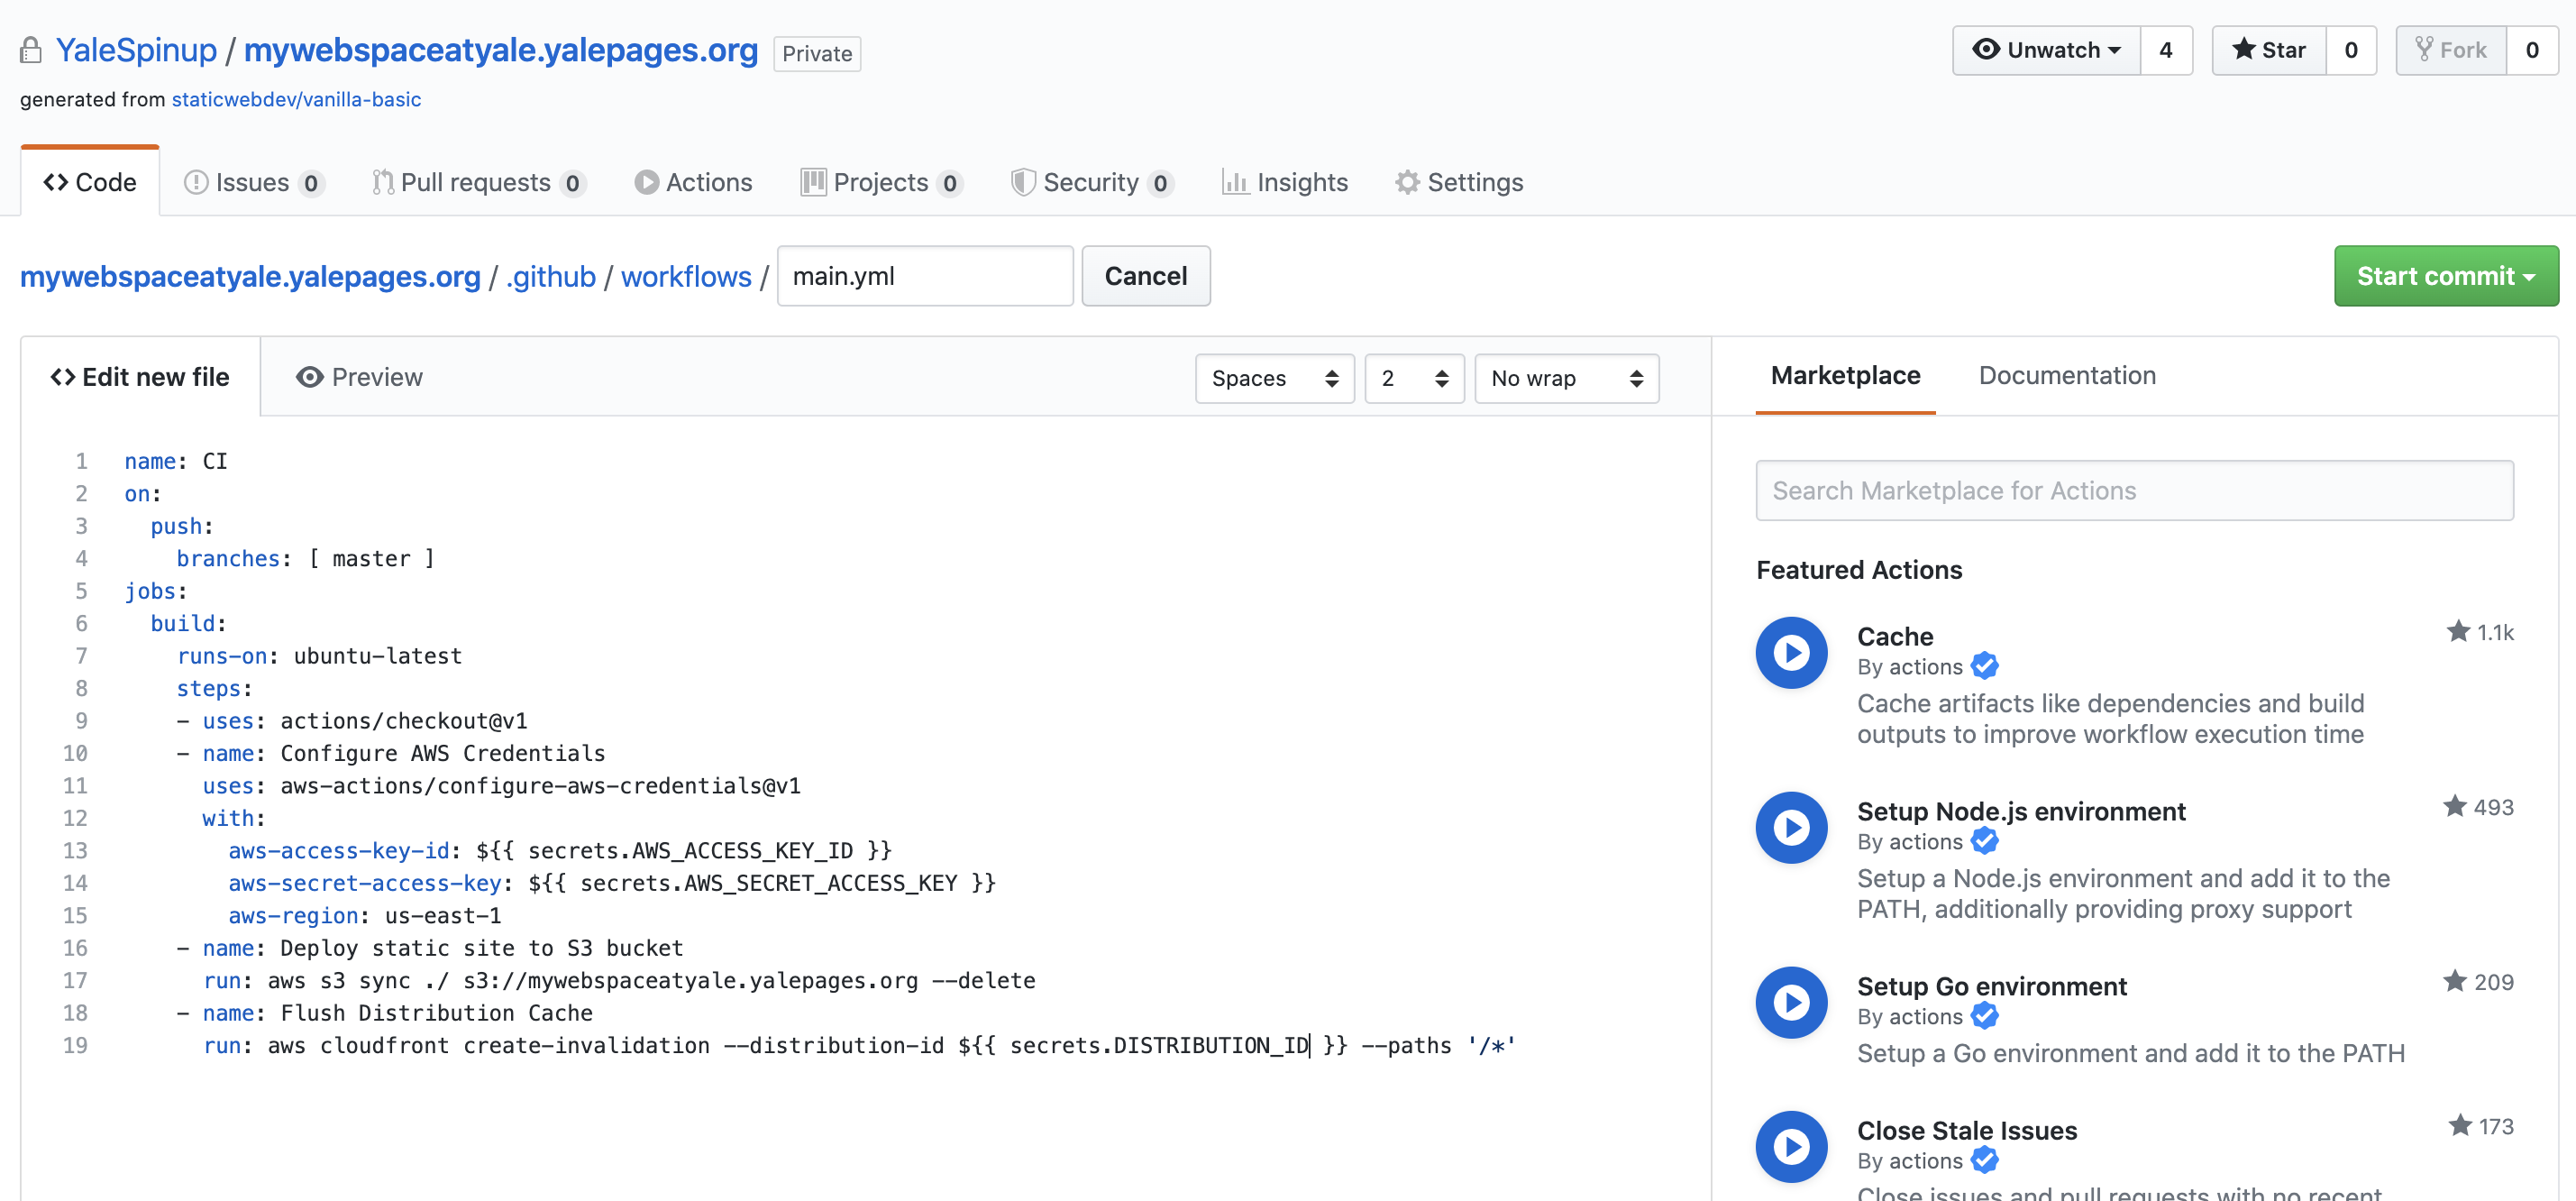
Click on the "Skip this and set up a workflow yourself" link and paste the following into the panel, adjusting the s3 bucket to your website name.
name: Build and Deploy
on:
  push:
    branches: [ master ]
jobs:
  build:
    runs-on: ubuntu-latest
    steps:
    - uses: actions/checkout@v1
    - name: Configure AWS Credentials
      uses: aws-actions/configure-aws-credentials@v1
      with:
        aws-access-key-id: ${{ secrets.AWS_ACCESS_KEY_ID }}
        aws-secret-access-key: ${{ secrets.AWS_SECRET_ACCESS_KEY }}
        aws-region: us-east-1
    - name: Deploy static site to S3 bucket
      run: aws s3 sync ./ s3://mywebspaceatyale.yalepages.org --delete --exclude ".git*"
    - name: Flush Distribution Cache
      run: aws cloudfront create-invalidation --distribution-id ${{ secrets.DISTRIBUTION_ID }} --paths '/*'
NOTE: YAML is space sensitive, so be careful with your whitespace! Refer to the screenshot below if you get stuck.
Click the "Start Commit" button, add a commit message, make sure you've selected "Commit directly to the master branch.
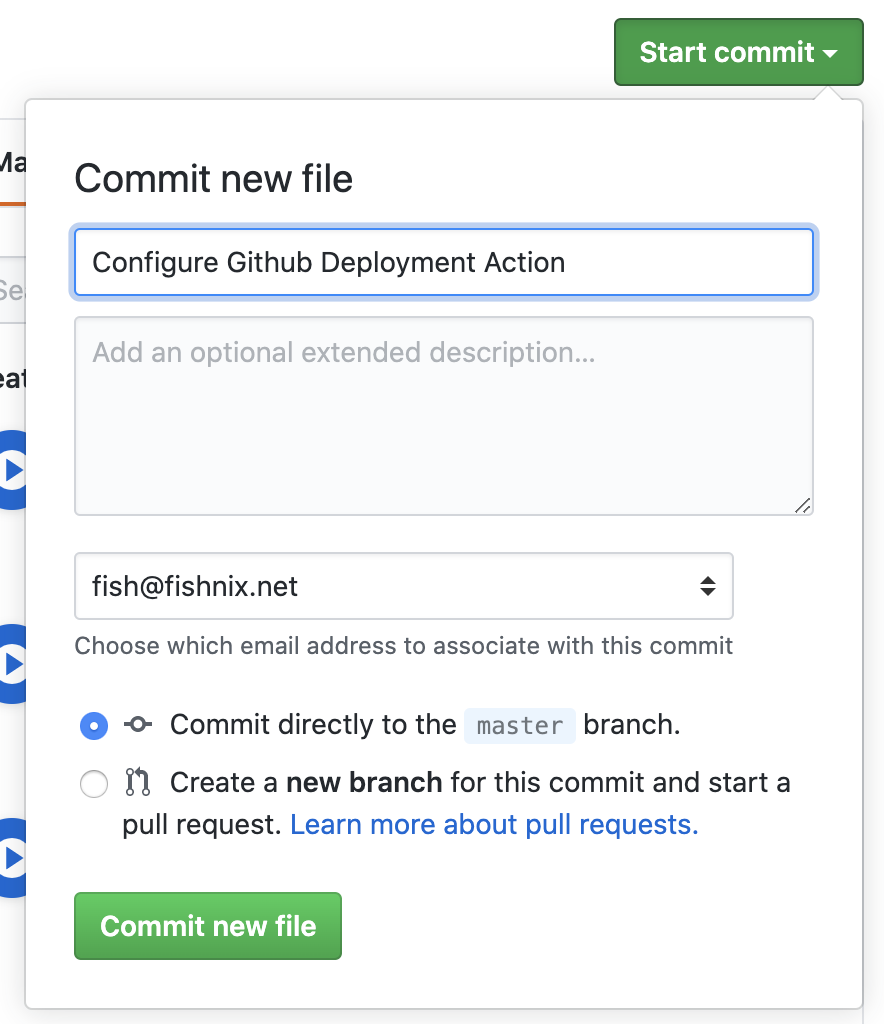
Click the "Commit File" button. This will save your workflow and (since we are committing to master) will execute it for the first time.
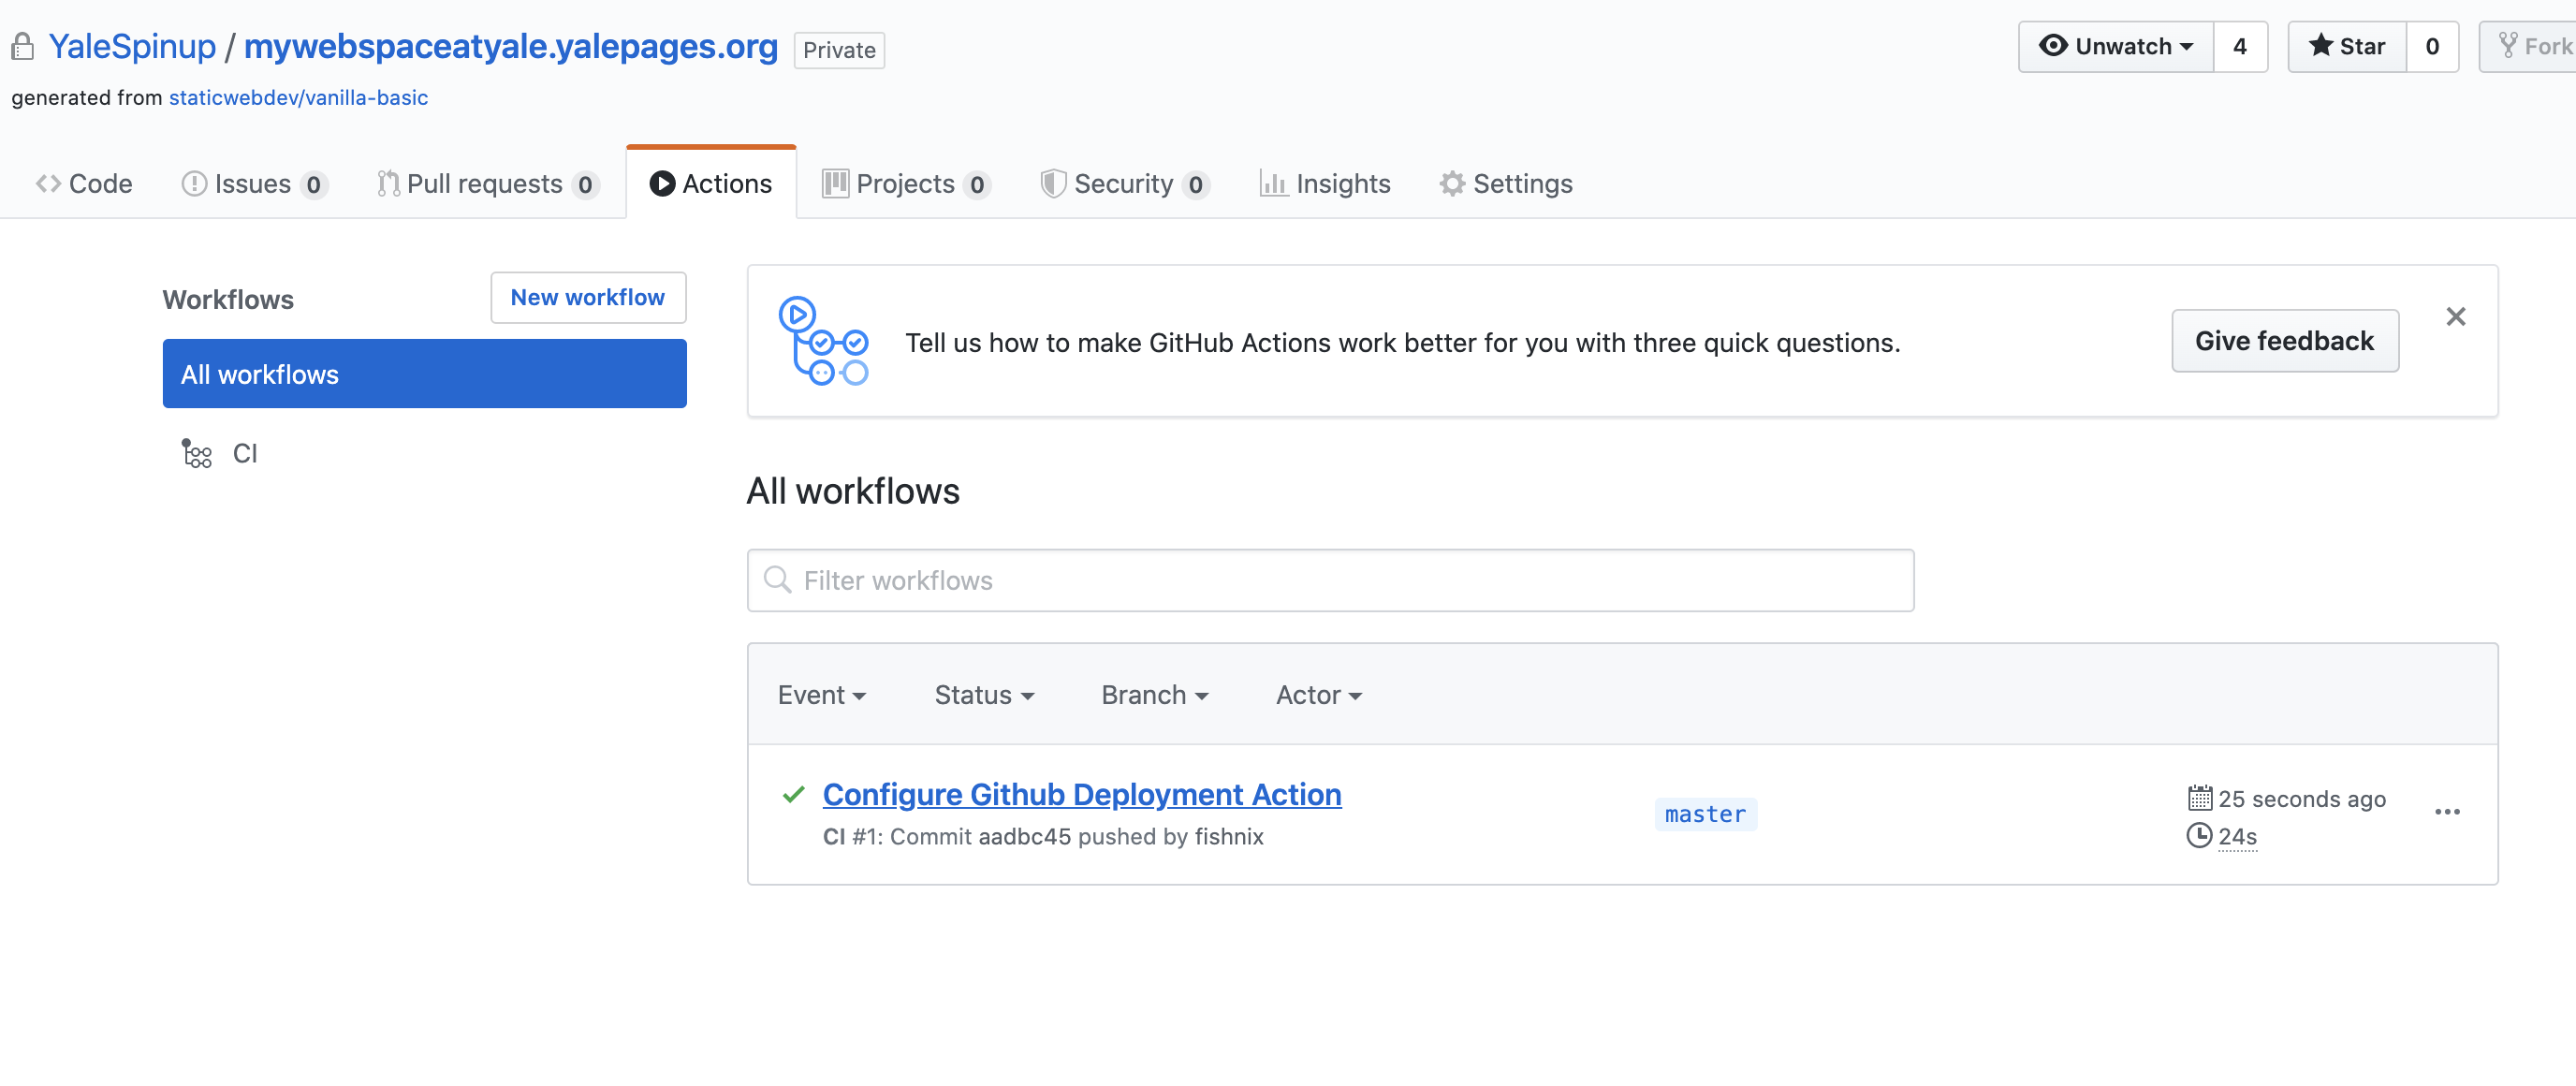
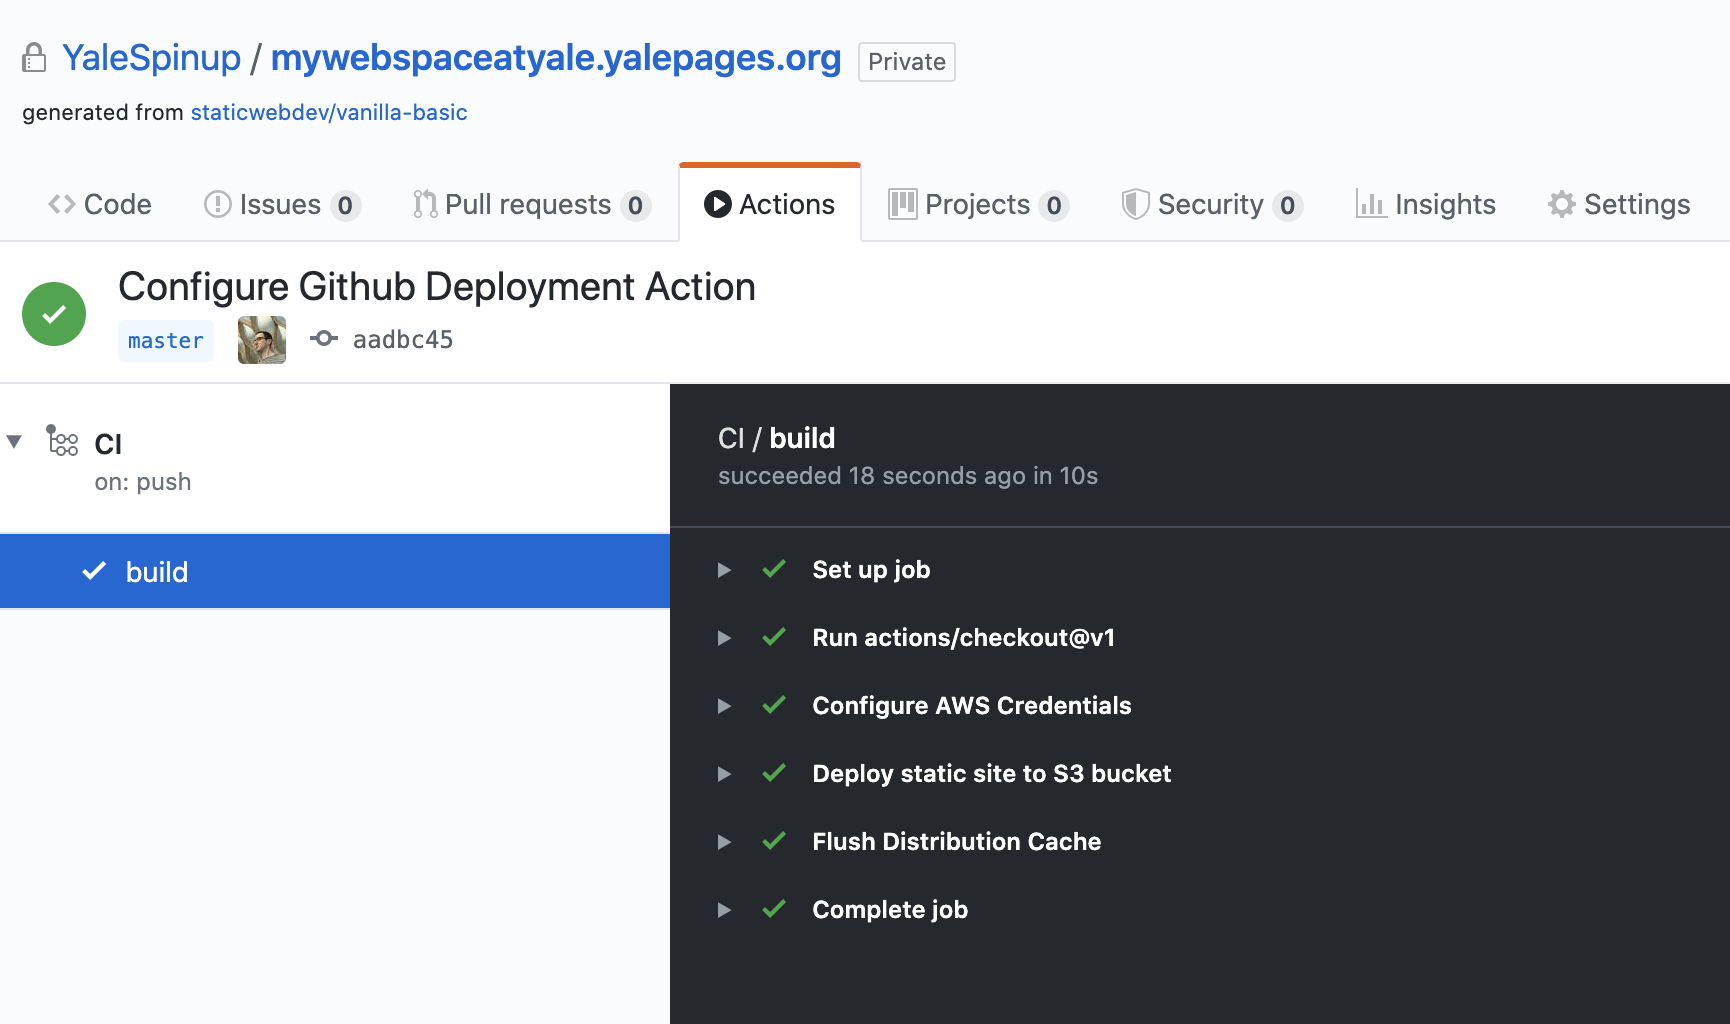
Test your website
Congratulations, you should be able to visit your website!
Cleanup
If you're not planning to keep this website, make sure to clean up your resources.
Delete all files from your website using an S3 GUI (like cyberduck) or the aws CLI command:
aws s3 rm --recursive s3://mywebspaceatyale.yalepages.org/
Delete your spinup resource by clicking the "Delete website" button in the "Control Panel".
Cleanup your github actions and/or the entire repository.
Related articles