...
We’ll deploy NocoDB (https://docs.nocodb.com/). This application provides a user interface to commonly used database systems without requiring coding expertise on the part of the database owner. We will deploy this application from its public Docker repository to AWS ECS using Spinup.
We start with an empty space in Spinup:
...
| Expand |
|---|
| title | Setting up the Database |
|---|
|
First, let’s choose a database (in our case I’ll create a Serverless MySQL):
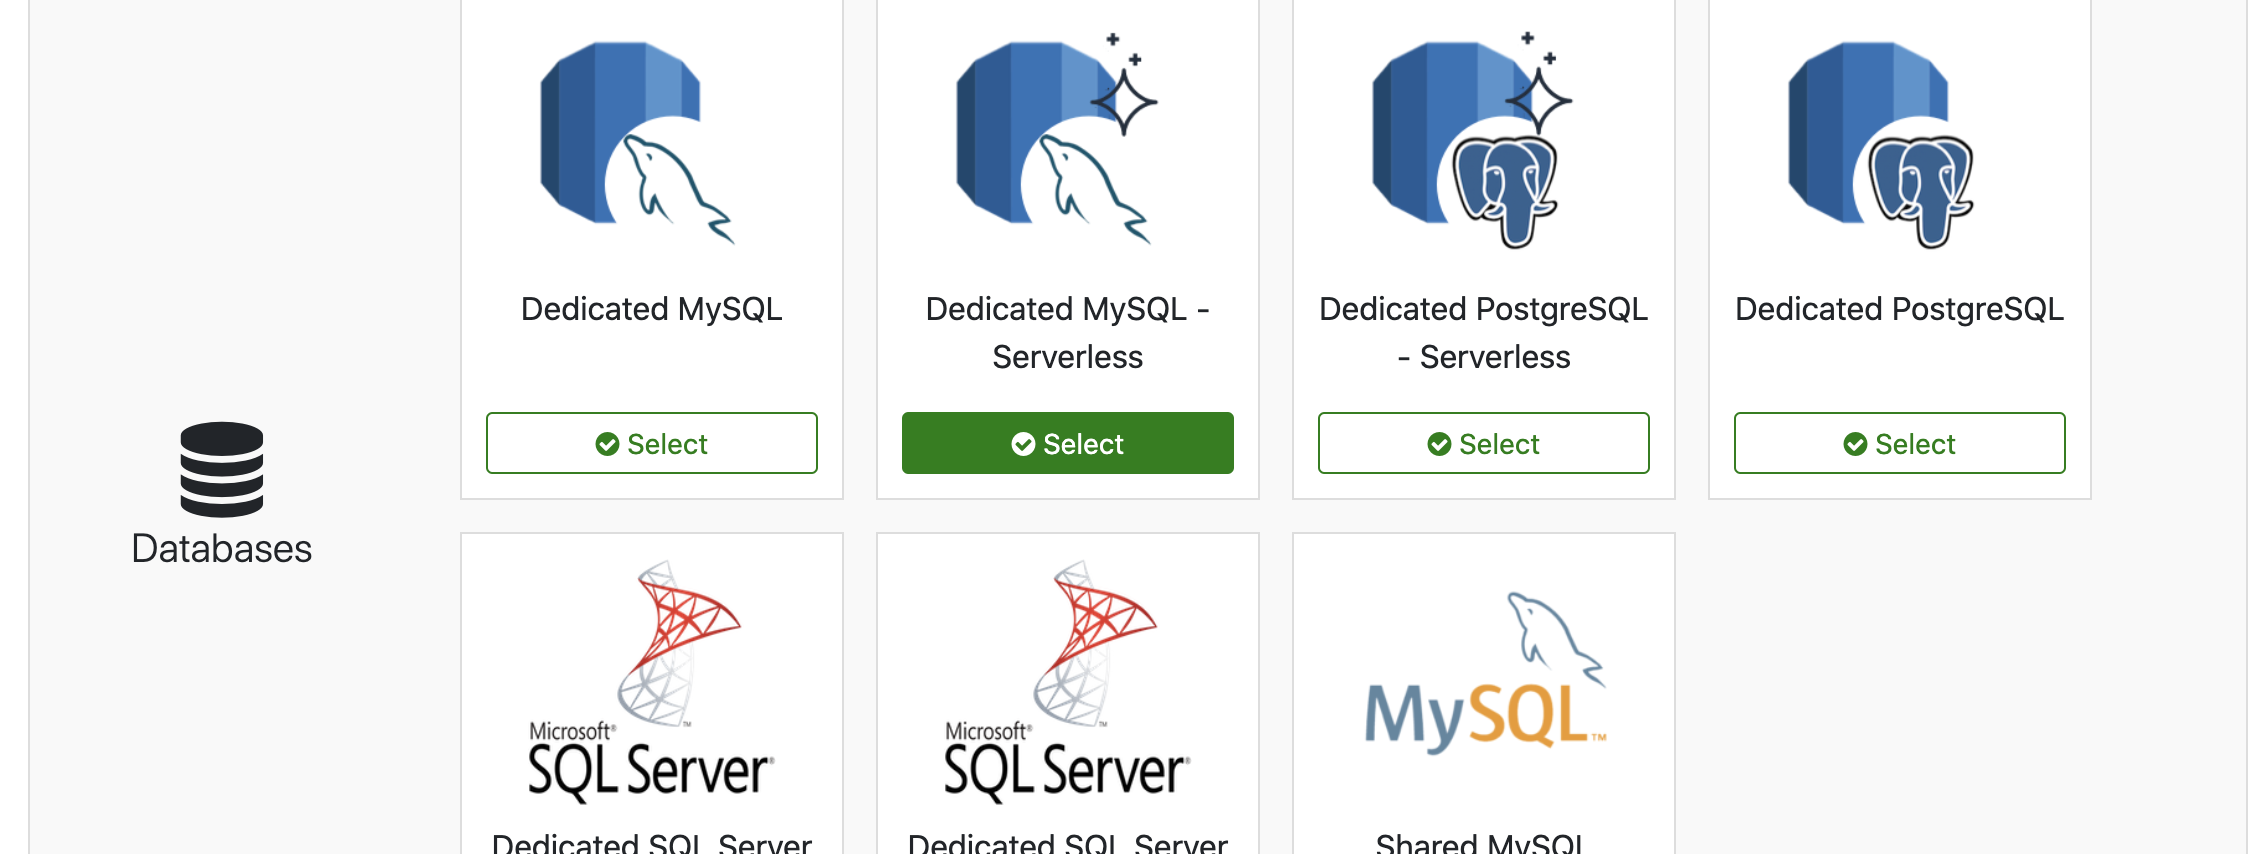 Image Modified Image ModifiedSpecify the required parameters and click Create database (write down the username and password first):
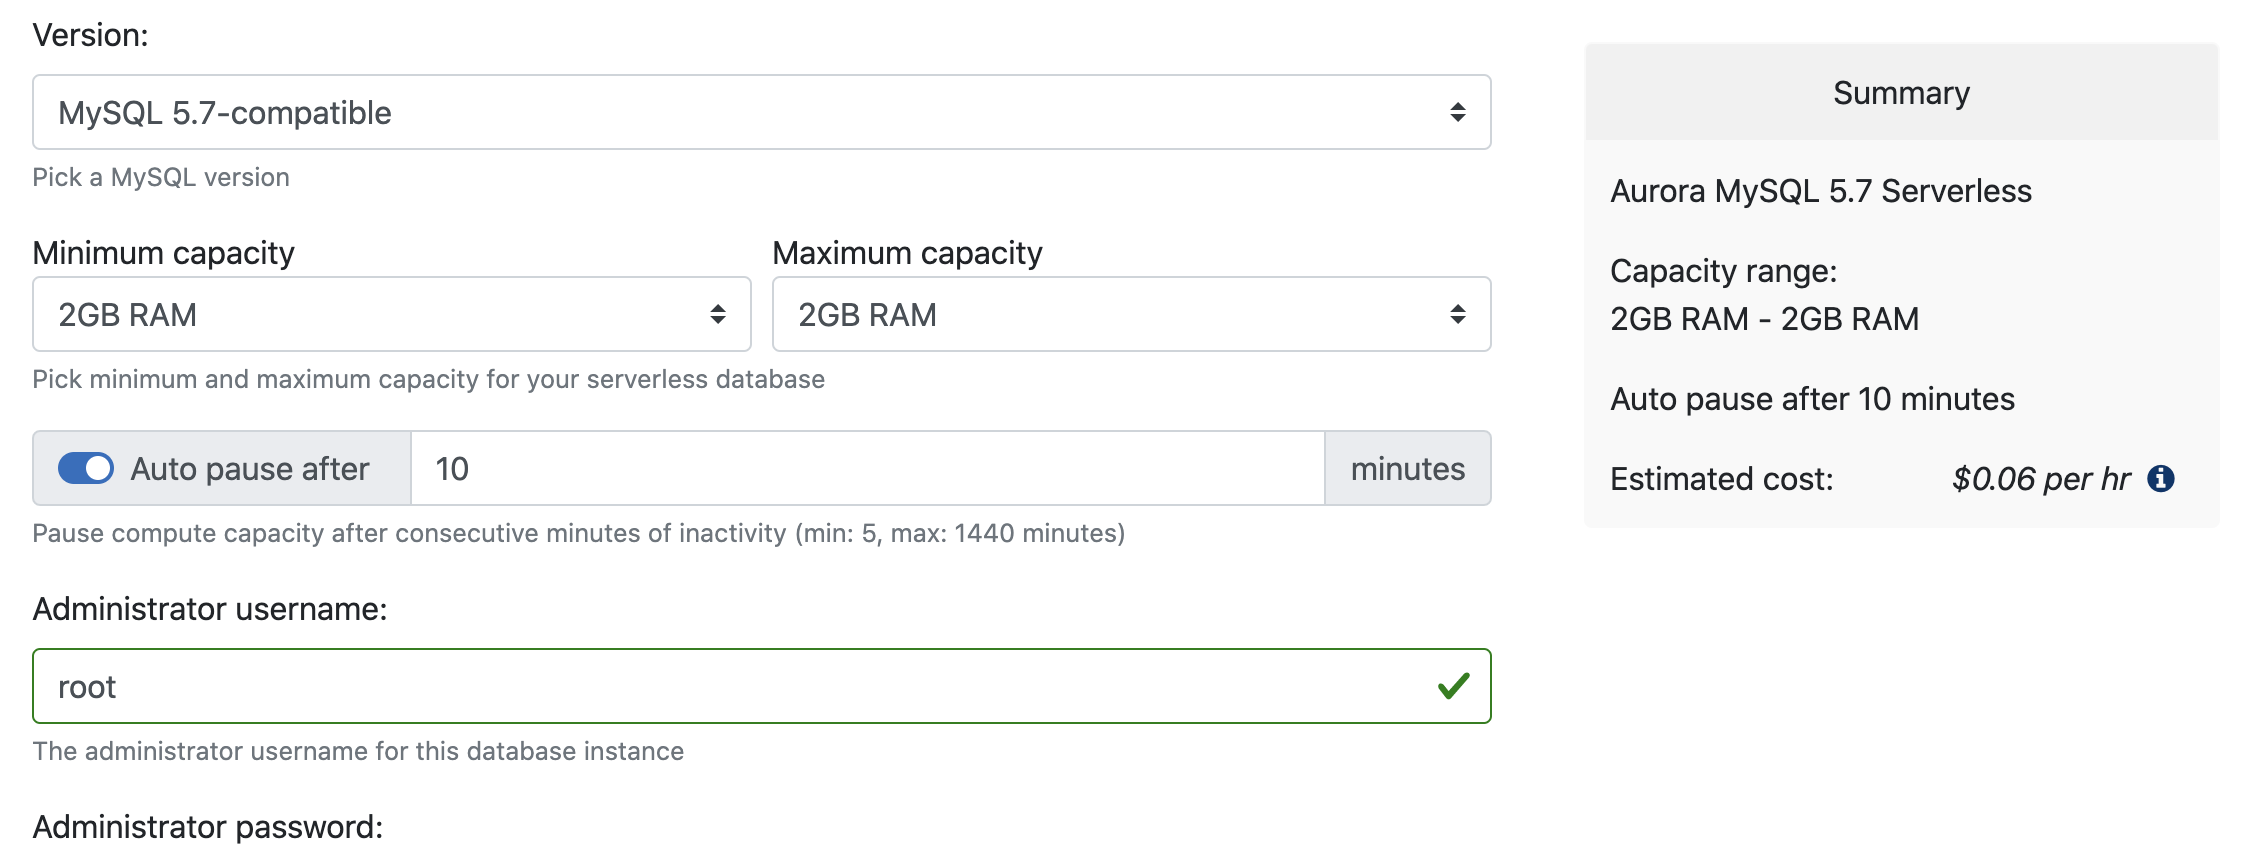 Image Modified Image Modified| Info |
|---|
It will take a few minutes for the database to be fully provisioned. When it’s ready, note the Endpoint URL as we’ll need that to connect in the step below. In our case it’s spinup-db0018a4.cluster-c9ukc6s0rmbg.us-east-1.rds.amazonaws.com |
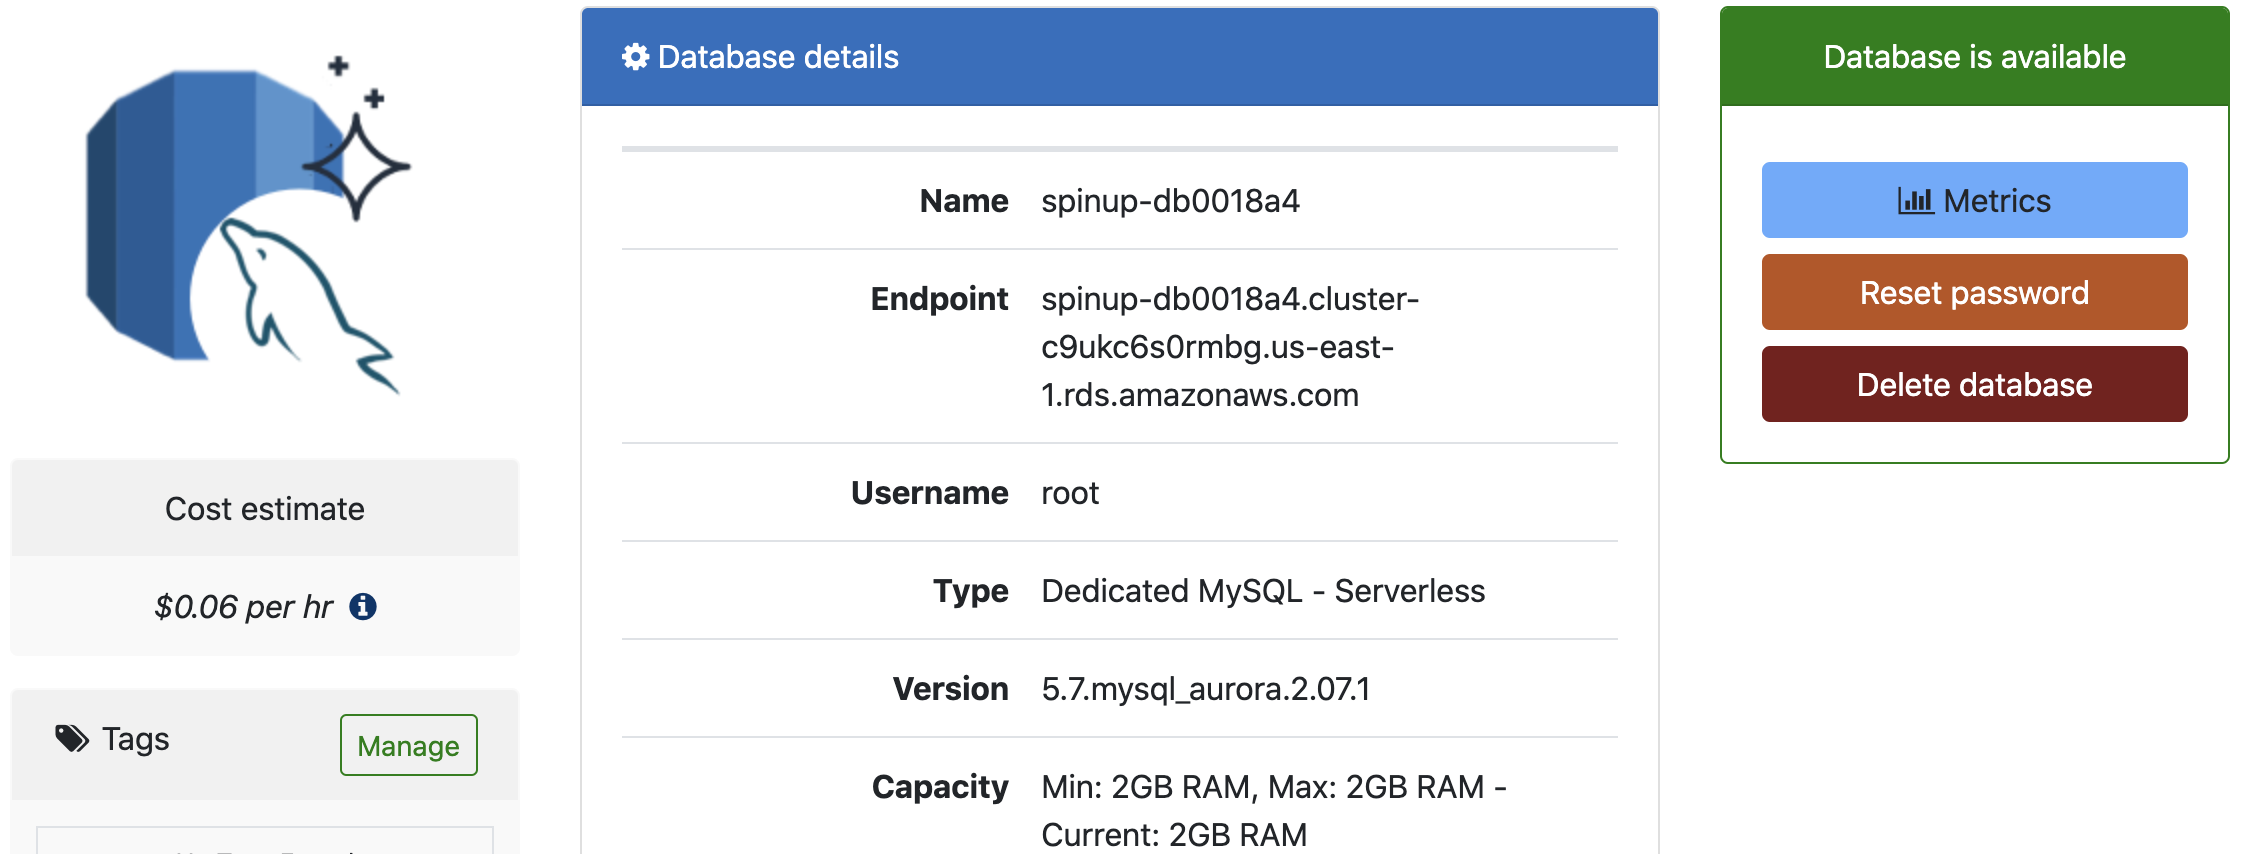 Image Modified Image ModifiedNext, we need to create a secret parameter which will be used by the container service - go to the Secrets tab in the space:
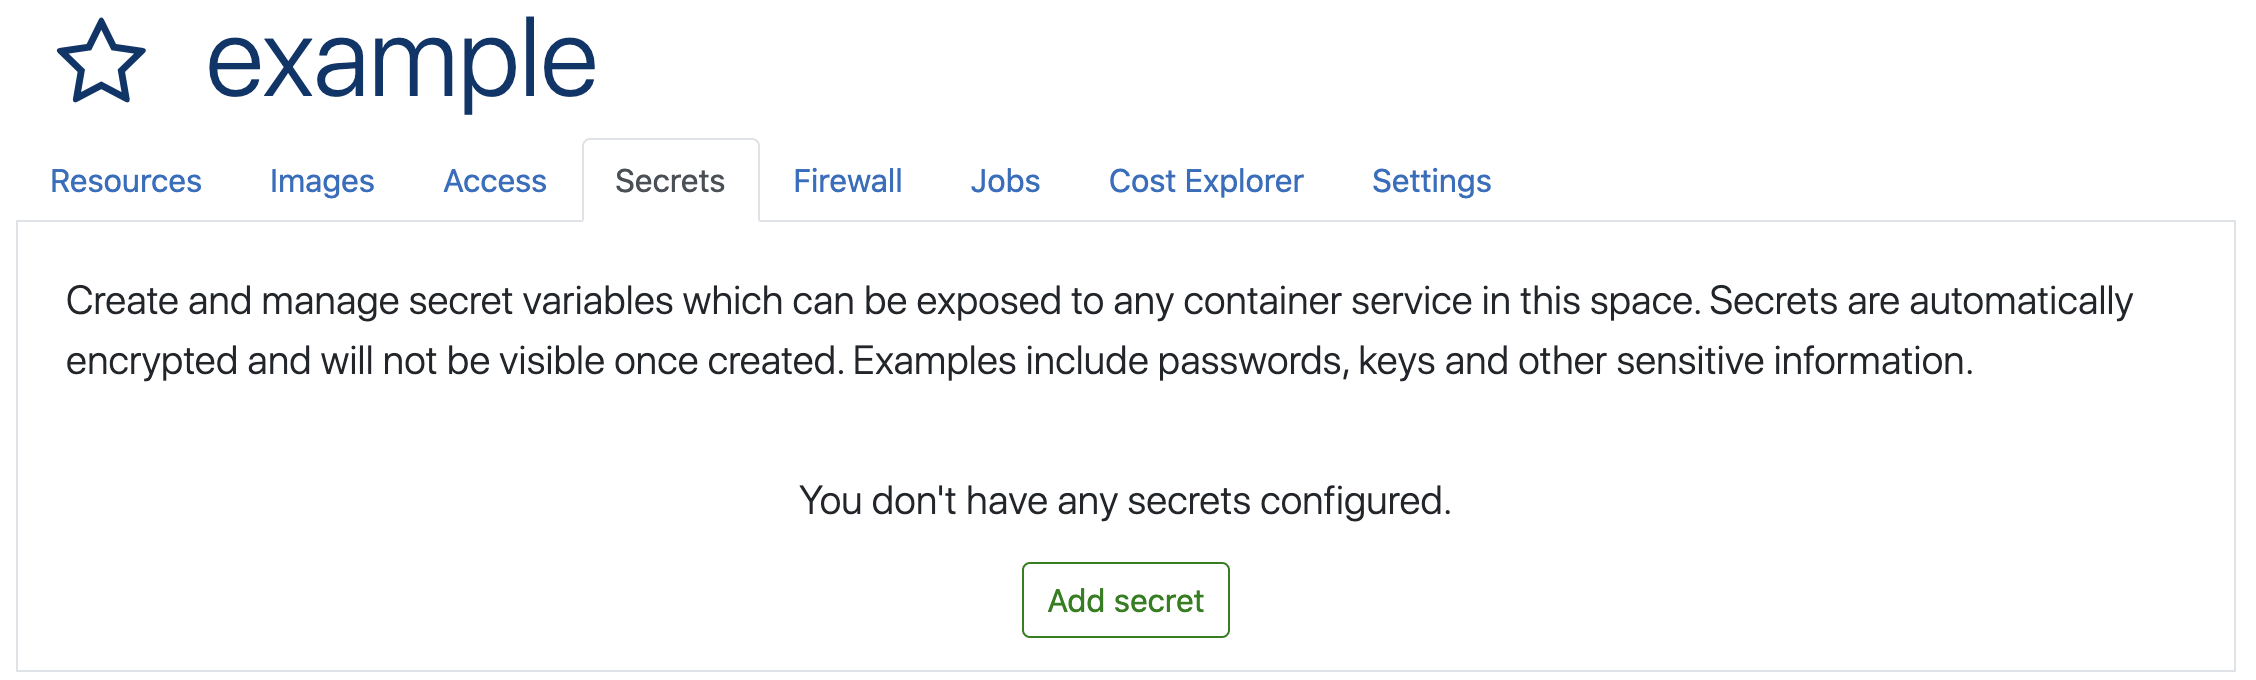 Image Modified Image Modified| Info |
|---|
The secret in this example is specific to the Nocodb app and will be different for other apps (usually some variable that tells how the app can connect to the database). |
The secret in this case is NC_DB - it needs to be in the following format (just replace ENDPOINT, USER, PASSWORD, DBNAME with your specific values):
mysql2://ENDPOINT:3306?u=USER&p=PASSWORD&d=DBNAME 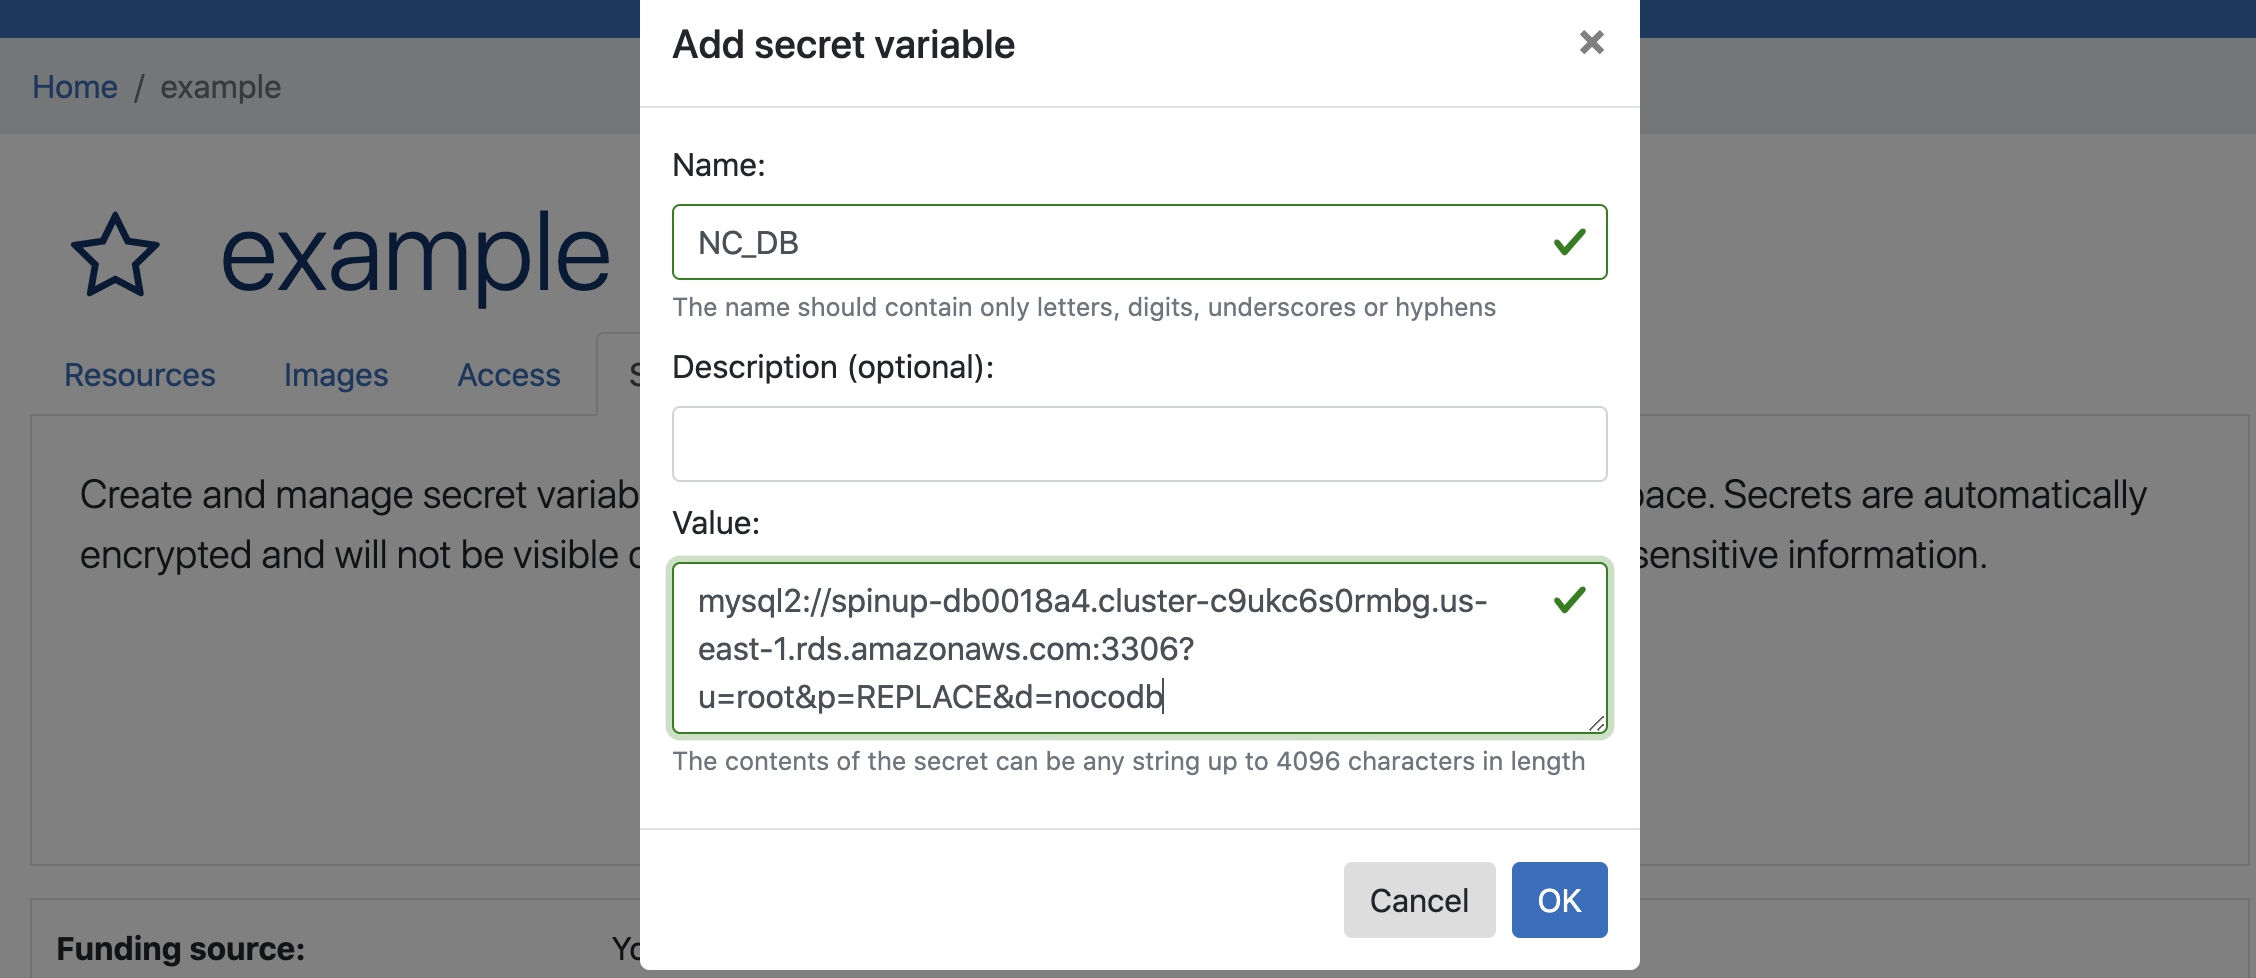 Image Modified Image Modified |
| Expand |
|---|
| title | Building the Container Service |
|---|
|
Choose the Container Service option inside Spinup
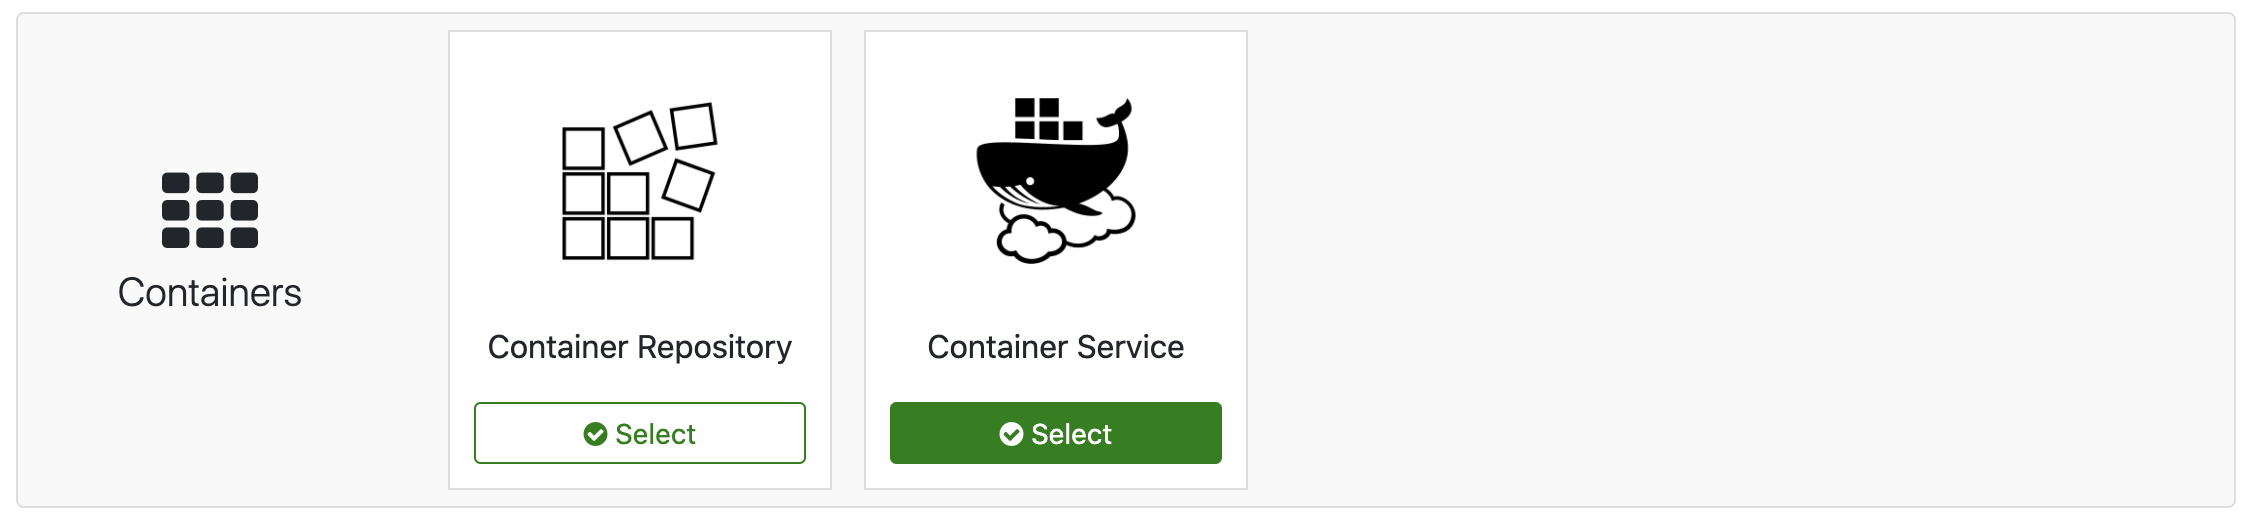 Image Modified Image ModifiedIn the first tab, enter the name and size of your container: 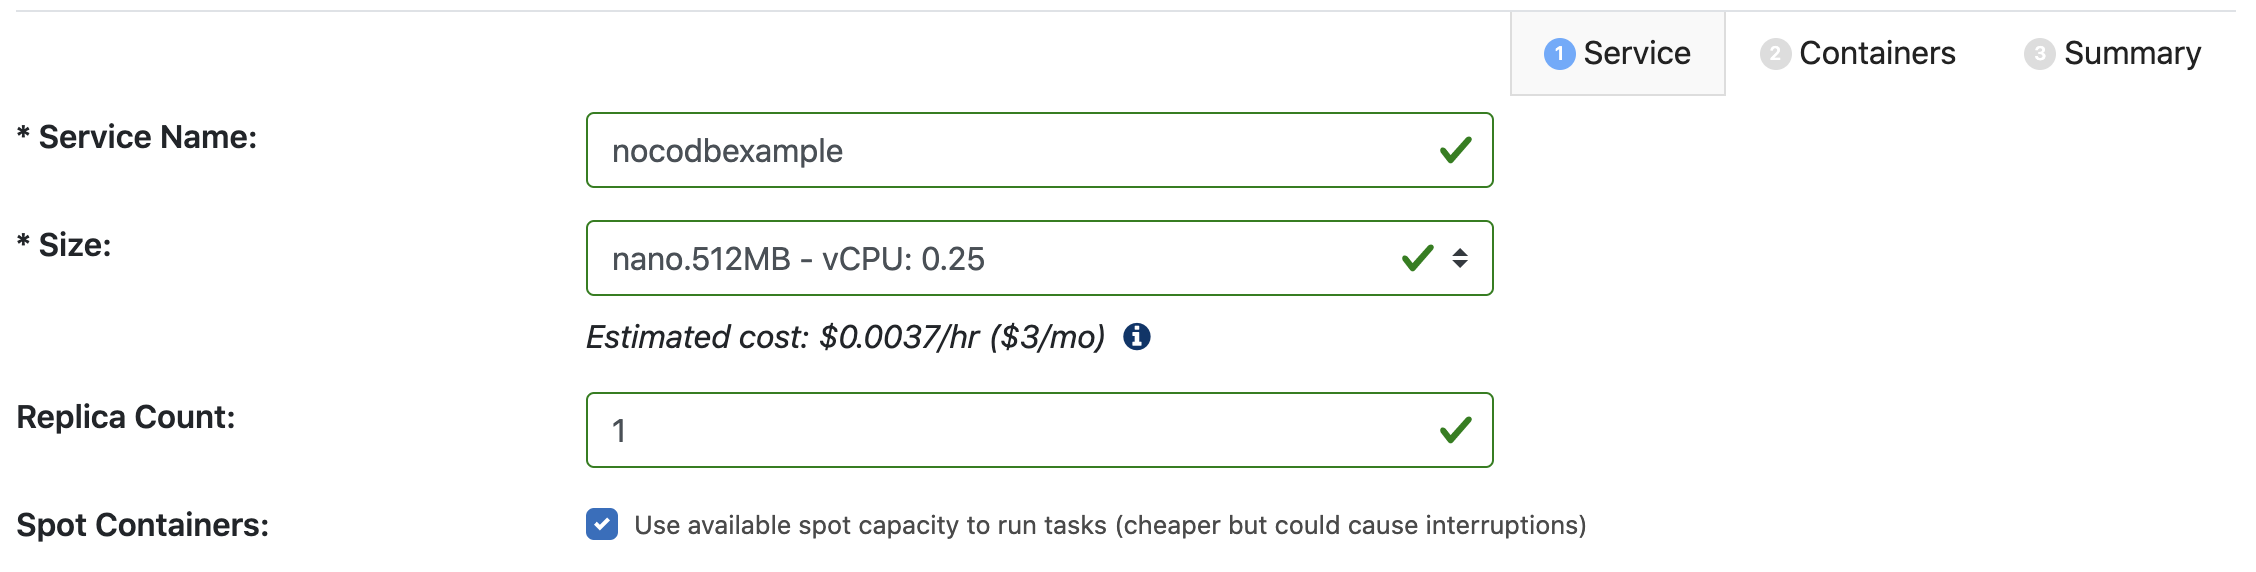 Image Modified Image ModifiedThe second tab is where the majority of the configuration happens. Enter a name for the container (e.g. nocodb) Edit the Image section and enter the name of the Docker image (e.g. nocodb/nocodb), then click the checkmark to save it 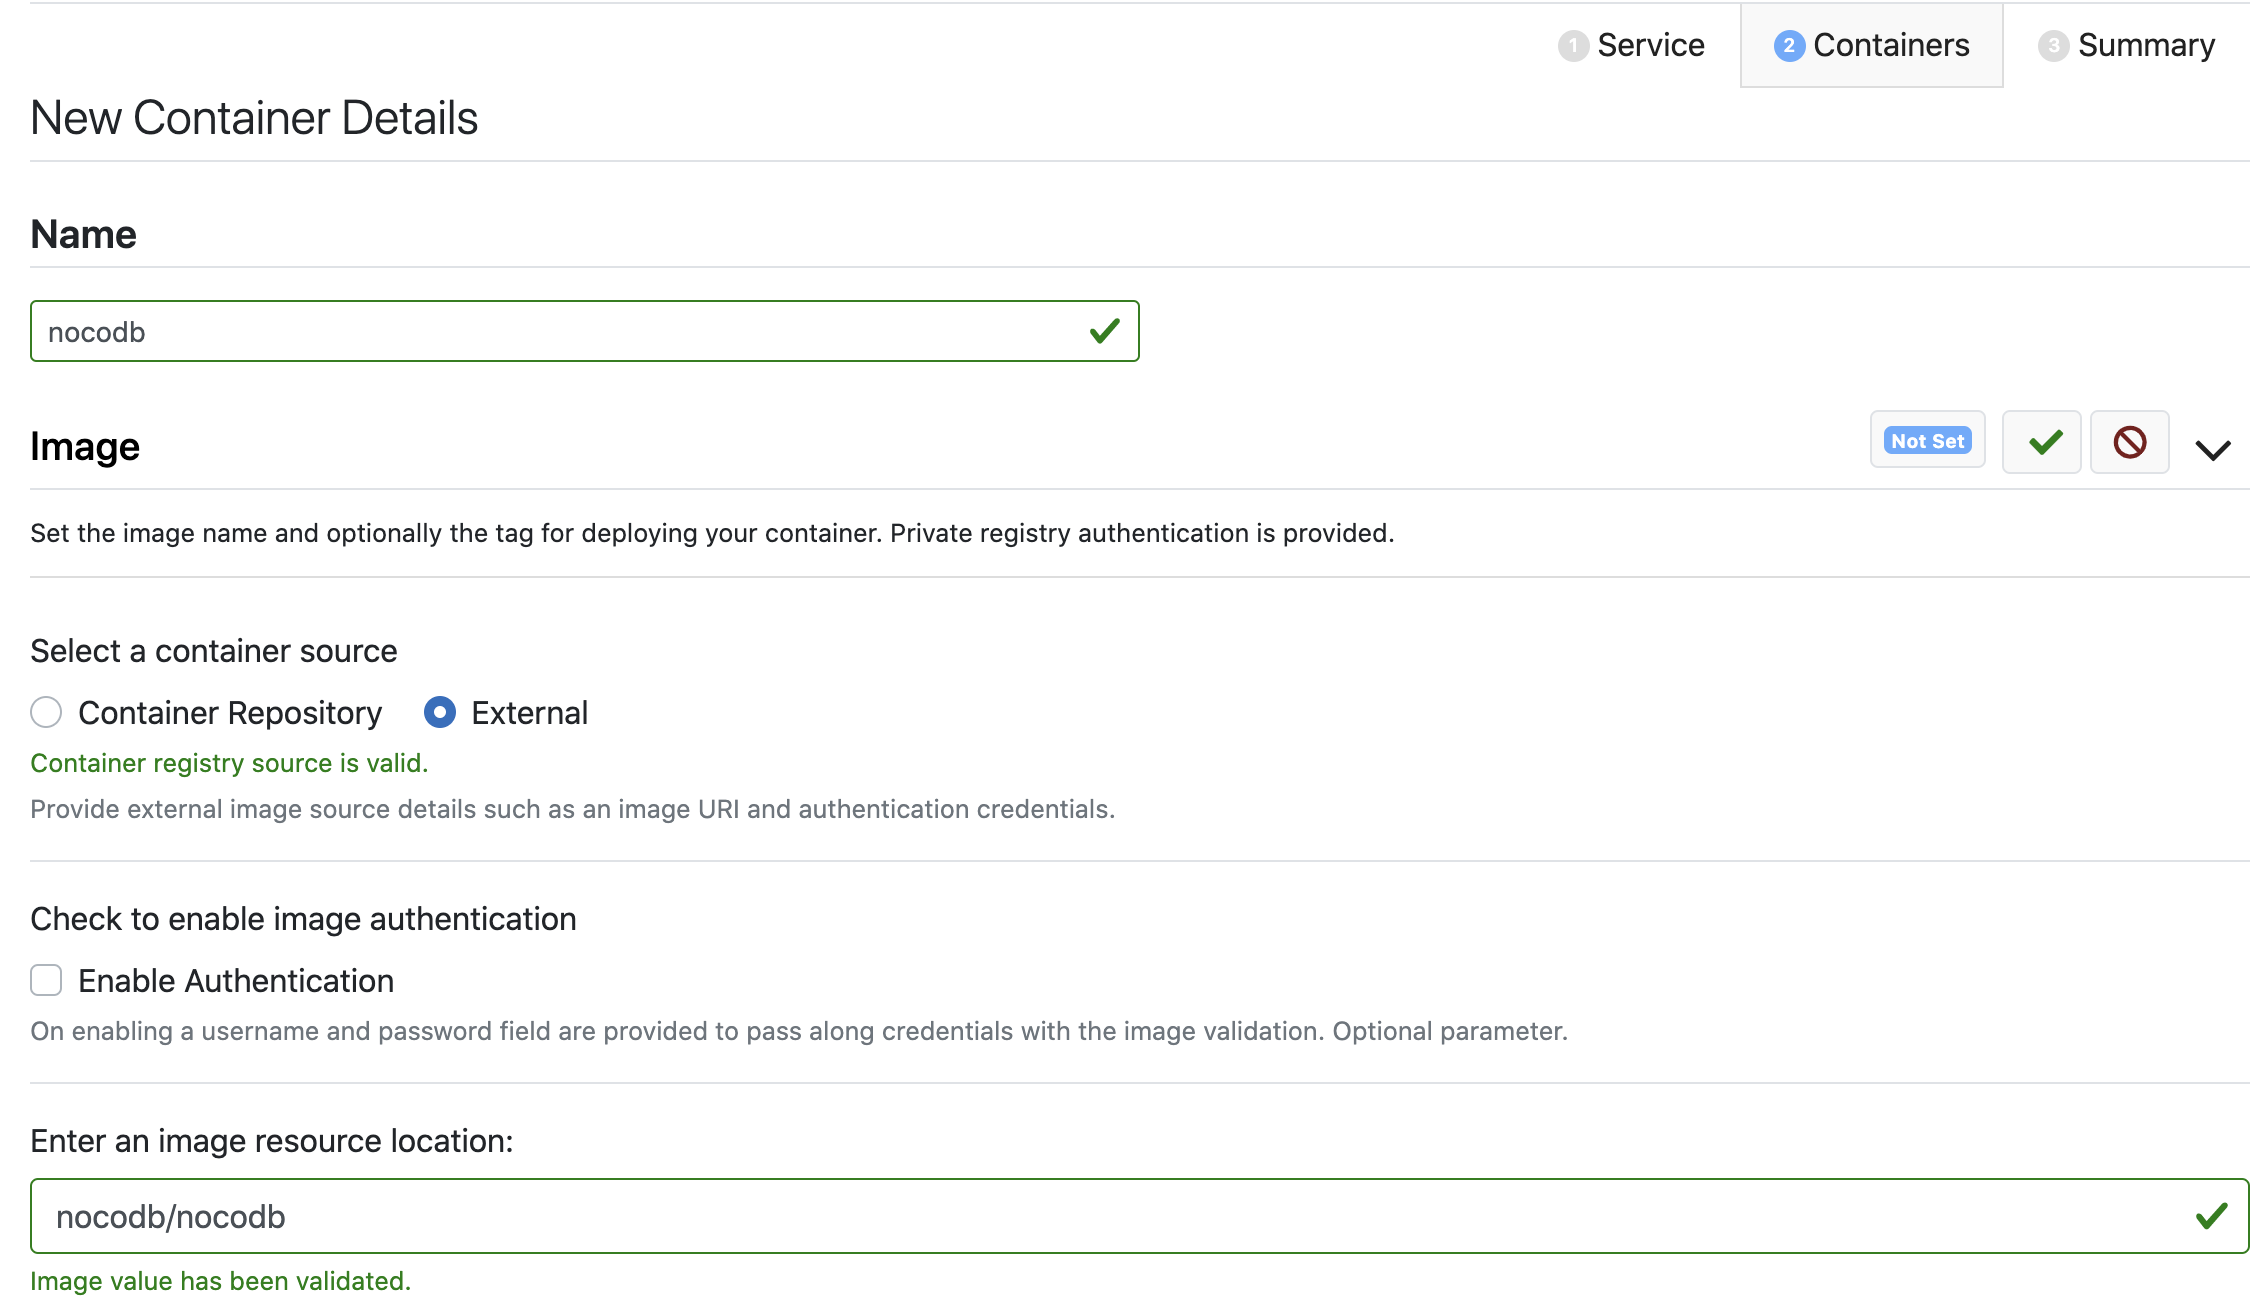 Image Modified Image ModifiedEdit the Port section and add a TCP port (e.g. 8080) - this is the port that the Docker container is configured to listen on (you may have to consult the Dockerfile to determine what it is). Click the checkmark to save. 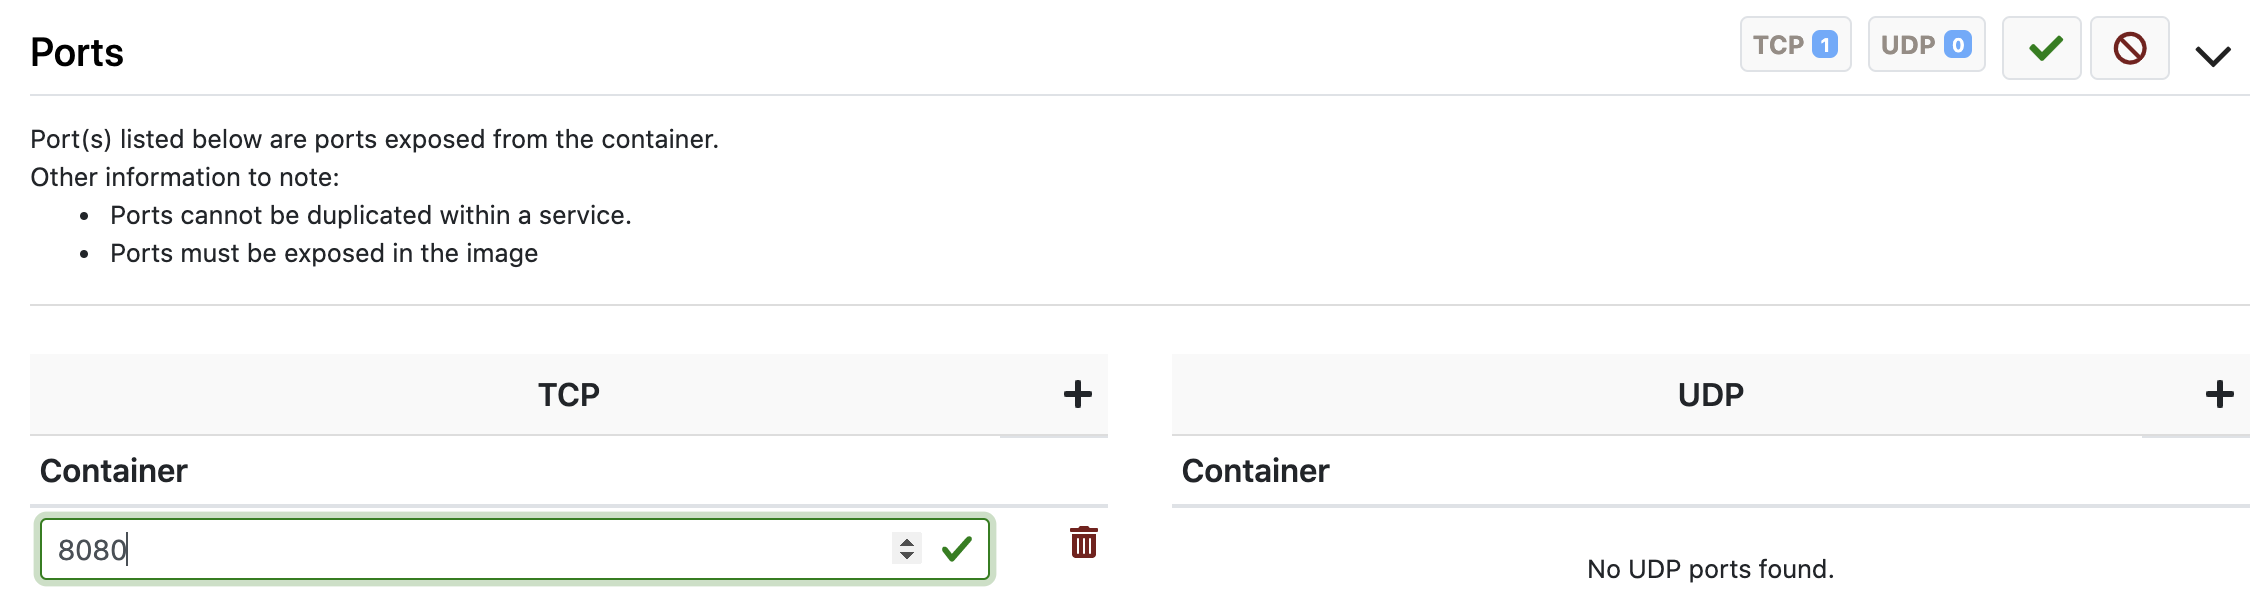 Image Modified Image ModifiedEdit the Secret Environment Variables sections and add a secret (e.g. NC_DB) that maps to the secret we added earlier - this will expose it as a variable in the container. Click the checkmark to save. 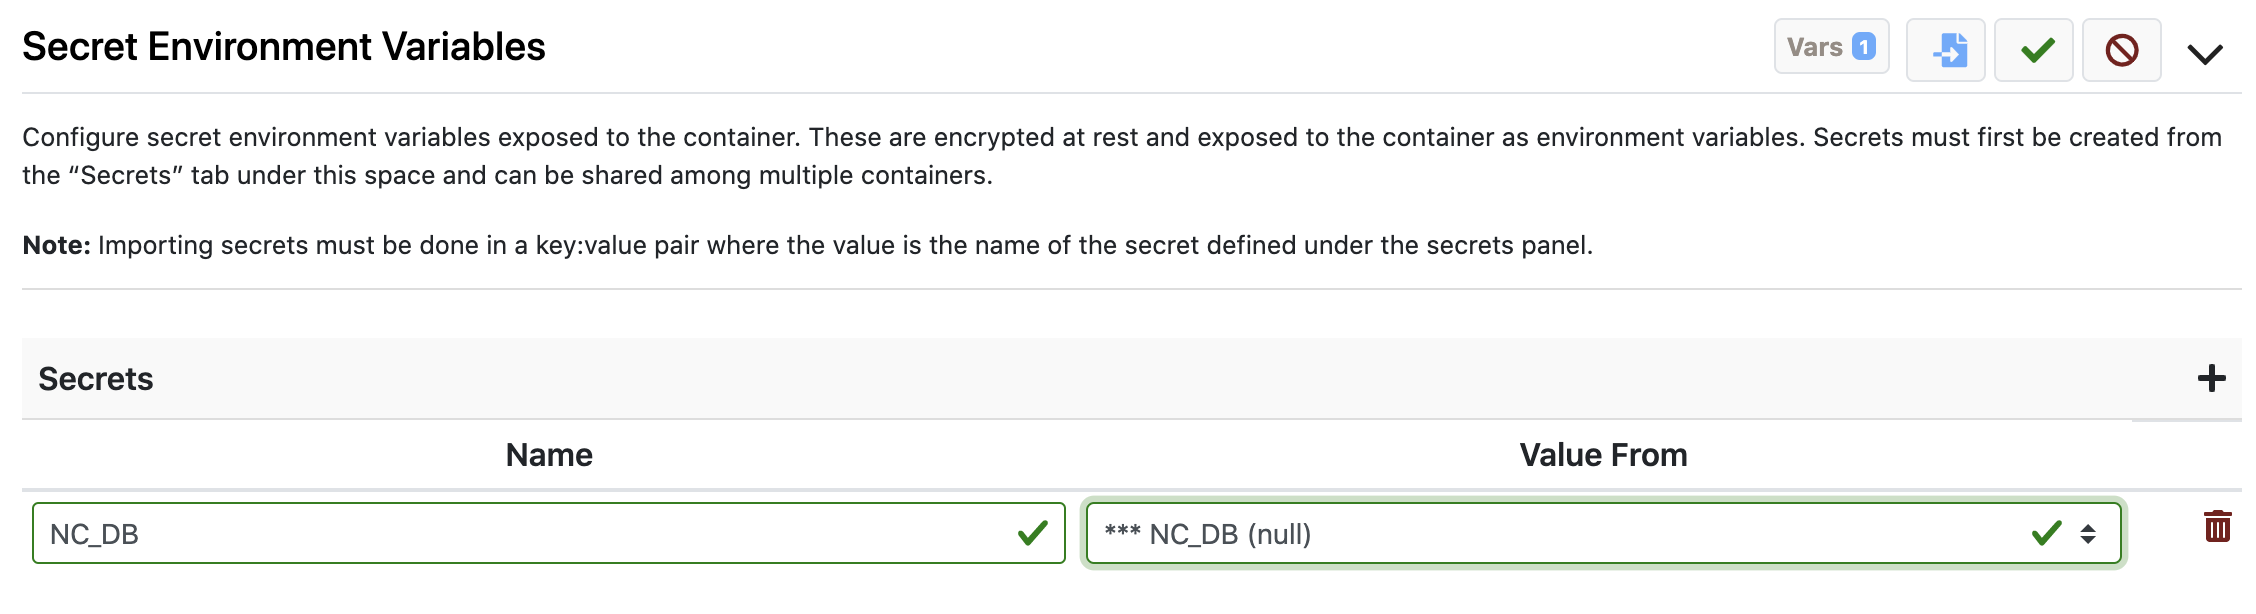 Image Modified Image Modified
We are finished with the container configuration, so click Add Container at the bottom - this will take to the top of the page - click Summary to proceed.
 Image Modified Image ModifiedOn the last tab just review to make sure the details look like what you expect and click Create Service
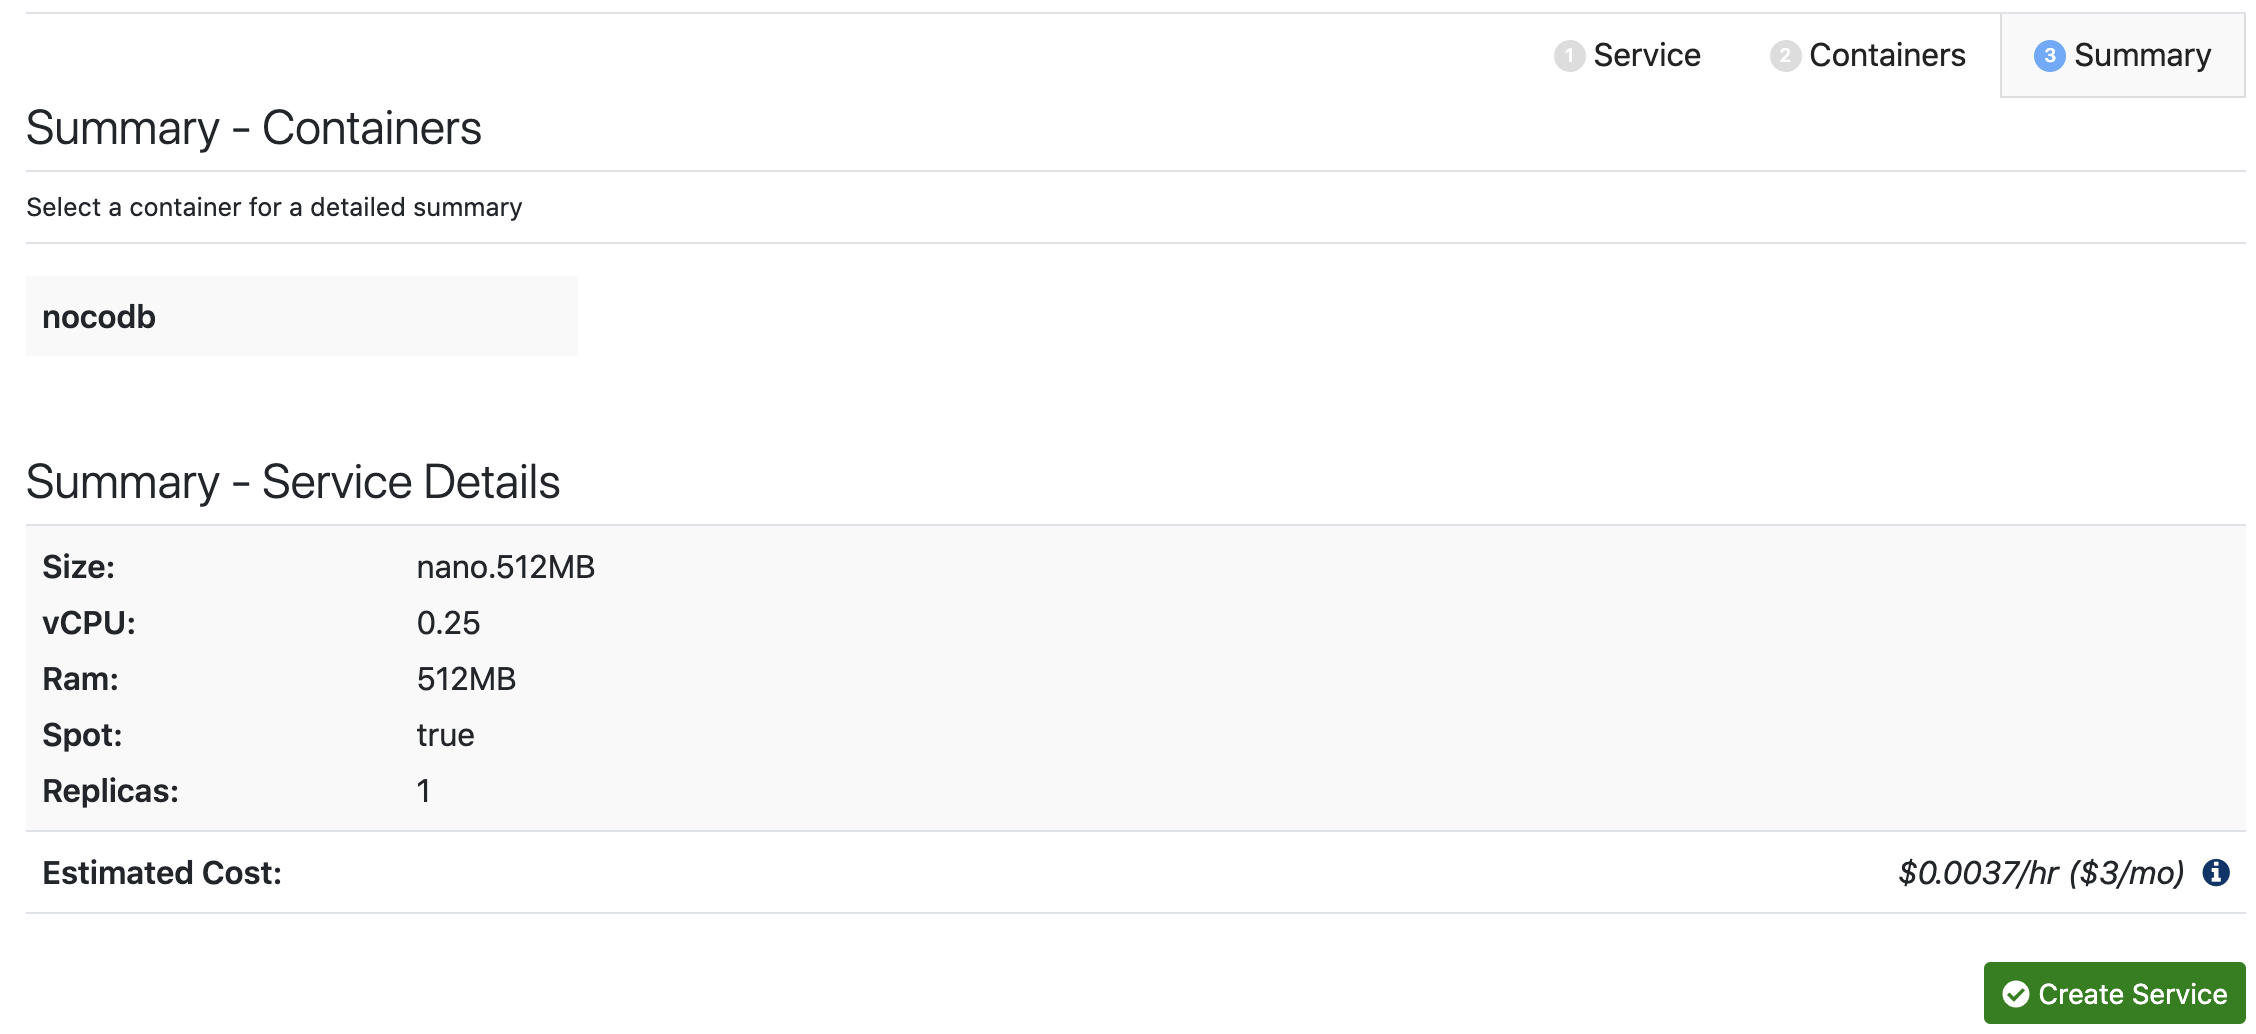 Image Modified Image ModifiedSpinup starts deploying the container and you will see the management page for the container service - you will know when it’s ready when the yellow dot in the upper left corner turns green. 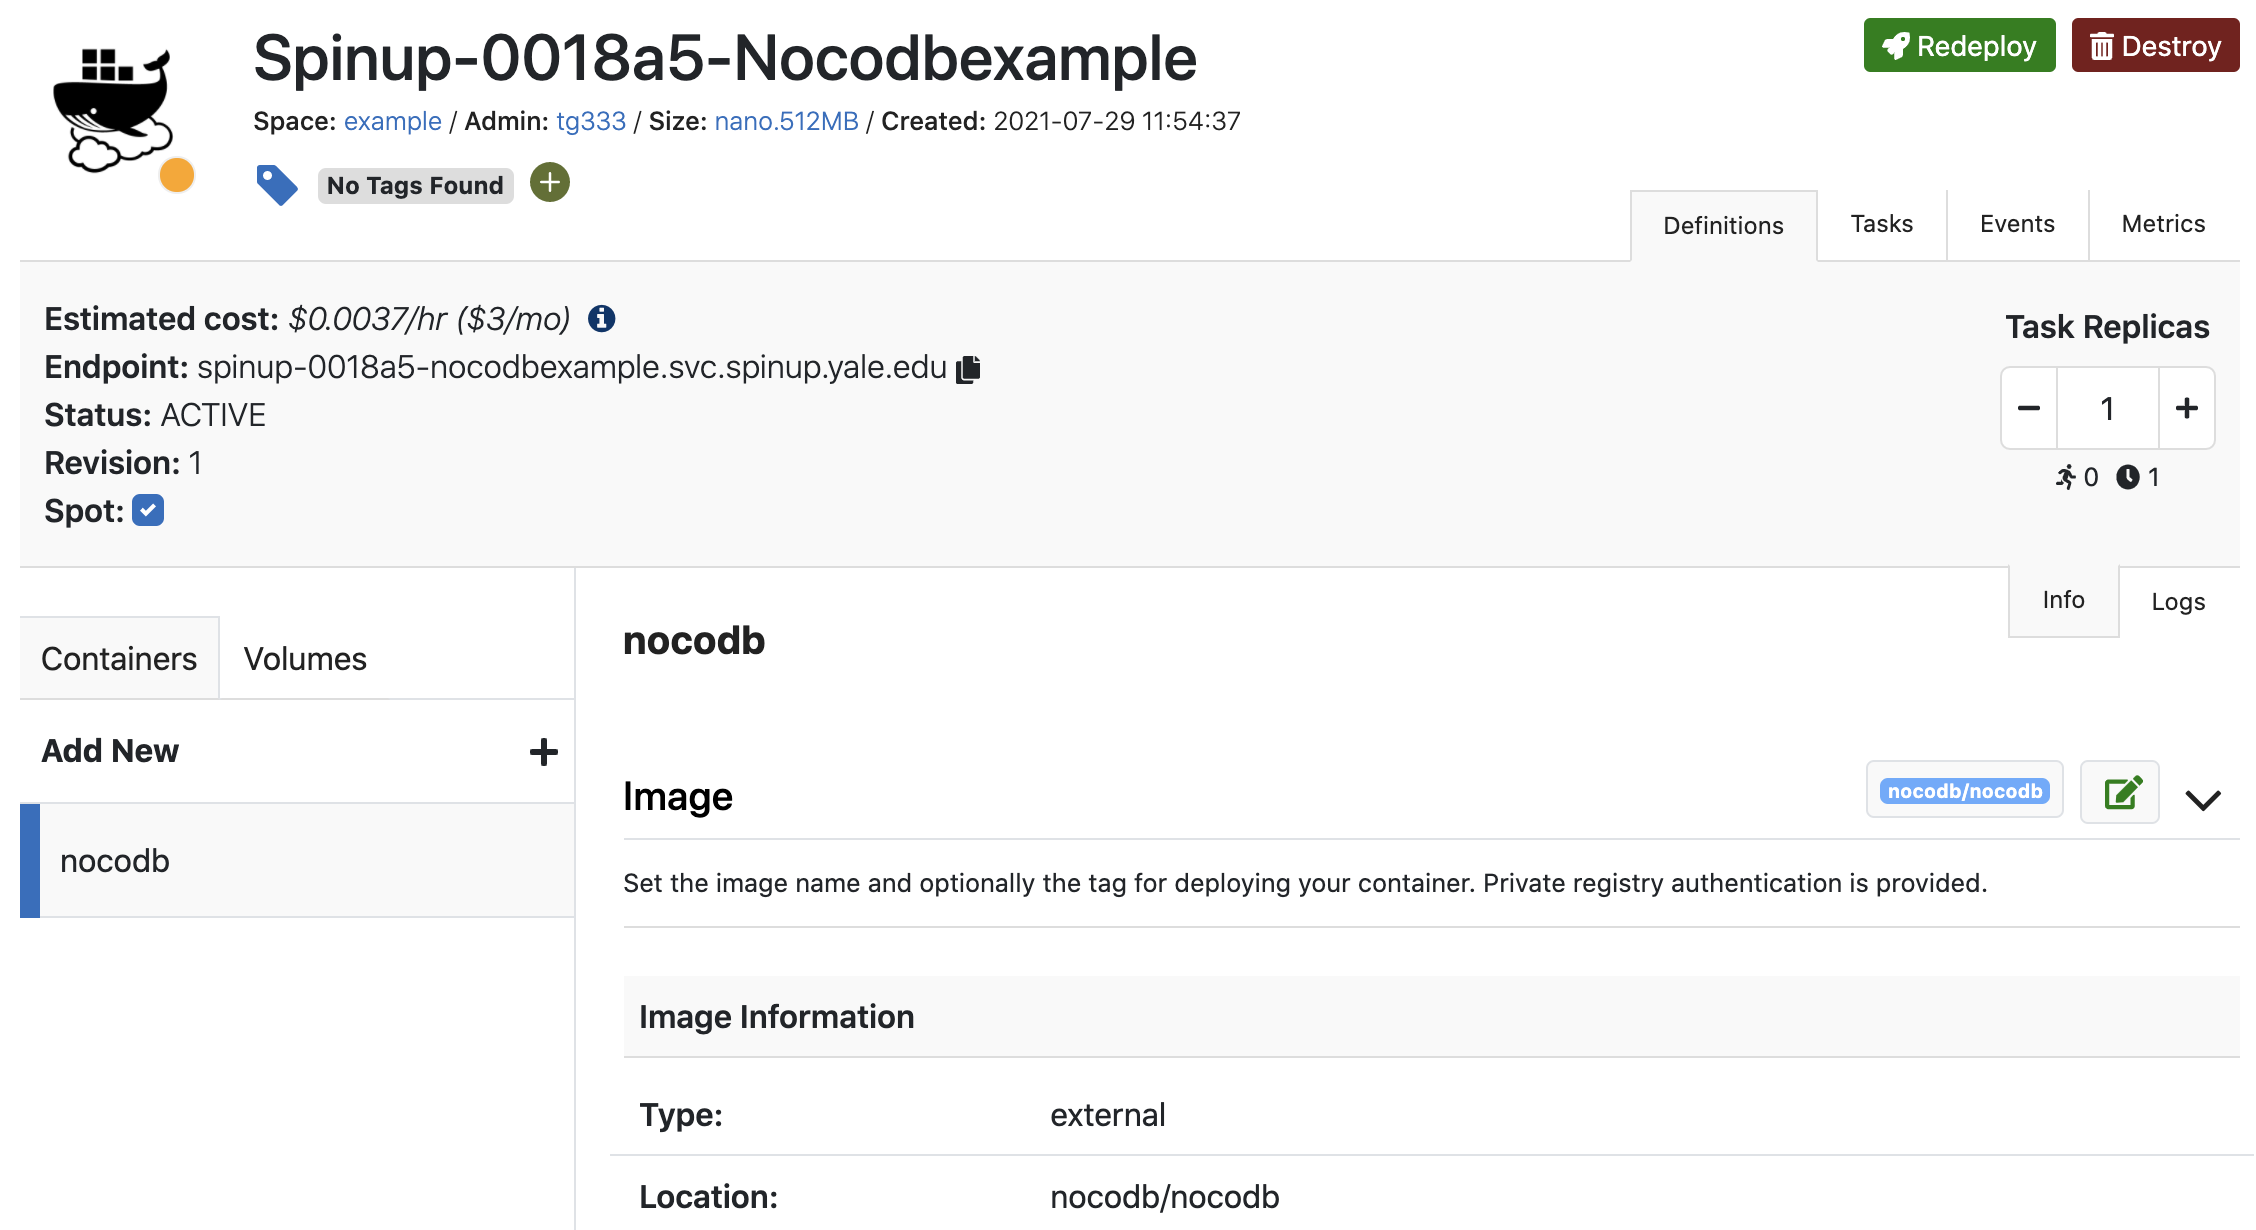 Image Modified Image Modified
| Info |
|---|
Note the container Endpoint - this is the URL where you can access the app (in this case spinup-0018a5-nocodbexample.svc.spinup.yale.edu). |
|
| Expand |
|---|
| title | Opening Associated Ports |
|---|
|
Navigate to the Firewall tab for your space. You will notice that by default the only ports allowed are 22 and 3389 for administrator access. Click Add rule to open another port.
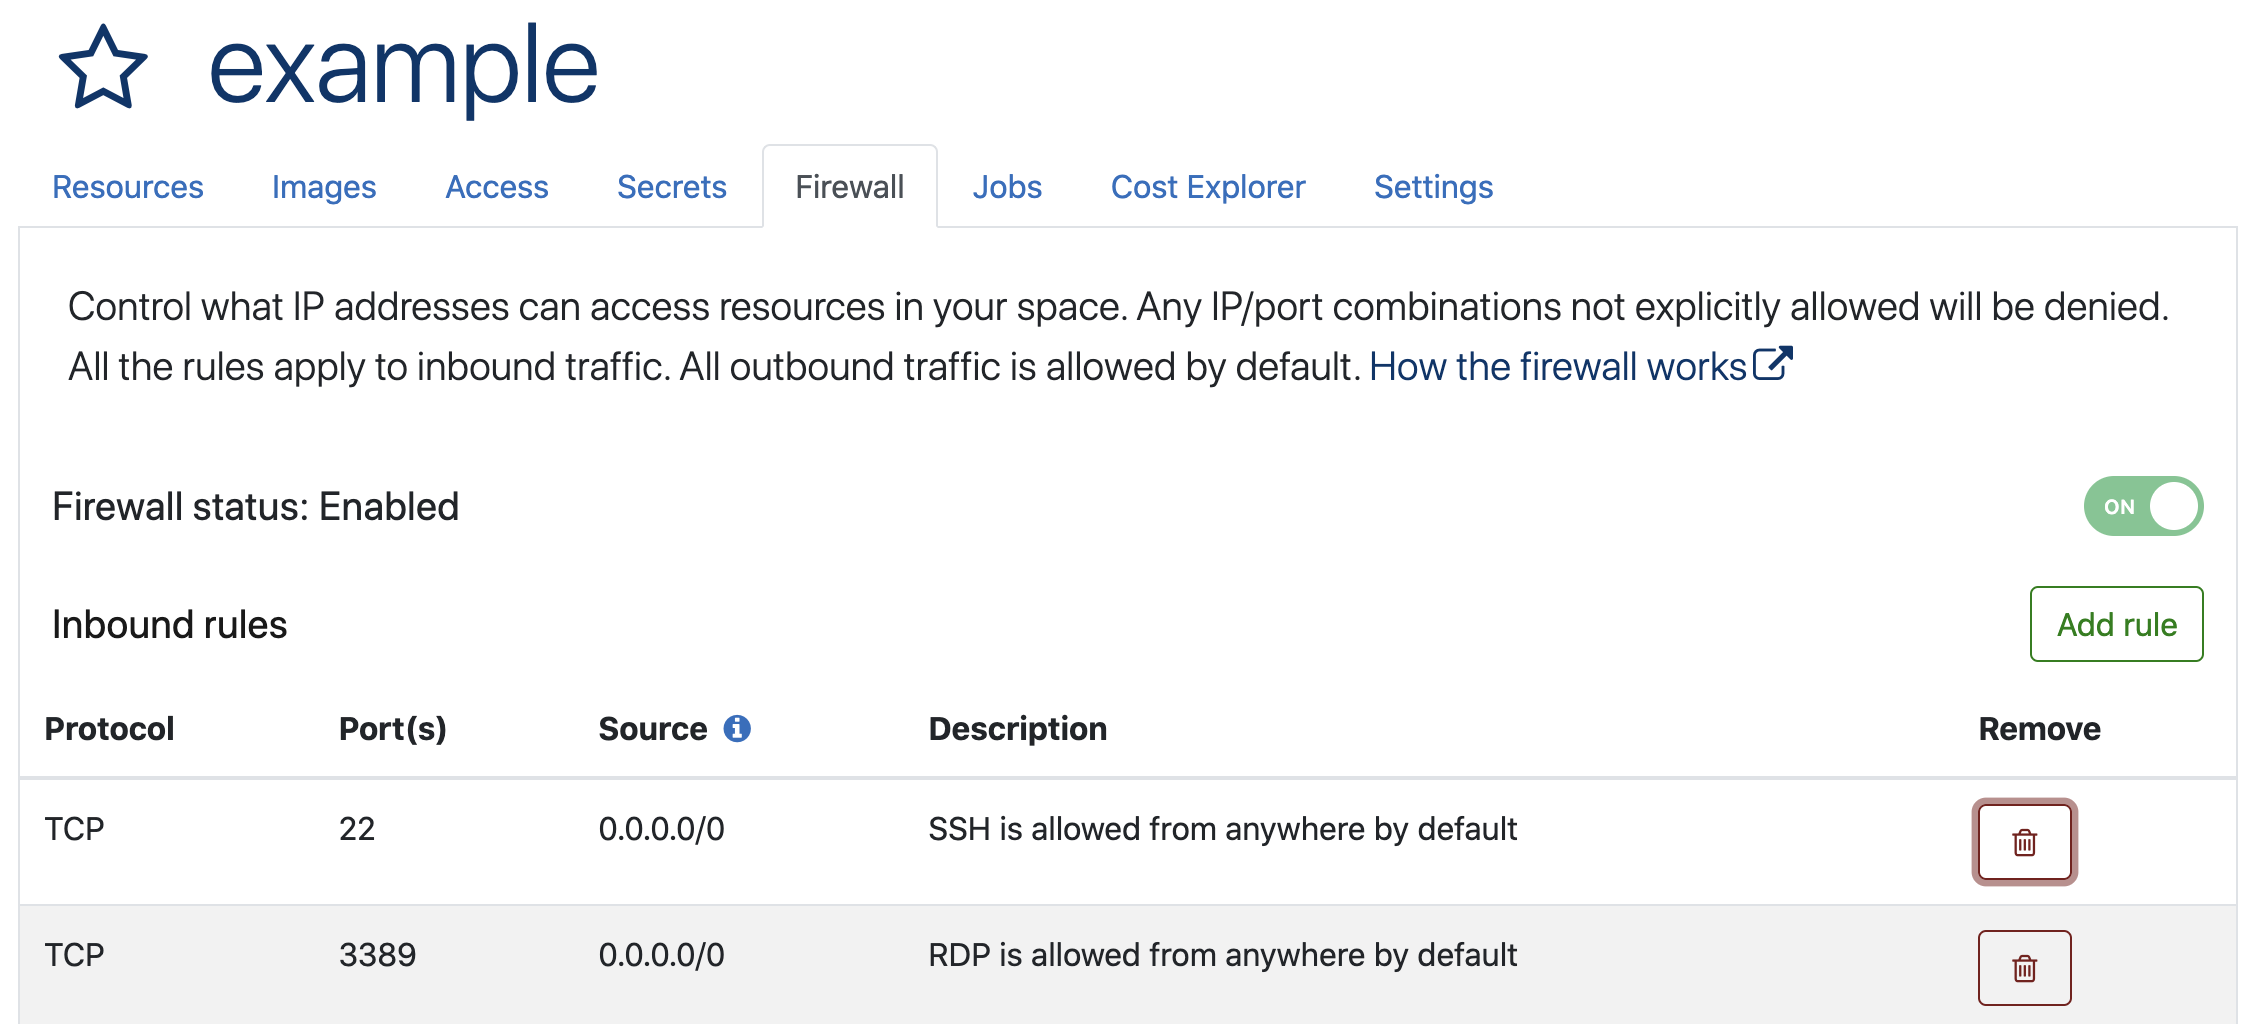 Image Modified Image ModifiedSelect Other (custom) from the Service drop-down, then enter the port number (e.g. 8080) and click the Anywhere toggle to allow access from anywhere on campus. Click Add rule and after a few seconds you should see it in the list of open ports.
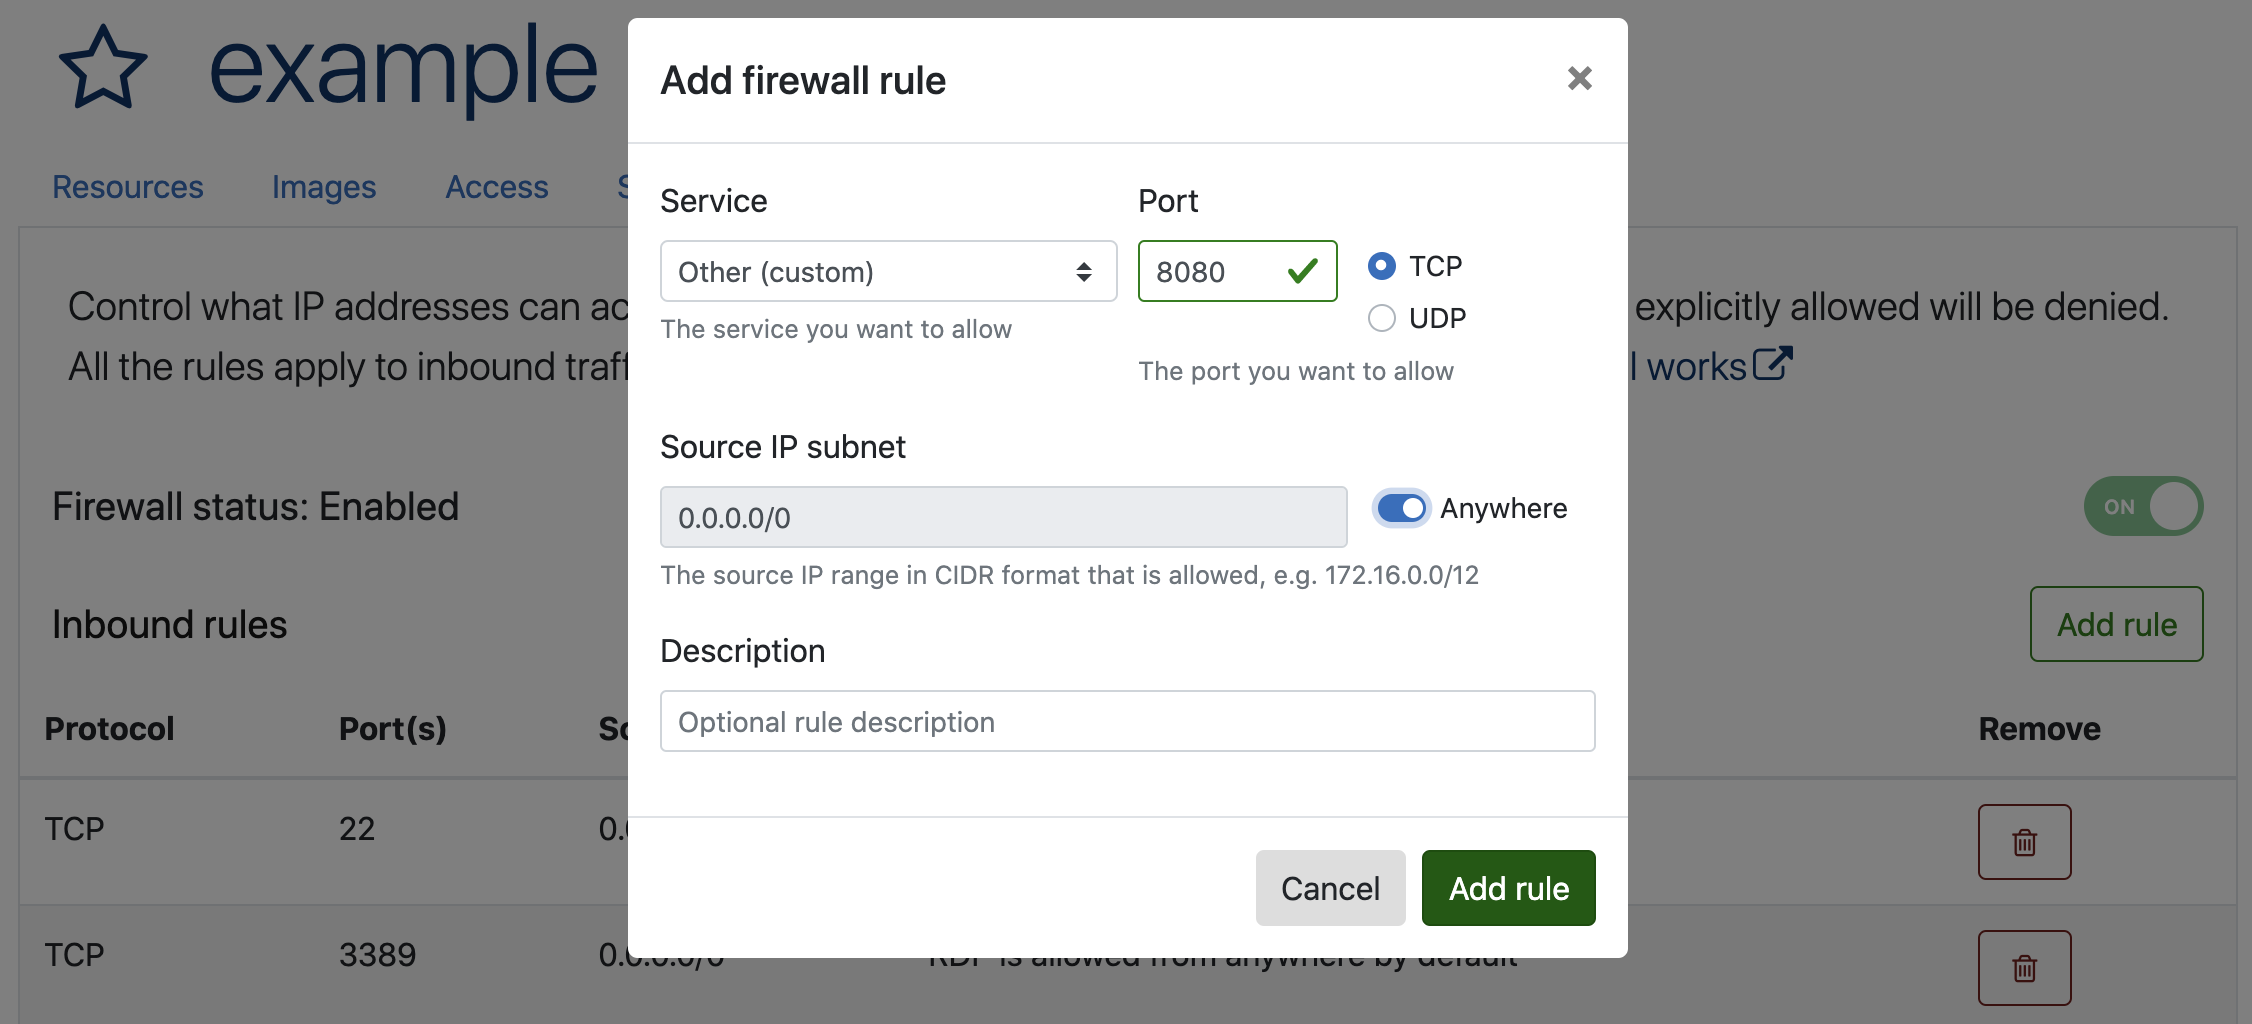 Image Modified Image Modified |
| Expand |
|---|
|
If everything worked, you should now be able to access the app from a web browser using the Endpoint of the Container Service and the specified port: http://<ENDPOINT>:8080. In our example we can do that at http://spinup-0018a5-nocodbexample.svc.spinup.yale.edu:8080. | Note |
|---|
Note that the above URL is only available on the Yale network and if you need to expose it to the Internet, you need to request that from the Spinup team. It involves setting up an additional web proxy (ALB) and a custom DNS name (e.g. nocodbexample.yale.edu) with SSL certificate. There is an additional monthly cost for this service. |
|
...
Related articles
| Filter by label (Content by label) |
|---|
| showLabels | false |
|---|
| max | 5 |
|---|
| spaces | com.atlassian.confluence.content.render.xhtml.model.resource.identifiers.SpaceResourceIdentifier@ca98fe5d |
|---|
| sort | modified |
|---|
| showSpace | false |
|---|
| reverse | true |
|---|
| type | page |
|---|
| cql | label in ( "container_service" , "spinup" , "kb-how-to-article" ) and type = "page" and space = "spinup" |
|---|
| labels | container_service storage kb-how-to-article spinup |
|---|
|
...